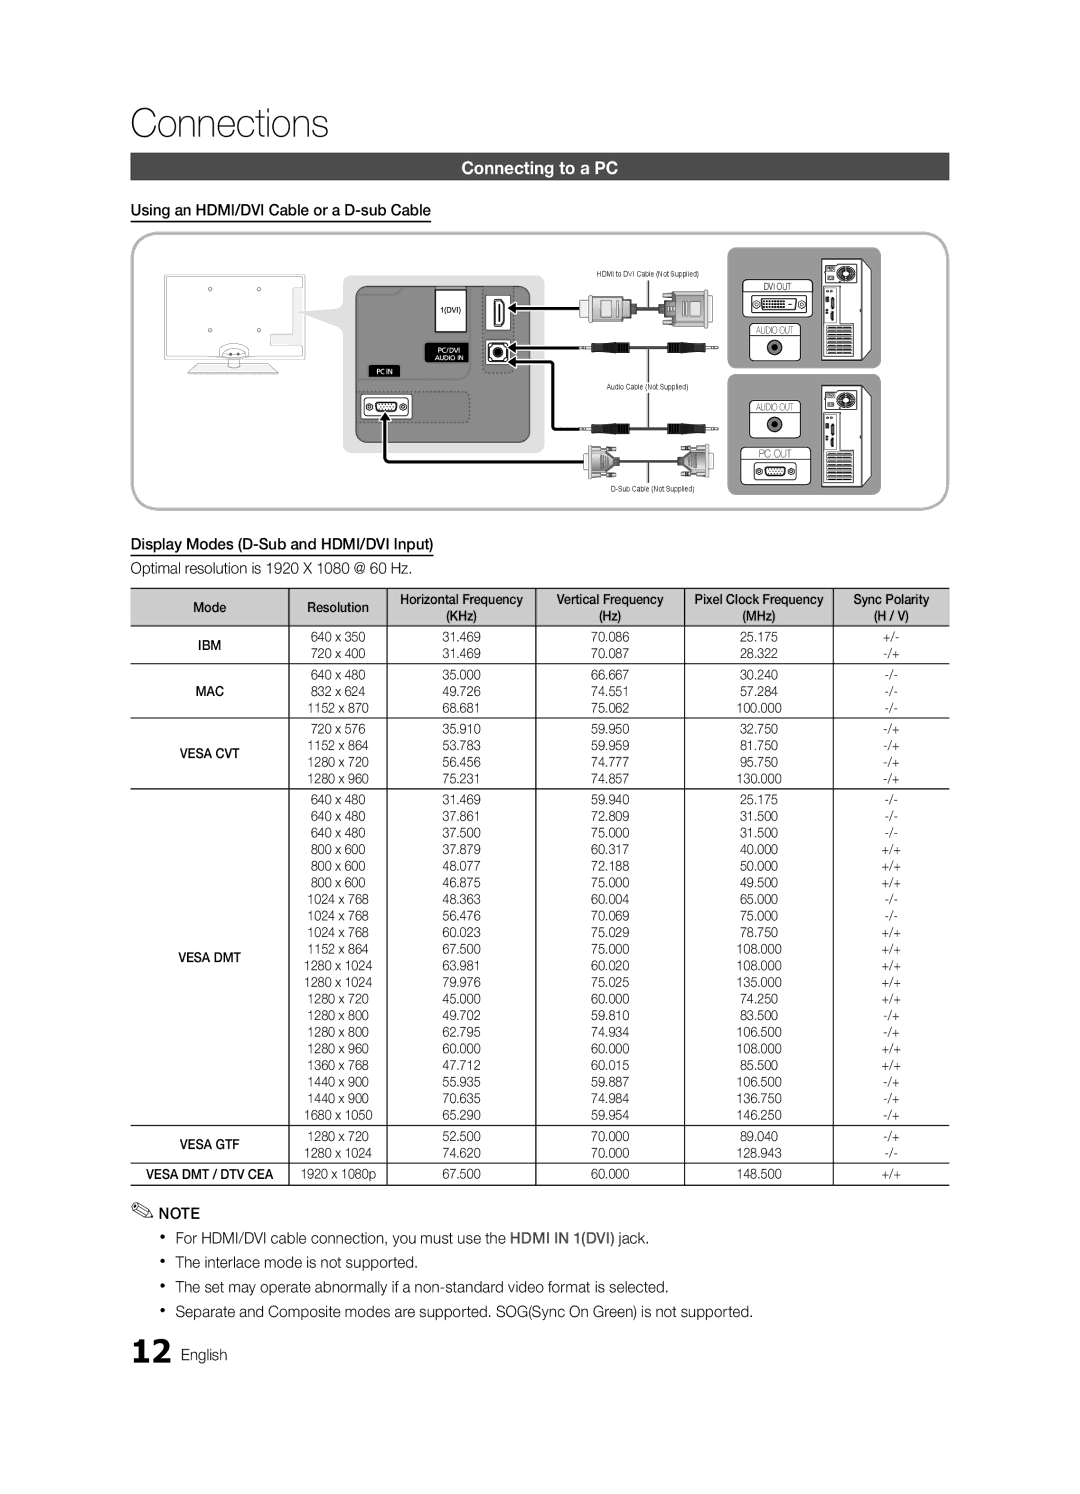
Connections
Connecting to a PC
Using an HDMI/DVI Cable or a D-sub Cable
HDMI to DVI Cable (Not Supplied)
DVI OUT
AUDIO OUT
Audio Cable (Not Supplied)
AUDIO OUT
PC OUT
Display Modes
Optimal resolution is 1920 X 1080 @ 60 Hz.
Mode | Resolution | Horizontal Frequency | Vertical Frequency | Pixel Clock Frequency | Sync Polarity | |
(KHz) | (Hz) | (MHz) | (H / V) | |||
|
| |||||
IBM | 640 x 350 | 31.469 | 70.086 | 25.175 | +/- | |
720 x 400 | 31.469 | 70.087 | 28.322 | |||
| ||||||
|
|
|
|
|
| |
| 640 x 480 | 35.000 | 66.667 | 30.240 | ||
MAC | 832 x 624 | 49.726 | 74.551 | 57.284 | ||
| 1152 x 870 | 68.681 | 75.062 | 100.000 | ||
|
|
|
|
|
| |
| 720 x 576 | 35.910 | 59.950 | 32.750 | ||
VESA CVT | 1152 x 864 | 53.783 | 59.959 | 81.750 | ||
1280 x 720 | 56.456 | 74.777 | 95.750 | |||
| ||||||
| 1280 x 960 | 75.231 | 74.857 | 130.000 | ||
| 640 x 480 | 31.469 | 59.940 | 25.175 | ||
| 640 x 480 | 37.861 | 72.809 | 31.500 | ||
| 640 x 480 | 37.500 | 75.000 | 31.500 | ||
| 800 x 600 | 37.879 | 60.317 | 40.000 | +/+ | |
| 800 x 600 | 48.077 | 72.188 | 50.000 | +/+ | |
| 800 x 600 | 46.875 | 75.000 | 49.500 | +/+ | |
| 1024 x 768 | 48.363 | 60.004 | 65.000 | ||
| 1024 x 768 | 56.476 | 70.069 | 75.000 | ||
| 1024 x 768 | 60.023 | 75.029 | 78.750 | +/+ | |
VESA DMT | 1152 x 864 | 67.500 | 75.000 | 108.000 | +/+ | |
1280 x 1024 | 63.981 | 60.020 | 108.000 | +/+ | ||
| ||||||
| 1280 x 1024 | 79.976 | 75.025 | 135.000 | +/+ | |
| 1280 x 720 | 45.000 | 60.000 | 74.250 | +/+ | |
| 1280 x 800 | 49.702 | 59.810 | 83.500 | ||
| 1280 x 800 | 62.795 | 74.934 | 106.500 | ||
| 1280 x 960 | 60.000 | 60.000 | 108.000 | +/+ | |
| 1360 x 768 | 47.712 | 60.015 | 85.500 | +/+ | |
| 1440 x 900 | 55.935 | 59.887 | 106.500 | ||
| 1440 x 900 | 70.635 | 74.984 | 136.750 | ||
| 1680 x 1050 | 65.290 | 59.954 | 146.250 | ||
VESA GTF | 1280 x 720 | 52.500 | 70.000 | 89.040 | ||
1280 x 1024 | 74.620 | 70.000 | 128.943 | |||
| ||||||
|
|
|
|
|
| |
VESA DMT / DTV CEA | 1920 x 1080p | 67.500 | 60.000 | 148.500 | +/+ | |
|
|
|
|
|
|
✎✎NOTE
xx For HDMI/DVI cable connection, you must use the HDMI IN 1(DVI) jack. xx The interlace mode is not supported.
xx The set may operate abnormally if a
xx Separate and Composite modes are supported. SOG(Sync On Green) is not supported. 12 English