On-Screen Display
Menu | How to adjust |
|
|
|
|
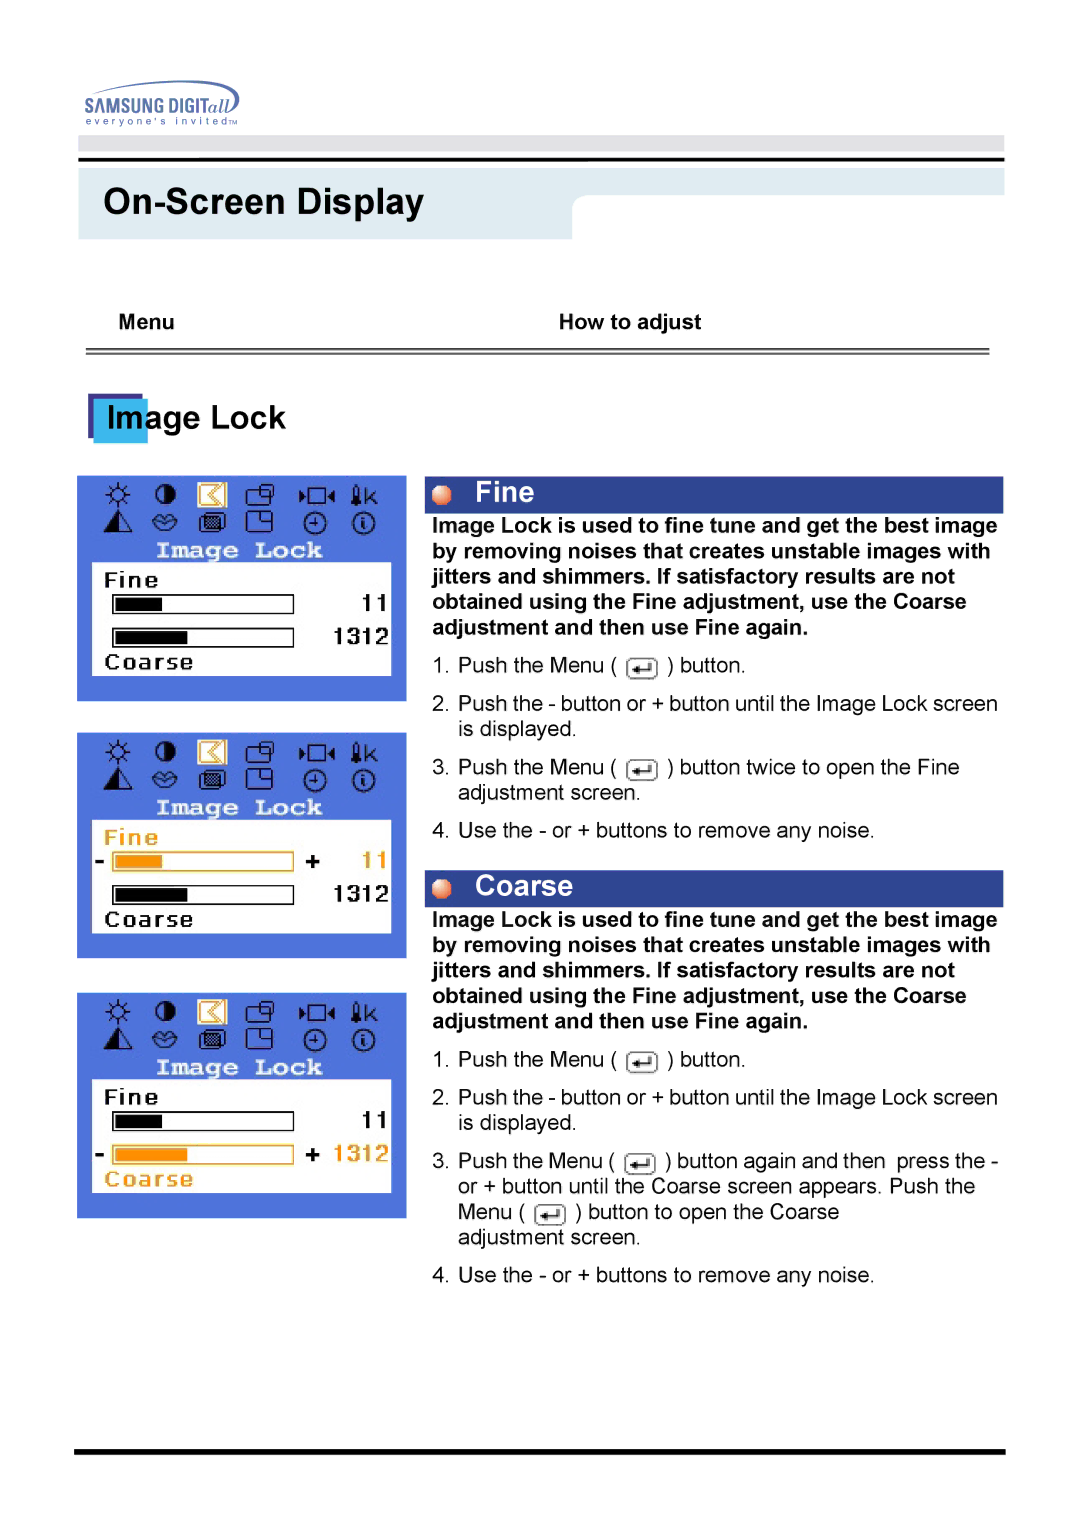
Image Lock
Fine
Image Lock is used to fine tune and get the best image by removing noises that creates unstable images with jitters and shimmers. If satisfactory results are not obtained using the Fine adjustment, use the Coarse adjustment and then use Fine again.
1.Push the Menu ( ![]() ) button.
) button.
2.Push the - button or + button until the Image Lock screen is displayed.
3.Push the Menu ( ![]() ) button twice to open the Fine adjustment screen.
) button twice to open the Fine adjustment screen.
4.Use the - or + buttons to remove any noise.
Coarse
Image Lock is used to fine tune and get the best image by removing noises that creates unstable images with jitters and shimmers. If satisfactory results are not obtained using the Fine adjustment, use the Coarse adjustment and then use Fine again.
1.Push the Menu ( ![]() ) button.
) button.
2.Push the - button or + button until the Image Lock screen is displayed.
3.Push the Menu ( ![]() ) button again and then press the - or + button until the Coarse screen appears. Push the
) button again and then press the - or + button until the Coarse screen appears. Push the
Menu ( ![]() ) button to open the Coarse adjustment screen.
) button to open the Coarse adjustment screen.
4.Use the - or + buttons to remove any noise.