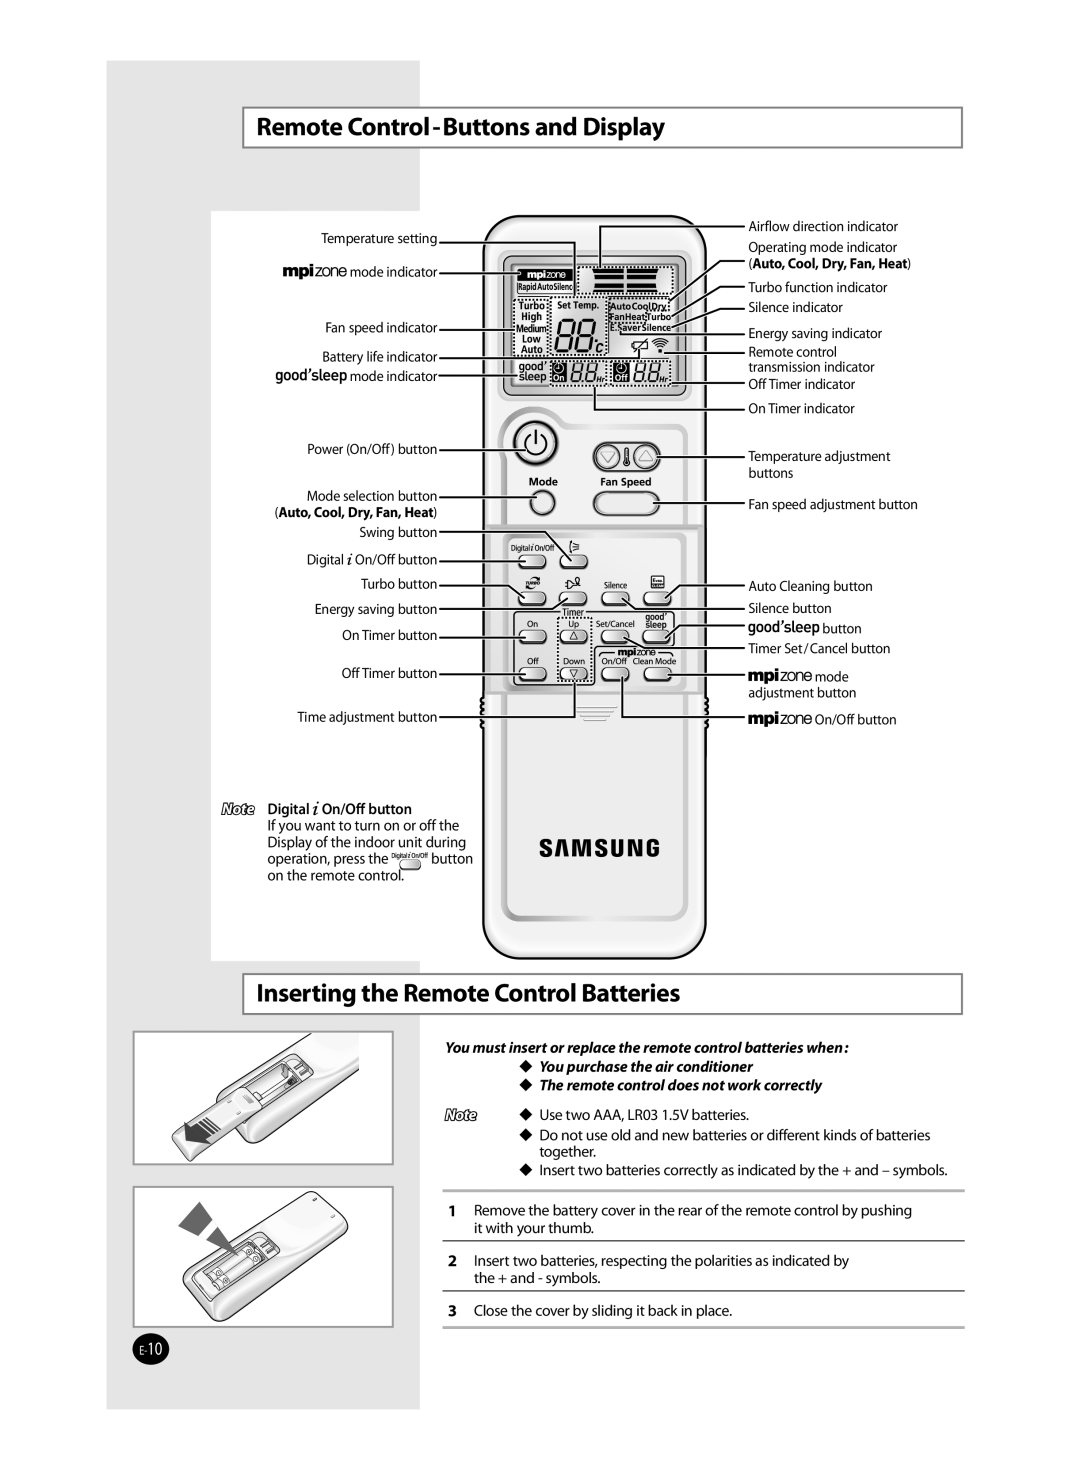
Remote Control-Buttons and Display
Temperature setting | Airflow direction indicator | |
Operating mode indicator | ||
| ||
mode indicator | (Auto, Cool, Dry, Fan, Heat) | |
Turbo function indicator | ||
| ||
| Silence indicator | |
Fan speed indicator | Energy saving indicator | |
| ||
Battery life indicator | Remote control | |
transmission indicator | ||
mode indicator | ||
Off Timer indicator | ||
| ||
| On Timer indicator | |
Power (On/Off) button | Temperature adjustment | |
| ||
| buttons | |
Mode selection button | Fan speed adjustment button | |
(Auto, Cool, Dry, Fan, Heat) | ||
| ||
Swing button |
| |
Digital On/Off button |
| |
Turbo button | Auto Cleaning button | |
Energy saving button | Silence button | |
On Timer button | button | |
Timer Set/Cancel button | ||
| ||
Off Timer button | mode | |
| adjustment button | |
Time adjustment button | On/Off button |
Note Digital![]() On/Off button
On/Off button
If you want to turn on or off the Display of the indoor unit during
operation, press the ![]()
![]() button on the remote control.
button on the remote control.
Inserting the Remote Control Batteries
You must insert or replace the remote control batteries when: You purchase the air conditioner
The remote control does not work correctly
Note Use two AAA, LR03 1.5V batteries.
Do not use old and new batteries or different kinds of batteries together.
Insert two batteries correctly as indicated by the + and – symbols.
1 Remove the battery cover in the rear of the remote control by pushing it with your thumb.
2 Insert two batteries, respecting the polarities as indicated by the + and - symbols.
3Close the cover by sliding it back in place.
