Anynet+
Using Anynet+(HDMI-CEC)
1Connect the AV receiver to a Samsung TV with an HDMI cable. (See page 15)
2Set the Anynet+ function on your TV. (See the TV instruction manual for more information.)
•You can operate the AV receiver by using the TV remote control. (Available TV button : VOLUME ![]() ,
, ![]() button.)
button.)

 Connecting
 external devices


 (Cont'd)
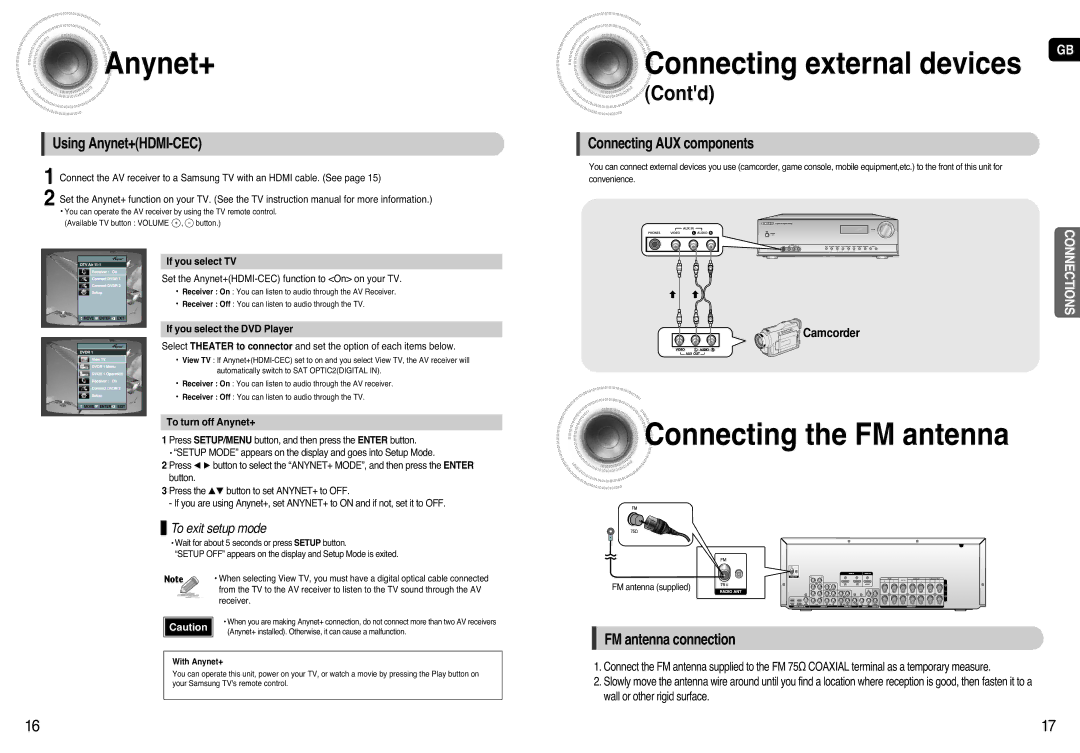
Connecting AUX components
You can connect external devices you use (camcorder, game console, mobile equipment,etc.) to the front of this unit for convenience.
GB
MOVEMOVE | ENTERENTER | EXITEXIT |
![]() MOVE
MOVE![]() ENTER
ENTER![]()
![]() EXIT
EXIT
If you select TV
Set the Anynet+(HDMI-CEC) function to <On> on your TV.
•Receiver : On : You can listen to audio through the AV Receiver.
•Receiver : Off : You can listen to audio through the TV.
If you select the DVD Player
Select THEATER to connector and set the option of each items below.
•View TV : If
•Receiver : On : You can listen to audio through the AV receiver.
•Receiver : Off : You can listen to audio through the TV.
![]()
![]() Camcorder
Camcorder
CONNECTIONS
To turn off Anynet+
1 Press SETUP/MENU button, and then press the ENTER button.
•“SETUP MODE” appears on the display and goes into Setup Mode.
2 Press œ √ button to select the “ANYNET+ MODE”, and then press the ENTER button.
3 Press the …† button to set ANYNET+ to OFF.
- If you are using Anynet+, set ANYNET+ to ON and if not, set it to OFF.
 To exit setup mode
•Wait for about 5 seconds or press SETUP button.
“SETUP OFF” appears on the display and Setup Mode is exited.
• When selecting View TV, you must have a digital optical cable connected from the TV to the AV receiver to listen to the TV sound through the AV receiver.
|
|
| • When you are making Anynet+ connection, do not connect more than two AV receivers |
| Caution |
| |
|
| (Anynet+ installed). Otherwise, it can cause a malfunction. | |
|
|
|
|
With Anynet+
You can operate this unit, power on your TV, or watch a movie by pressing the Play button on your Samsung TV's remote control.


 Connecting
 the FM antenna
FM antenna (supplied)
FM antenna connection
1.Connect the FM antenna supplied to the FM 75Ω COAXIAL terminal as a temporary measure.
2.Slowly move the antenna wire around until you find a location where reception is good, then fasten it to a wall or other rigid surface.
16 | 17 |