| Uso del forno (continua) |
IT | Impostazione della temperatura del forno |
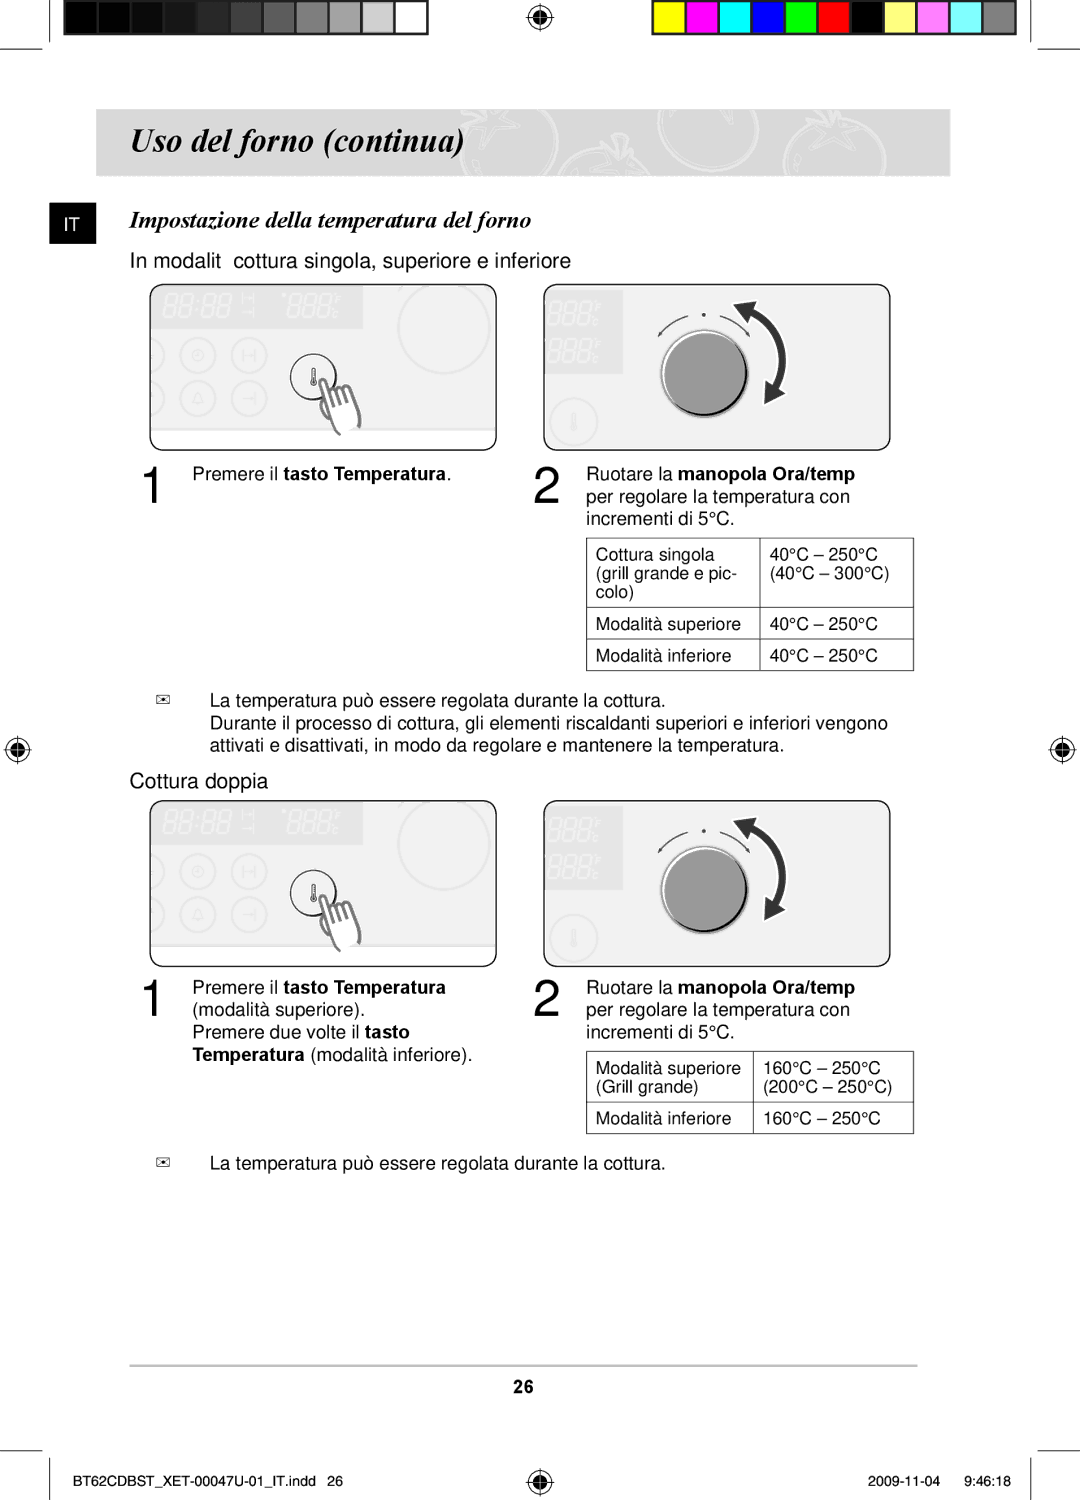
| In modalità cottura singola, superiore e inferiore |
1 | Premere il tasto Temperatura. | 2 | Ruotare la manopola Ora/temp | |
| per regolare la temperatura con | |||
|
|
| incrementi di 5°C. |
|
|
|
|
|
|
|
|
| Cottura singola | 40°C – 250°C |
|
|
| (grill grande e pic- | (40°C – 300°C) |
|
|
| colo) |
|
|
|
| Modalità superiore | 40°C – 250°C |
|
|
|
|
|
|
|
| Modalità inferiore | 40°C – 250°C |
|
|
|
|
|
)La temperatura può essere regolata durante la cottura.
Durante il processo di cottura, gli elementi riscaldanti superiori e inferiori vengono attivati e disattivati, in modo da regolare e mantenere la temperatura.
Cottura doppia
1 | Premere il tasto Temperatura |
(modalità superiore). |
Premere due volte il tasto Temperatura (modalità inferiore).
2 | Ruotare la manopola Ora/temp | |
per regolare la temperatura con | ||
| incrementi di 5°C. |
|
|
|
|
| Modalità superiore | 160°C – 250°C |
| (Grill grande) | (200°C – 250°C) |
| Modalità inferiore | 160°C – 250°C |
|
|
|
)La temperatura può essere regolata durante la cottura.
26