Oven Use (Continued) 


| Delayed start | |
EN | ||
| ||
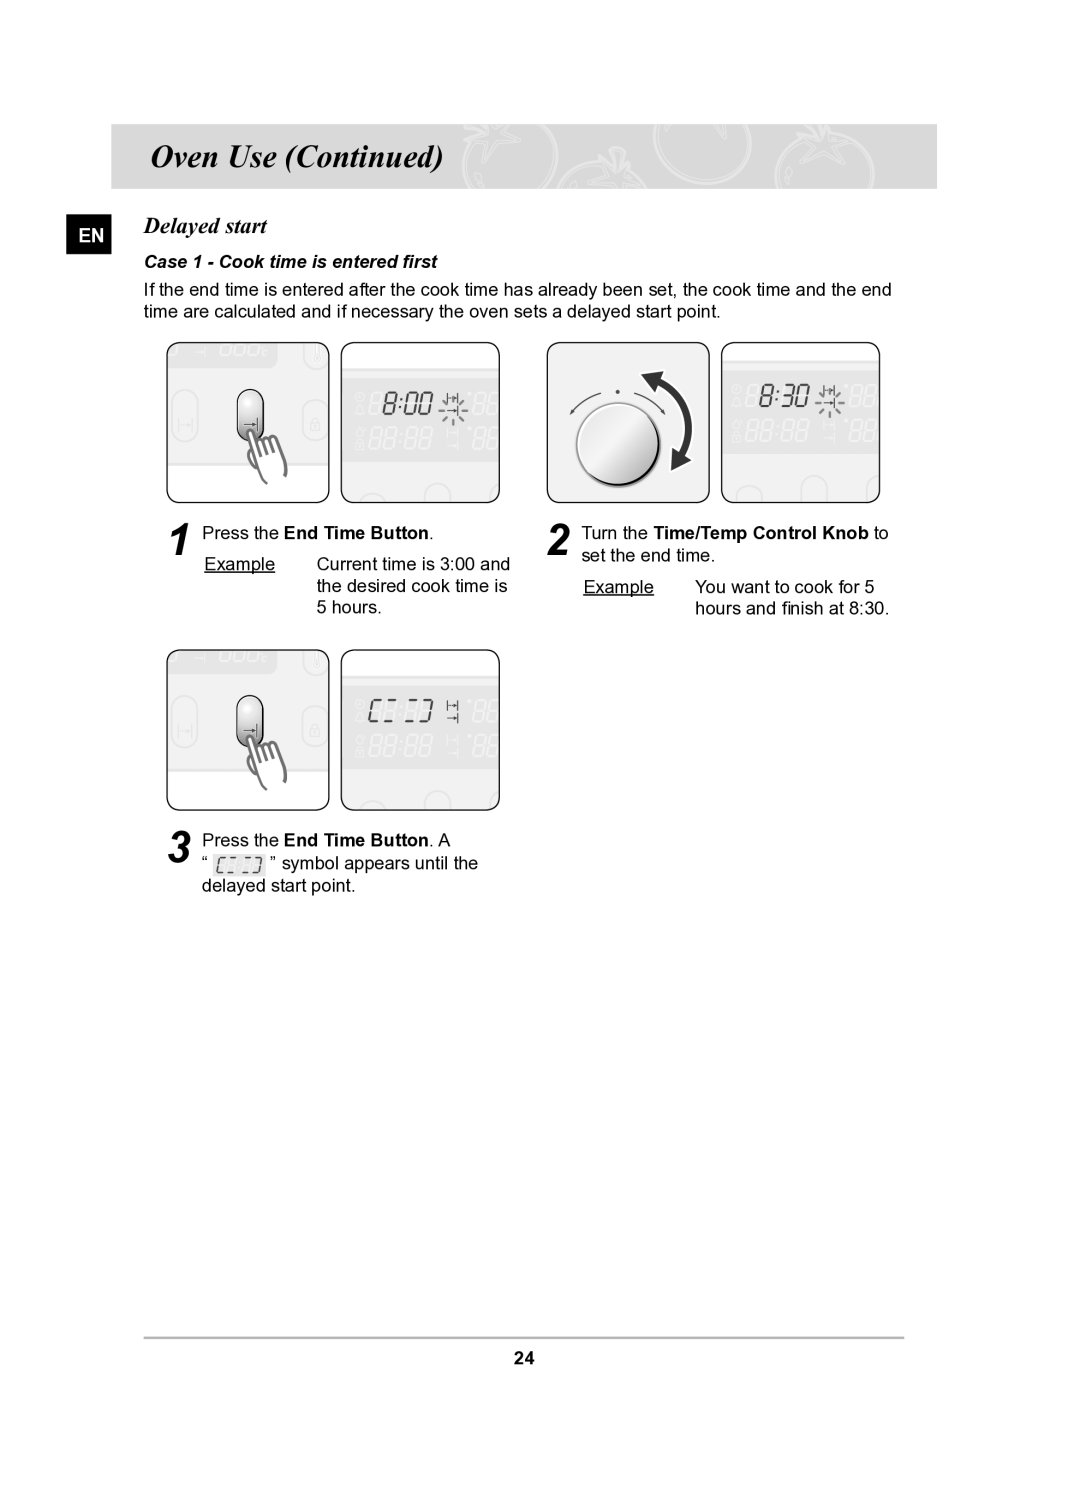
| Case 1 - Cook time is entered first | |
| If the end time is entered after the cook time has already been set, the cook time and the end | |
| time are calculated and if necessary the oven sets a delayed start point.. |
1 | Press the End Time Button.. | Turn the Time/Temp Control Knob to | ||
Example | Current time is 3:00 and | 2 set the end time.. | ||
|
| the desired cook time is | Example | You want to cook for 5 |
|
| 5 hours.. |
| hours and fnish at 8:30. |
3 Press the End Time Button.. A
“ ![]()
![]()
![]()
![]()
![]()
![]()
![]() ” symbol appears until the delayed start point..
” symbol appears until the delayed start point..
24