Cleaning and Care (Continued)
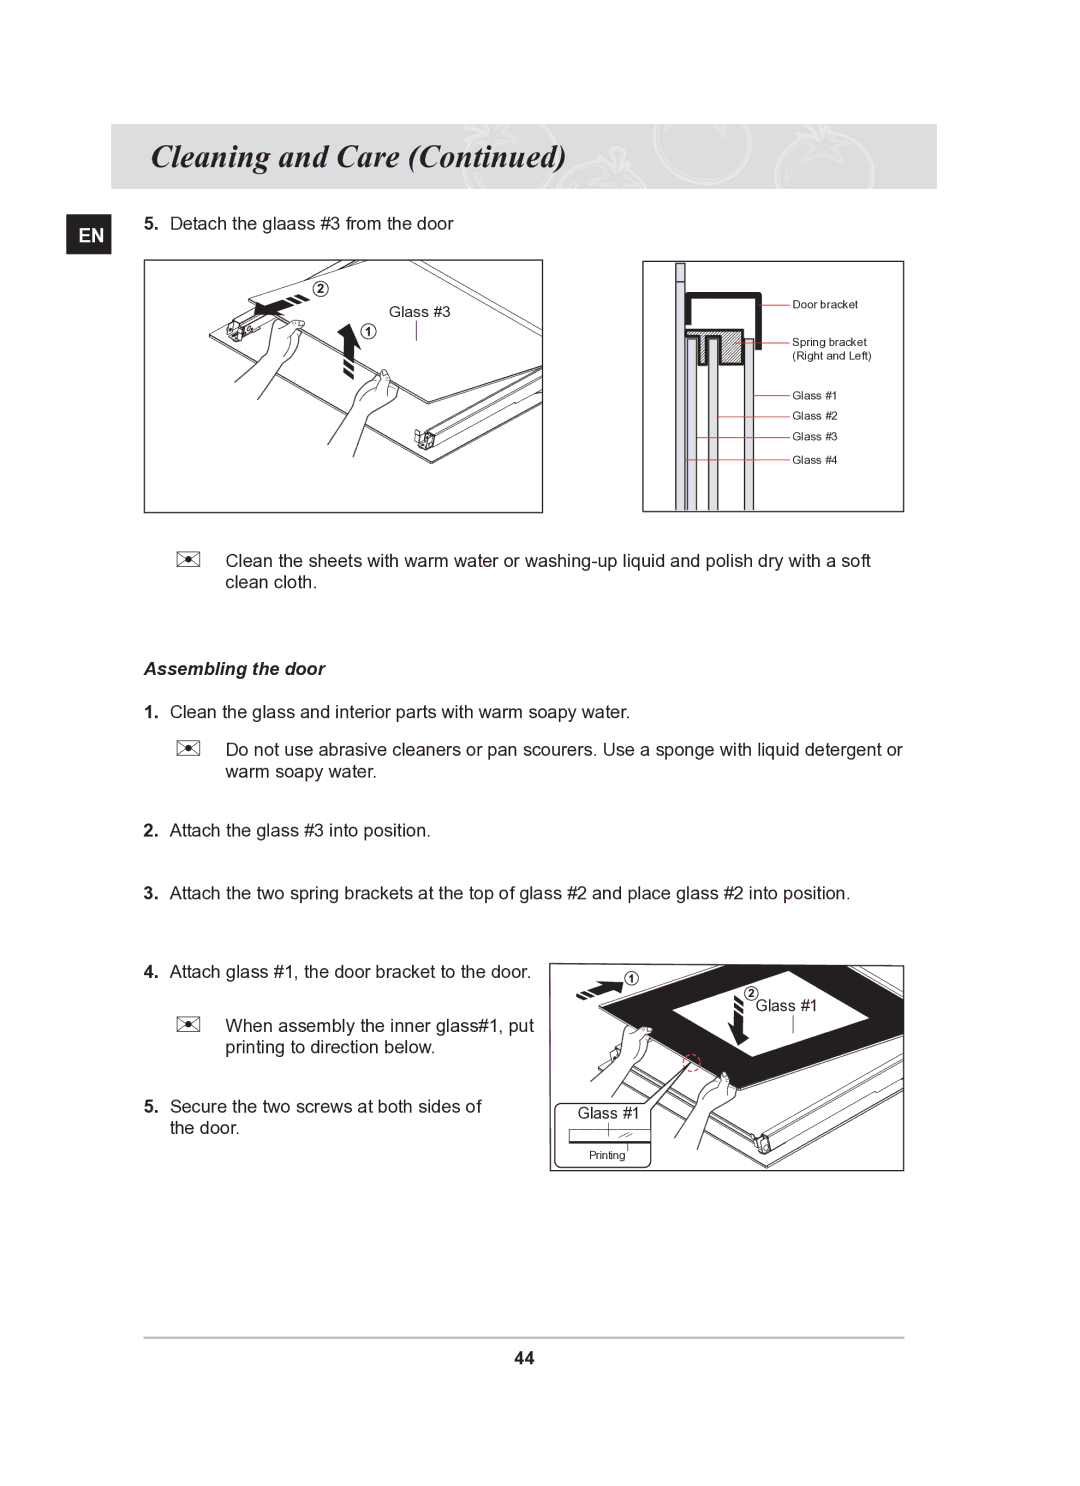
| 5.. Detach the glaass #3 from the door | |||
EN | ||||
|
|
| ||
|
|
|
| |
|
| Glass #3 | ||
|
|
|
| |
|
|
|
| |
Door bracket |
Spring bracket |
(Right and Left) |
Glass #1 |
Glass #2 |
Glass #3 |
Glass #4 |
)Clean the sheets with warm water or
Assembling the door
1..Clean the glass and interior parts with warm soapy water..
)Do not use abrasive cleaners or pan scourers. Use a sponge with liquid detergent or warm soapy water..
2..Attach the glass #3 into position..
3..Attach the two spring brackets at the top of glass #2 and place glass #2 into position..
4..Attach glass #1, the door bracket to the door..
)When assembly the inner glass#1, put printing to direction below..
5..Secure the two screws at both sides of the door..
Glass #1
Glass #1
Printing
44
