Installation Instructions
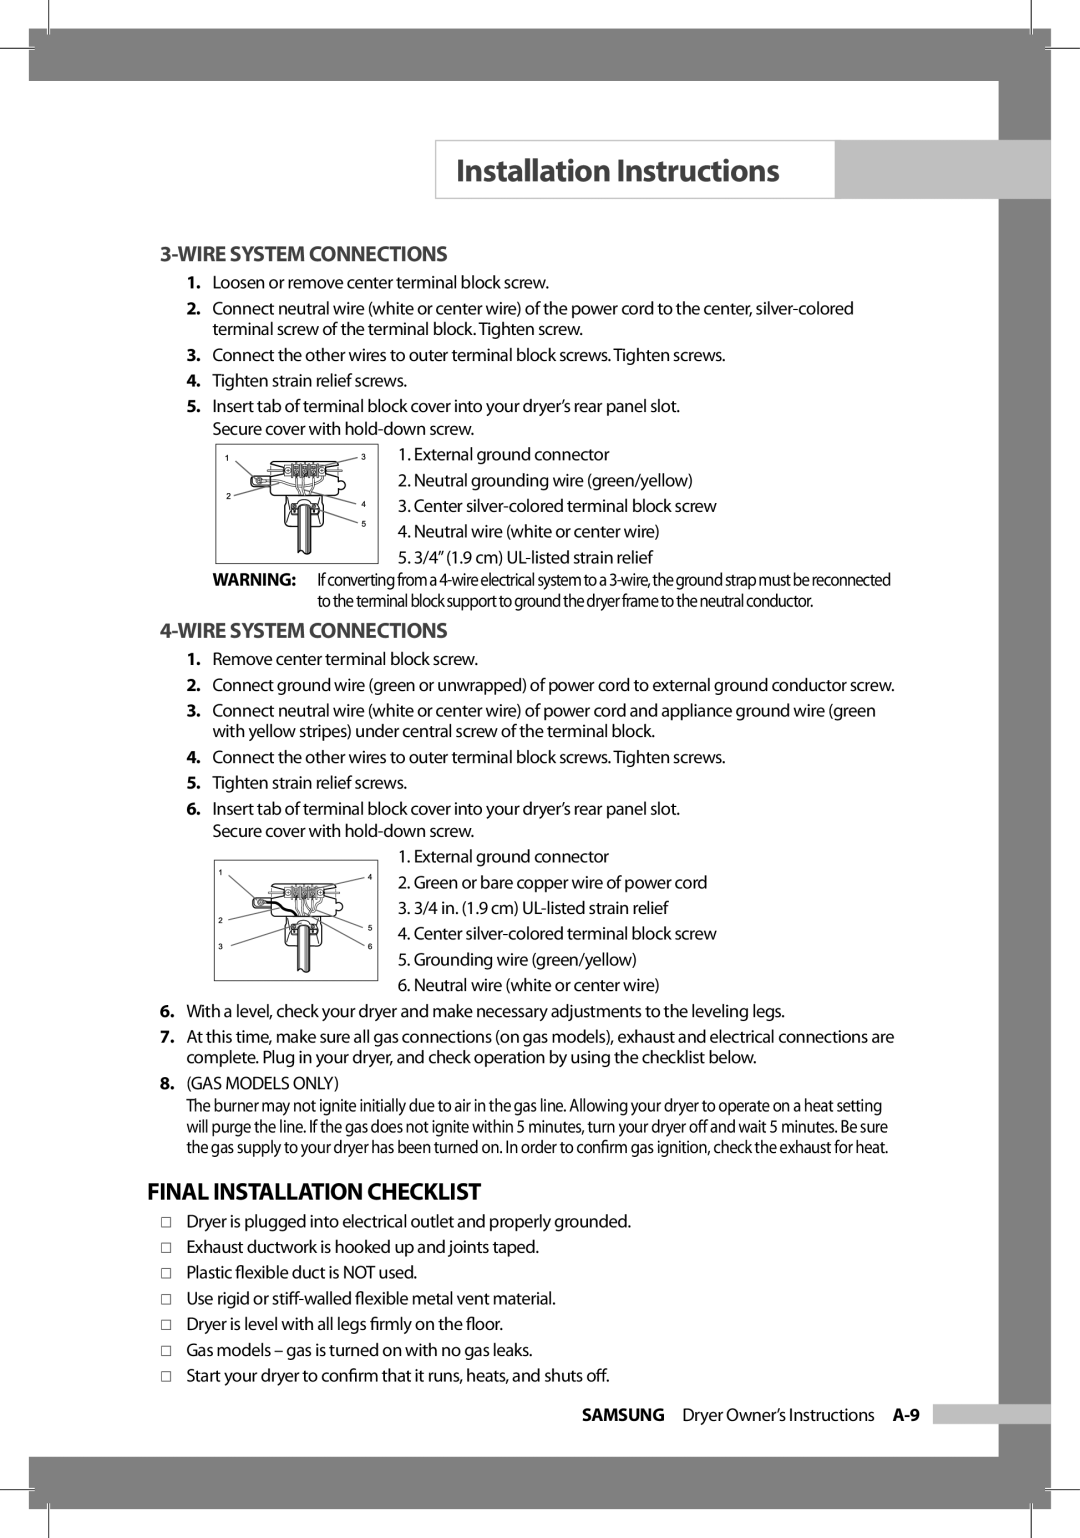
3-WIRE SYSTEM CONNECTIONS
1.Loosen or remove center terminal block screw.
2.Connect neutral wire (white or center wire) of the power cord to the center,
3.Connect the other wires to outer terminal block screws. Tighten screws.
4.Tighten strain relief screws.
5.Insert tab of terminal block cover into your dryer’s rear panel slot. Secure cover with
1. External ground connector
2. Neutral grounding wire (green/yellow)
3. Center
4. Neutral wire (white or center wire)
5. 3/4” (1.9 cm)
WARNING: If converting from a
1.Remove center terminal block screw.
2.Connect ground wire (green or unwrapped) of power cord to external ground conductor screw.
3.Connect neutral wire (white or center wire) of power cord and appliance ground wire (green with yellow stripes) under central screw of the terminal block.
4.Connect the other wires to outer terminal block screws. Tighten screws.
5.Tighten strain relief screws.
6.Insert tab of terminal block cover into your dryer’s rear panel slot. Secure cover with
1.External ground connector
2. Green or bare copper wire of power cord
3. 3/4 in. (1.9 cm)
4. Center
5.Grounding wire (green/yellow)
6.Neutral wire (white or center wire)
6.With a level, check your dryer and make necessary adjustments to the leveling legs.
7.At this time, make sure all gas connections (on gas models), exhaust and electrical connections are complete. Plug in your dryer, and check operation by using the checklist below.
8.(GAS MODELS ONLY)
The burner may not ignite initially due to air in the gas line. Allowing your dryer to operate on a heat setting will purge the line. If the gas does not ignite within 5 minutes, turn your dryer off and wait 5 minutes. Be sure the gas supply to your dryer has been turned on. In order to confirm gas ignition, check the exhaust for heat.
FINAL INSTALLATION CHECKLIST
□Dryer is plugged into electrical outlet and properly grounded.
□Exhaust ductwork is hooked up and joints taped.
□Plastic flexible duct is NOT used.
□Use rigid or
□Dryer is level with all legs firmly on the floor.
□Gas models – gas is turned on with no gas leaks.
□Start your dryer to confirm that it runs, heats, and shuts off.
SAMSUNG Dryer Owner’s Instructions