Microwave oven Installation Requirements
EN Requirements
The requirements for proper microwave oven operation are as follows:
•Operating Voltage: 24V DC.
•Breaking Voltage: Min. 21.5V, Max. 30.2V.
•Battery life must be at least 45Ah at 24V .
If possible, connect the oven to a separate supply battery (a secondary battery).
Supplied Items
Microwave oven, Turntable, Terminal Post Cover (plastic cover), Install bracket(Left/Right),
Items needed for Installation
Before installing the appliance, make sure you have the following items:
•
•
•2 connection power cables : one red, one black(refer to the page 6 for the length and size of the connection cables)
•Power cable terminal, power cable binder, and electrical tape.
•Depending on the installation location, the following tools may be required.
•Stick ruler, chalk, hammer, and gimlet.
•Drill and borer.
•Ring/Fork type spanner set.
•Crimp pincers, soldering iron.
•Screw driver.
Installation
Installation Location Tips
•Before installing the oven, be sure to comply with the following: The installation location for the oven should be even, flat, and sturdy.
•Do not allow humidity or heat to affect the oven.
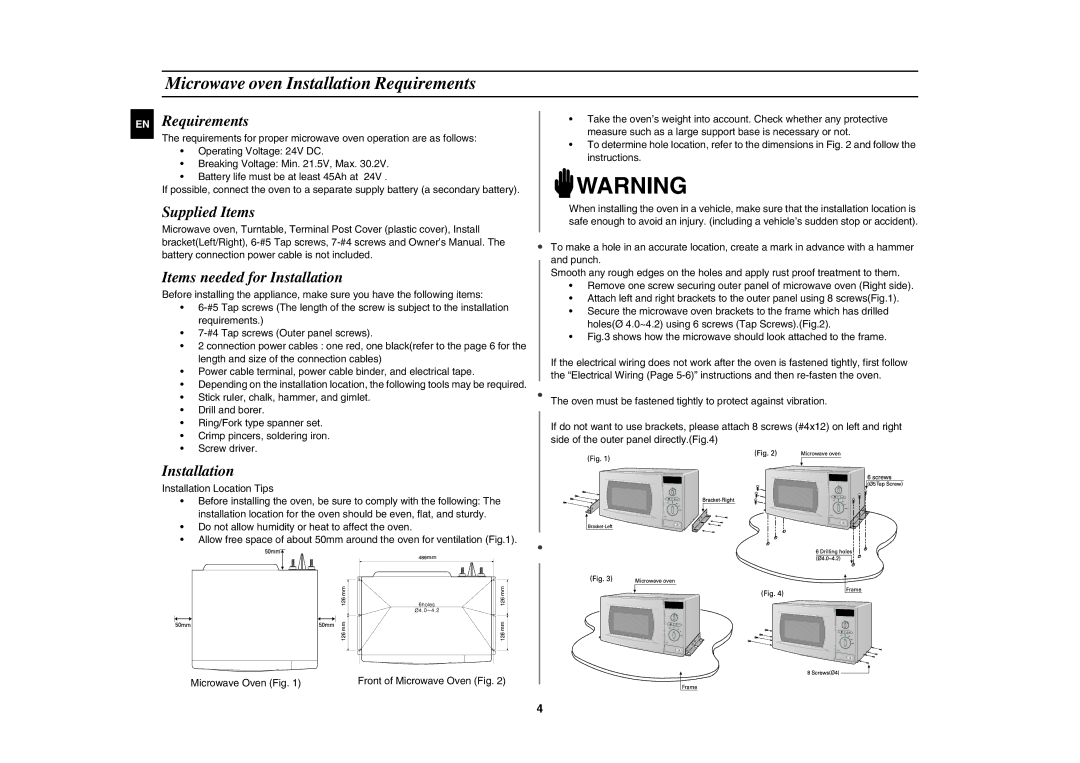
•Allow free space of about 50mm around the oven for ventilation (Fig.1).
Microwave Oven (Fig. 1) | Front of Microwave Oven (Fig. 2) |
•Take the oven’s weight into account. Check whether any protective measure such as a large support base is necessary or not.
•To determine hole location, refer to the dimensions in Fig. 2 and follow the instructions.
![]() WARNING
WARNING
When installing the oven in a vehicle, make sure that the installation location is safe enough to avoid an injury. (including a vehicle’s sudden stop or accident).
To make a hole in an accurate location, create a mark in advance with a hammer and punch.
Smooth any rough edges on the holes and apply rust proof treatment to them.
•Remove one screw securing outer panel of microwave oven (Right side).
•Attach left and right brackets to the outer panel using 8 screws(Fig.1).
•Secure the microwave oven brackets to the frame which has drilled holes(Ø 4.0~4.2) using 6 screws (Tap Screws).(Fig.2).
•Fig.3 shows how the microwave should look attached to the frame.
If the electrical wiring does not work after the oven is fastened tightly, first follow the “Electrical Wiring (Page
The oven must be fastened tightly to protect against vibration.
If do not want to use brackets, please attach 8 screws (#4x12) on left and right side of the outer panel directly.(Fig.4)
4