Manuals
/
Lexmark
/
Computer Equipment
/
Printer
Lexmark
S510-2222-00 setup guide Lift the top cover until it stops, Install printer supplies
Models:
S510-2222-00
1
48
94
94
Download
94 pages
38.07 Kb
45
46
47
48
49
50
51
52
<
>
Install
Configure for TCP/IP
Considering environmental issues
Setup Guide
Printing a menu settings page
Safety
Removing the system board access cover
Roll the high-capacityfeeder toward the printer and check the alignment of the pins with the holes in the docking frame
Using the heavy media tray
Page 48
Image 48
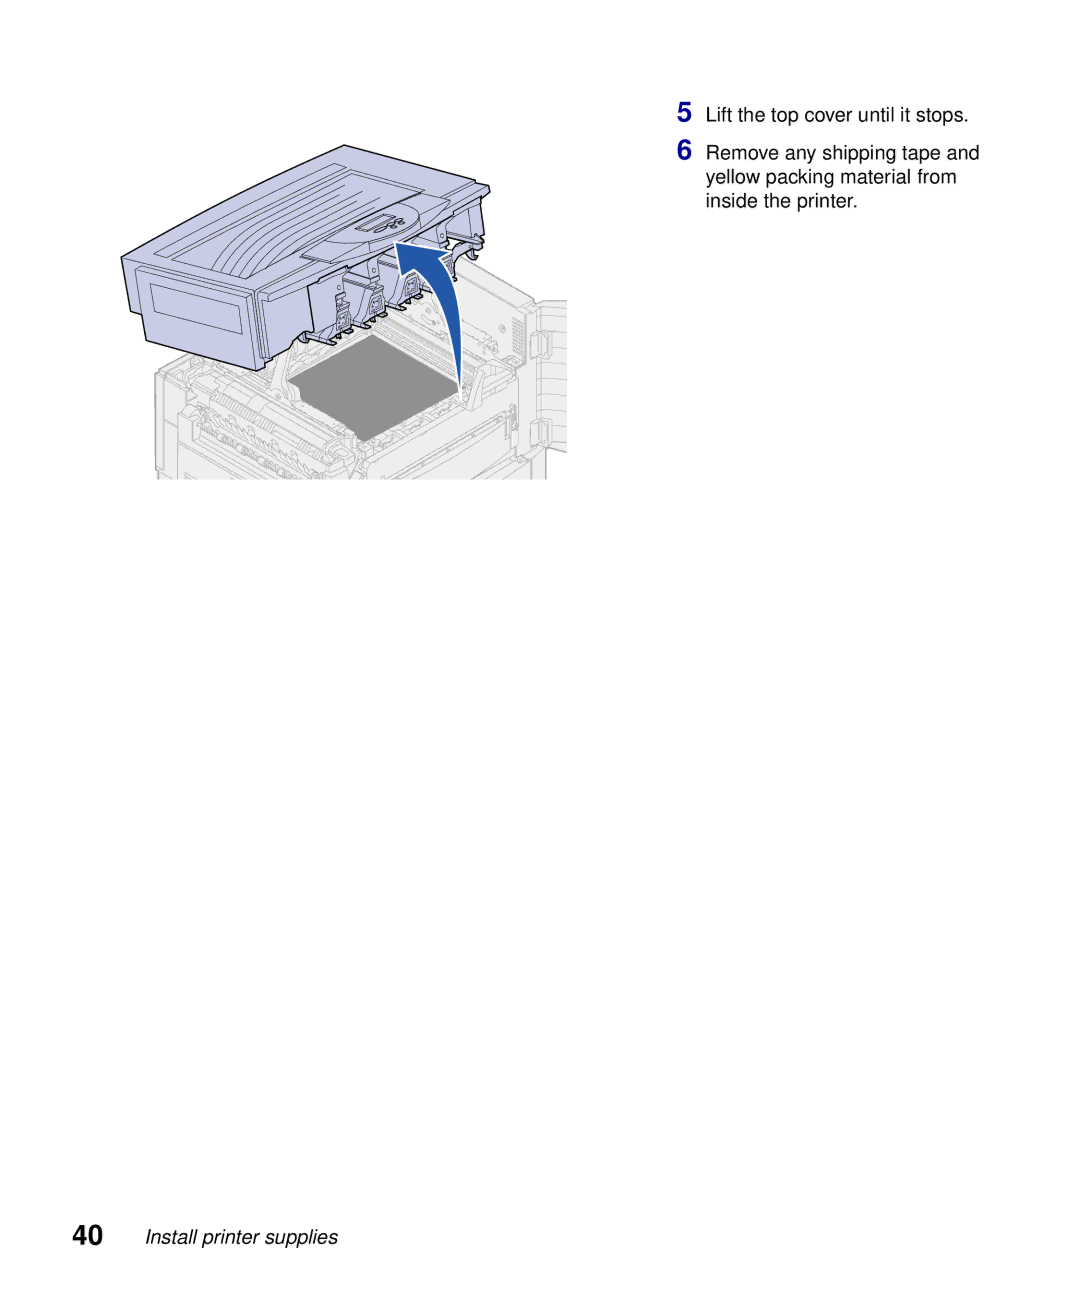
5
Lift the top cover until it stops.
6
Remove any shipping tape and yellow packing material from inside the printer.
40
Install printer supplies
Page 47
Page 49
Page 48
Image 48
Page 47
Page 49
Contents
Setup Guide
Infoprint Color
Page
Setup Guide
Infoprint Color
Safety information
Edition October
FCC emissions information
Conventions
Table of contents
Opening the top cover
Introduction
About your printer
Other sources of information
Publications CD
Step 1 Unpack your printer
Setup Guide Publications CD
Quick Reference and sleeve
Unpack your printer
2 Unpack your printer
Considering environmental issues
Step 2: Select a location for your printer
Select a location for your printer
4 Select a location for your printer
734.9 mm 29 in 102 mm 5 in.152.1 mm 6 in
1241.8 mm
508 mm
Network and internet printers
Select a location for your printer
869.2 mm 34.3 in 102 mm 5 in.152.1 mm 6 in
1241.8 mm
6 Select a location for your printer
869.2 mm 34.3 in 102 mm 5 in.329.5 mm 13 in
1241.8 mm
56 in
Printer with high-capacityfeeder
Select a location for your printer
8 Set up the printer and paper handling options
Topic
Go to page
Installing the printer base or cabinet
Set up the printer and paper handling options
Installing a 550-sheetdrawer
10 Set up the printer and paper handling options
Positioning the printer
Set up the printer and paper handling options
Installing an optional duplex unit
12 Set up the printer and paper handling options
Set up the printer and paper handling options
5 Slide in the duplex unit
14 Set up the printer and paper handling options
Tighten the thumbscrews
Close the duplex unit door
Installing an optional high-capacityfeeder
Set up the printer and paper handling options
16 Set up the printer and paper handling options
Attaching the docking frame
Set up the printer and paper handling options
3 Use the wrench to tighten the screws
18 Set up the printer and paper handling options
Attaching the guide rail and feeder
4 Roll the high-capacityfeeder toward the printer and check the alignment of the pins with the holes in the docking frame
Set up the printer and paper handling options
20 Set up the printer and paper handling options
Installing height adjustment spacers
Set up the printer and paper handling options
22 Set up the printer and paper handling options
Add or remove spacers To add spacers
Attaching the paper tray labels
Set up the printer and paper handling options
Step 4 Install memory and option cards
Removing the system board access cover
24 Install memory and option cards
Install memory and option cards
2 Slide the cover up and away from the printer
26 Install memory and option cards
To install a
4 Use the following table to locate
the instructions you need
Installing a memory card
Install memory and option cards
Installing a firmware card
28 Install memory and option cards
Install memory and option cards
2 Unpack the firmware card
Installing a hard disk
30 Install memory and option cards
Installing an option card
Install memory and option cards
Card
Function
1 Remove the system board access cover see page
32 Install memory and option cards
4 Align the connector on the option card with the connector on the system board
Install memory and option cards
Reinstalling the system board access cover
34 Install memory and option cards
Step 5: Attach cables
Attach cables
36 Attach cables
Local printing
Attach cables
Step 6 Install printer supplies
38 Install printer supplies
To open the top cover
2 Open the front door
Install printer supplies
3 Rotate the top cover locking lever to the left
40 Install printer supplies
5 Lift the top cover until it stops
Installing the photodevelopers
Install printer supplies
Transfer belt
42 Install printer supplies
4 Remove the tape from the photodeveloper
Install printer supplies
6 While holding the photodeveloper with your left hand and the photodeveloper cover with your right hand, slide the photodeveloper in until the unit is fully seated
Installing the toner cartridges
44 Install printer supplies
Install printer supplies
Colored label
46 Install printer supplies
Attaching the Quick Reference booklet sleeve
Install printer supplies
Attaching an adhesive operator panel overlay
48 Install printer supplies
Closing the top cover
Install printer supplies
Place both hands on the top cover
as shown
50 Install printer supplies
3 Rotate the top cover locking lever to the right
bLift the top cover
4 Close the front door
Step 7 Load paper
Load paper
Go to
Source
Loading the paper trays
52 Load paper
1 Pull the paper tray out until it stops
2 Press the metal plate down until it locks
Load paper
4 Release the paper guide
54 Load paper
6 Place the paper in the tray, print side down
Load paper
9 Push the tray completely in the printer
56 Load paper
Using the heavy media tray
Set the paper size
PAPER MENU PAPER SIZE
Load paper
Set the paper type
PAPER MENU PAPER TYPE
58 Load paper
Loading the multipurpose feeder
Load paper
60 Load paper
Note Do not exceed the maximum stack height. Overfilling the feeder may cause jams
Load paper
The multipurpose tray can be closed by lifting it
62 Load paper
Loading the high- capacity feeder
Load paper
64 Load paper
Note Do not exceed the maximum stack height. Overfilling the tray may cause paper jams
Load paper
8 Press the Paper Tray button
66 Load paper
Step 8 Verify printer setup
Turning on the printer
Verify printer setup
Printing a menu settings page
68 Verify printer setup
UTILITIES MENU
Printing a network setup page
Verify printer setup
What do I do next?
UTILITIES MENU
Step 9 Configure for TCP/IP
Setting the printer IP address
70 Configure for TCP/IP
Verifying the IP settings
Configuring for Pull Printing
Configure for TCP/IP
Step 10 Install printer drivers
Network printing
72 Install printer drivers
Windows
Creating ports and installing drivers
Install printer drivers
Macintosh
Supported printer drivers
Installation instructions
74 Install printer drivers
Local printing
Other network environments
Macintosh You must install the printer’s PPD and use it with the LaserWriter 8 printer driver or the Adobe PostScript driver
Install printer drivers
Page
Step 11 Distribute information to users
Identifying printer users
Finding information
Distribute information to users
Distributing the information Storing the Quick
Congratulations
Reference
78 Distribute information to users
Index
Index
80 Index
Index
Page
Infoprint Color Setup Guide
Readers’ Comments - We’d Like to Hear from You
Publication No. S510-2222-00
Please tell us how we can improve this book
BUSINESS REPLY MAIL
Readers’ Comments - We’d Like to Hear from You
Page
Part Number 53P7114
S510-2222-00
1P P/N 53P7114