Basic Connections/Auto Setup

DVD/HDD View

1

from antenna

or cable

2

To TV’s

Antenna Input

3

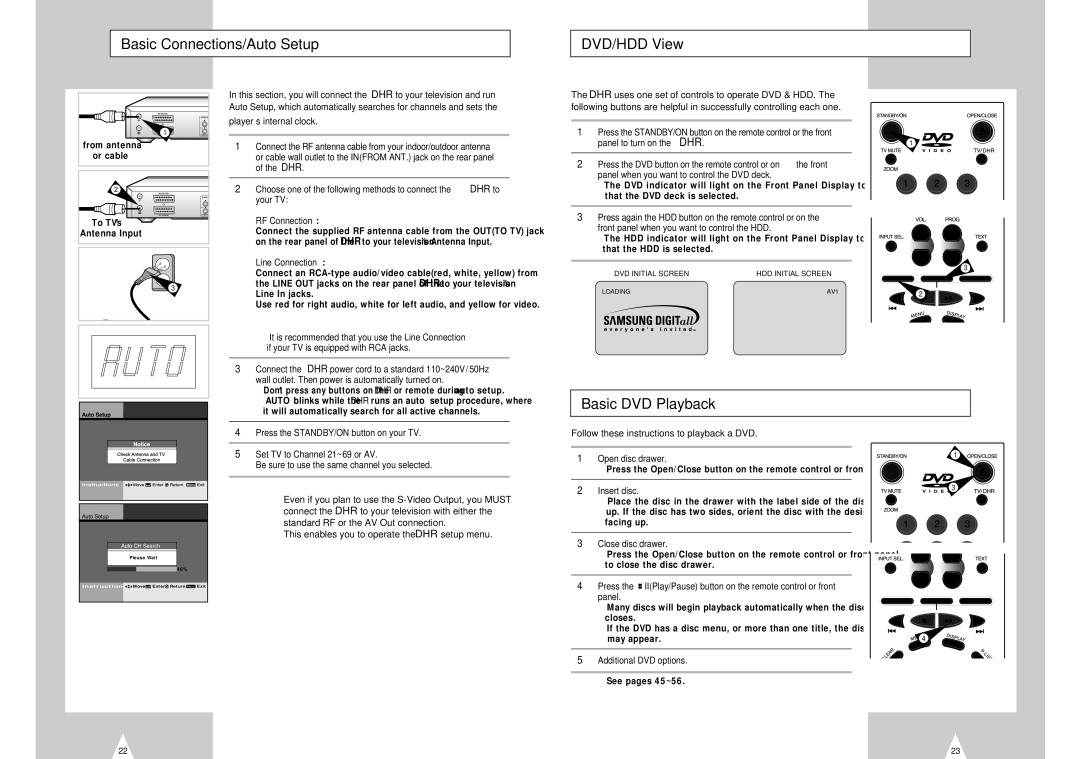
In this section, you will connect the DHR to your television and run Auto Setup, which automatically searches for channels and sets the

player’s internal clock.

1Connect the RF antenna cable from your indoor/outdoor antenna or cable wall outlet to the IN(FROM ANT.) jack on the rear panel of the DHR.

2Choose one of the following methods to connect the DHR to your TV:

RF Connection:

Connect the supplied RF antenna cable from the OUT(TO TV) jack on the rear panel of the DHR to your television’s Antenna Input.

Line Connection:

Connect an RCA-type audio/video cable(red, white, yellow) from the LINE OUT jacks on the rear panel of the DHR to your television’s Line In jacks.

Use red for right audio, white for left audio, and yellow for video.

It is recommended that you use the Line Connection if your TV is equipped with RCA jacks.

The DHR uses one set of controls to operate DVD & HDD. The following buttons are helpful in successfully controlling each one.

1Press the STANDBY/ON button on the remote control or the front panel to turn on the DHR.

2Press the DVD button on the remote control or on the front panel when you want to control the DVD deck.

The DVD indicator will light on the Front Panel Display to show that the DVD deck is selected.

3Press again the HDD button on the remote control or on the front panel when you want to control the HDD.

The HDD indicator will light on the Front Panel Display to show that the HDD is selected.

DVD INITIAL SCREEN

HDD INITIAL SCREEN

LOADING

AV1

1

3

2

3

Connect the DHR power cord to a standard 110~240V/50Hz


wall outlet. Then power is automatically turned on.


• Don’t press any buttons on the DHR or remote during auto setup.


“AUTO” blinks while the DHR runs an auto setup procedure, where


it will automatically search for all active channels.


Basic DVD Playback

Auto Setup

Auto CH Search

Audio Options

DisplayPlease OptionsWait

4

Press the STANDBY/ON button on your TV.


5

Set TV to Channel 21~69 or AV.


Be sure to use the same channel you selected.


Even if you plan to use the S-Video Output, you MUST connect the DHR to your television with either the standard RF or the AV Out connection.

This enables you to operate the DHR setup menu.

Follow these instructions to playback a DVD.

1

Open disc drawer.


Press the Open/Close button on the remote control or front panel.


2

Insert disc.


Place the disc in the drawer with the label side of the disc facing


up. If the disc has two sides, orient the disc with the desired label


facing up.


3

Close disc drawer.


Press the Open/Close button on the remote control or front panel


to close the disc drawer.

1

3


46%

lnstructions

Move


Enter Return Menu Exit


4

Press the ¤ II(Play/Pause) button on the remote control or front


panel.


Many discs will begin playback automatically when the disc drawer


closes.


If the DVD has a disc menu, or more than one title, the disc menu


may appear.


5

Additional DVD options.

4

22

See pages 45~56.

23

Page 12
Image 12
Samsung DVD-H40E/AFR, DVD-H40E/XEC Basic Connections/Auto Setup DVD/HDD View, Basic DVD Playback, Player’s internal clock

DVD-H40E/AFR, DVD-H40E/XEC specifications

The Samsung DVD-H40E is a versatile and feature-rich DVD player that showcases Samsung's dedication to home entertainment technology. Available in models such as the DVD-H40E/XEC and DVD-H40E/AFR, this DVD player offers a variety of functions that cater to different user preferences.

At the core of the Samsung DVD-H40E is its impressive compatibility with various disc formats, including DVD-Video, DVD±R/RW, CD-DA, and MP3-CD, which ensures that users can enjoy their favorite movies and music without the hassle of compatibility issues. This player also supports JPEG image playback, enabling users to view their photo collections directly on their TV screens.

The DVD-H40E features progressive scan technology, which enhances video quality by providing a smoother and sharper picture. By displaying images in full resolution, the progressive scan capability reduces motion blur and improves overall clarity, making it particularly beneficial for action-packed films and fast-paced scenes. Coupled with the player's Dolby Digital and DTS support, viewers can experience immersive audio that complements the stunning visuals.

Another standout feature of the Samsung DVD-H40E is its user-friendly interface and remote control. The intuitive design allows for easy navigation through menus, settings, and playback options, making it accessible for all users, from tech enthusiasts to casual viewers. The remote control adds convenience, allowing users to manage playback from the comfort of their seating area.

The player also incorporates features like fast and slow motion playback, enabling viewers to rewatch their favorite scenes at varying speeds. Additionally, the DVD-H40E is equipped with parental controls, giving families the ability to restrict access to certain content based on age ratings.

In terms of connectivity, the Samsung DVD-H40E includes composite video and audio outputs, allowing for simple connection to most TVs. It also supports S-Video output for those seeking improved picture quality. The compact design of the DVD-H40E ensures it fits well in any entertainment setup without taking up much space.

In summary, the Samsung DVD-H40E/XEC and DVD-H40E/AFR models blend technology and practicality, making them excellent choices for anyone looking to enhance their home viewing experience. With compatibility with various formats, high-quality video and audio output, and user-friendly features, it is a reliable addition to any entertainment system. Whether for casual viewing or an immersive movie night, the Samsung DVD-H40E stands out as a solid choice for DVD enthusiasts.