Choosing a Connection
Connection to a TV (For Video)
TV (Normal, Widescreen, Projection, etc..)
| Method 1 | Method 2 | Method 3 |
Basic Audio | Video | Interlace scan |
TV
Choosing a Connection
Connection to a TV (For Progressive scan, Digital Video)
Method 1 |
| Method 2 |
Progressive scan | Basic Audio | Digital Video DVI Audio Input |
TV
AV
Cable
DVD
Player
Cable
OR
Video Cables
OR
DVD
Player
Component Jacks | Audio Output Jacks | Digital Video Out | Audio Output Jacks |
Audio Output | Video Output | Component Jacks |
JacksJack
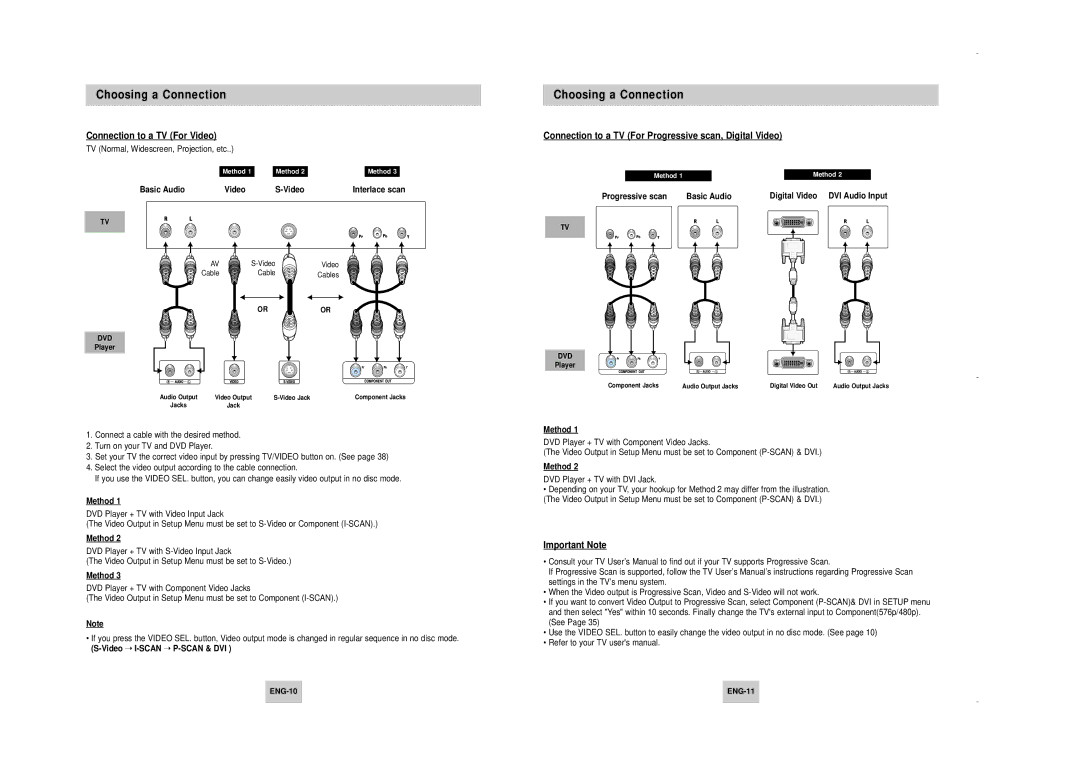
1.Connect a cable with the desired method.
2.Turn on your TV and DVD Player.
3.Set your TV the correct video input by pressing TV/VIDEO button on. (See page 38)
4.Select the video output according to the cable connection.
If you use the VIDEO SEL. button, you can change easily video output in no disc mode.
Method 1
DVD Player + TV with Video Input Jack
(The Video Output in Setup Menu must be set to
Method 2
DVD Player + TV with
(The Video Output in Setup Menu must be set to
Method 3
DVD Player + TV with Component Video Jacks
(The Video Output in Setup Menu must be set to Component
Note
•If you press the VIDEO SEL. button, Video output mode is changed in regular sequence in no disc mode.
Method 1
DVD Player + TV with Component Video Jacks.
(The Video Output in Setup Menu must be set to Component
Method 2
DVD Player + TV with DVI Jack.
•Depending on your TV, your hookup for Method 2 may differ from the illustration. (The Video Output in Setup Menu must be set to Component
Important Note
•Consult your TV User’s Manual to find out if your TV supports Progressive Scan.
If Progressive Scan is supported, follow the TV User’s Manual’s instructions regarding Progressive Scan settings in the TV’s menu system.
•When the Video output is Progressive Scan, Video and
•If you want to convert Video Output to Progressive Scan, select Component
•Use the VIDEO SEL. button to easily change the video output in no disc mode. (See page 10)
•Refer to your TV user's manual.
