English
Instructions
Contents
Dpof Index
Dpof Cancel
FAQ
Dpof Dpof Standard
About the icons
Getting to know your camera
Page
An FCC warning
Editing images on a PC Refer to
This digital camera can be used for
This digital camera can be used for
Manufacturers contents
Back & Bottom
Identification of features
Front & Top
Flash Self
Mode dial
Timer
Side/ 5-function button
Identification of features
Play
Mode Auto
Scene Mode Text
Ni-Cdover 1000mAh
Connecting to a Power Source
Important information about battery usage
Battery indicator
Instructions on how to use the memory card
Fine
2592 2272 2048 1600 1024 640 320
Removing the memory card
Inserting the memory card
AEB
LCD monitor indicator
Press the shutter button to capture an image
Starting the recording mode
Select the Auto mode by rotating the mode dial
ISO
Starting the recording mode
Value will display on the bottom of the LCD monitor
Please see page 40 for details on Aperture and Shutter
Recording time will display on the LCD monitor
For as long as the available recording time
Night Scene mode
Pressing the shutter button down half way
Things to Watch Out for When Taking Pictures
Zoom W/T button
Press the shutter button again. In Still Image mode
Zoom T button will have no effect
Zoom W/T button
Subject will appear nearer
Digital zoom Tele
Voice memo / UP button
Voice memo / UP button
Macro / Down button Focusing
Focus lock
Macro / Down button Focusing
~3.0 ~2.0 25~0.8
Flash / Left button
Unit m
ISO Autofocus Macro Wide Tele
X X X X X O O O O O O O O O O O O O
X X X X X X X X X
Seconds
Self-timer / Right button
10SEC self-timer
Double self-timer
Menu button
MENU/ OK button
Cameras sensitivity is
+/- button
Sub menu
Auto
Custom
Daylight
Cloudy
Tungsten
White paper
Press the Shutter button to take the picture
ASM buttonManual & Scene mode button
Slow Fast
AUTO, F2.7 ~ F11
Large
Small
LCD button
Metering Multi Spot
Using the LCD monitor to adjust the camera settings
Camera working mode
MYSET3
Effect Sepia
Soft
MYSET1 Myset MYSET2
Use the UP and Down buttons to select a sub menu
How to use the menu
Size
Avi
Size
Quality
Single
Metering
Continuous shot
RGB
Continuous shot
Effect
Fine Normal
Vivid
Effect
Sharpness
Press the right button
Press the Left/Right buttons to select the Myset
Menu tap
Slot number to save
Scene
Starting play mode
Voice file, the voice indicator Will be displayed on
Clip, the movie clip indicator
Date
Size
Flash OFF
Thumbnail Enlargement button
Trim
Cancel
Temporarily stops playback
Pause mode Resumes playback
Play & Pause / Down button
Microphone is the best distance to record sound
Image & Icons Image & Information Image only
LEFT/ RIGHT/ MENU/ OK button
Change the display as shown below
Delete button
Protect ONE PIC
Setting up the play back function using the LCD monitor
Slide Repeat
Resize
Dpof Print
Menu tab Main menu Sub menu Secondary menu
Print
Custom SET
Reset
On selected
Press the OK button to save the configuration
Starting the slide show
Vertical
Rotating an image
Horizontal
1704 1536 1200 768 480
Resize
Image Resize Types 2272X 2048X 1600X 1024X 640X
Logo
Lock
Protecting images
ALL Pics
Deleting all images
Selecting no Cancels Delete All
Recordings
Menu tab Select the Standard menu by pressing the UP
Down button and press the Right button
Picture, excluding movie clips and voice
If Index is selected
Dpof Print Size
YES All images saved in the internal memory are
LEFT/ Right button
Dpof Auto Print
Printer Setup
PictBridge
Images
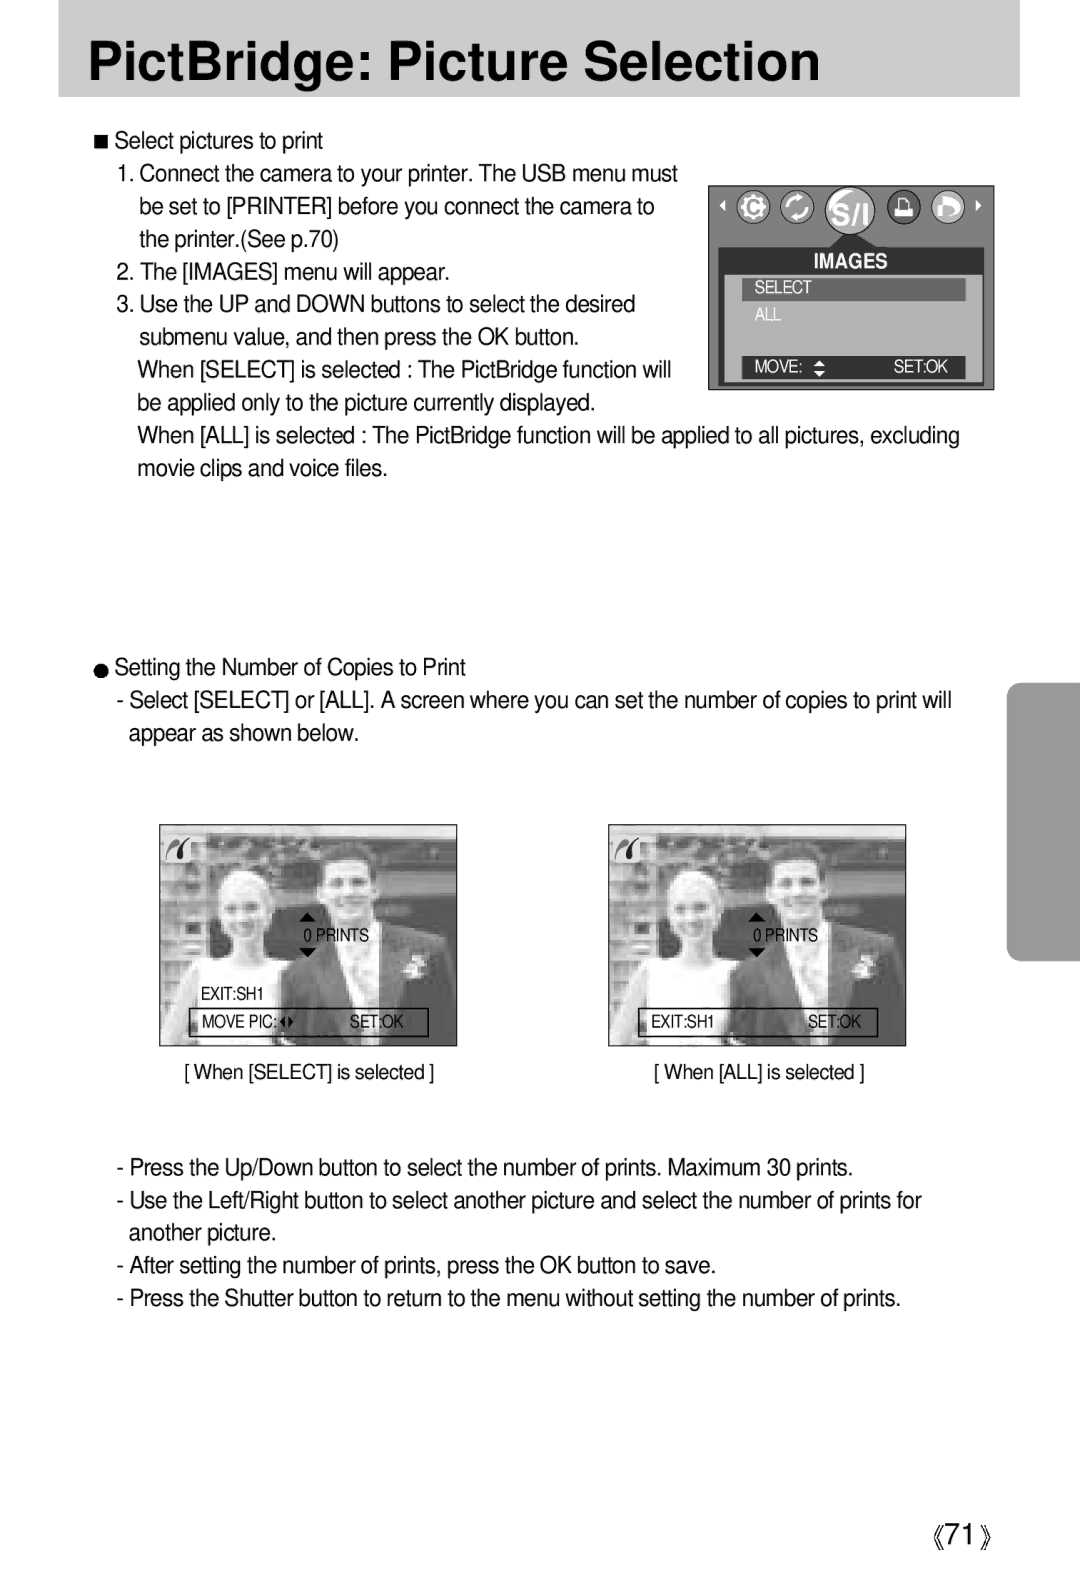
Use the UP and Down buttons to select the desired
PictBridge Picture Selection
Printer.See p.70
Images menu will appear
Paper
PictBridge Printing
Standard
Print the pictures stored
AUTO, OFF, on
PictBridge Print Setting
Auto SET
AUTO, DRAFT, NORMAL, Fine
PictBridge Reset
Setup menu
3SEC
File name
Computer Printer
LCD
File name
Auto power off
Press the LEFT/ Right button and select the Setup menu tab
Selecting OFF Power off function will not operate
Down button and press the Right button
Language
Formatting a memory card
Date type
Setting up the Date/ Time
Date & Time will be imprinted on the image file
Imprinting the recording date
Function lamp
Imprint type, and then press the OK button
Sound
Function lamp
Computer
Selecting an External Device USB
LCD brightness
Selecting an External Device
If no is selected
InitializationRESET ALL
Quick view
~ 3 SEC
Start up image
Setting up the Mycam menu
Turned on Setting a Startup Image
Start up sound
Shutter sound
Important notes
Important notes
Card Full
Card Error
File Error
LOW Battery
Before contacting a service center
Clean the lens
Symptom Causes Remedy
Macro shot mode
Mode Unclear
Connection
When using
Check the connection
Camera is off Turn the camera on
Specifications
640 640x480 pixels
Dimensions WxHxD
Special Features
File Format
System Requirements
Software Notes
About the software
Setting up the application software
Install Digimax Viewer. Click Next button
Click the OK button
Frame 8 may not appear according to System requirements
Select Components window will appear. Click Next button
101
102
103
104
COMPUTER, and then press the OK button
Starting PC Mode
Cut
107
Removing the USB Driver for Windows 98SE
Removable Disk
Removing the removable disk
Using the USB Driver for MAC
Setting up the USB Driver for MAC
Property
Digimax Viewer
Using PhotoImpression
Digimax Reader
Recognized as text
Digimax Reader
FAQ
Case
Manager Install the camera driver correctly
Tab and then click Update Driver or Reinstall Driver
USB interface Case When using the USB hub
Settings Control
119
6806-2290