Playback ( à)

Deleting images

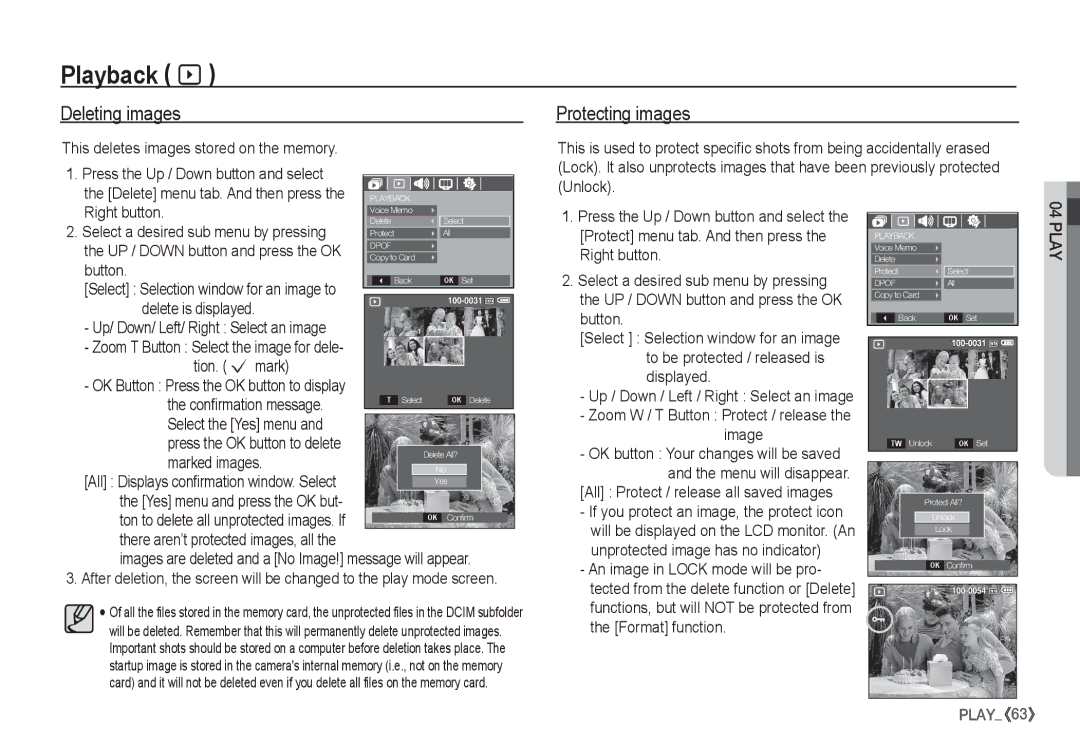
This deletes images stored on the memory.

1. Press the Up / Down button and select

the [Delete] menu tab. And then press the PLAYBACK

Protecting images

This is used to protect specific shots from being accidentally erased (Lock). It also unprotects images that have been previously protected (Unlock).

Right button.

Voice Memo


2. Select a desired sub menu by pressing

Delete


Select


Protect


All


the UP / DOWN button and press the OK

DPOF


Copy to Card


button.


Back


OK

Set

[Select] : Selection window for an image to


delete is displayed.


- Up/ Down/ Left/ Right : Select an image


- Zoom T Button : Select the image for dele-


tion. ( Ë mark)


- OK Button : Press the OK button to display


the confirmation message.


T Select


OK

Delete


Select the [Yes] menu and


press the OK button to delete


Delete All?


marked images.


No


[All] : Displays confirmation window. Select


Yes


the [Yes] menu and press the OK but-


ton to delete all unprotected images. If


OK

Confirm


there aren’t protected images, all the

images are deleted and a [No Image!] message will appear.

3. After deletion, the screen will be changed to the play mode screen.

Of all the files stored in the memory card, the unprotected files in the DCIM subfolder

will be deleted. Remember that this will permanently delete unprotected images. Important shots should be stored on a computer before deletion takes place. The startup image is stored in the camera's internal memory (i.e., not on the memory card) and it will not be deleted even if you delete all files on the memory card.

1.Press the Up / Down button and select the [Protect] menu tab. And then press the Right button.

2.Select a desired sub menu by pressing the UP / DOWN button and press the OK button.

[Select ] : Selection window for an image to be protected / released is displayed.

-Up / Down / Left / Right : Select an image

-Zoom W / T Button : Protect / release the image

-OK button : Your changes will be saved and the menu will disappear.

[All] : Protect / release all saved images

-If you protect an image, the protect icon will be displayed on the LCD monitor. (An unprotected image has no indicator)

-An image in LOCK mode will be pro- tected from the delete function or [Delete] functions, but will NOT be protected from the [Format] function.


04

PLAYBACK


PLAY

Voice Memo


Delete


Protect

Select

DPOF

All


Copy to Card


Back

OK

Set

TW Unlock

OK Set

Protect All?

Unlock

Lock

OK Confirm

PLAY_ 63

Page 64
Image 64
Samsung EC-S1065SBA/FR, EC-S1065PBA/FR manual Deleting images, Protecting images

EC-S1065SBA/FR, EC-S1065PBA/FR specifications

The Samsung EC-S1065PBA/FR and EC-S1065SBA/FR are compact yet powerful point-and-shoot cameras that seamlessly blend advanced technology with user-friendly features, making them ideal for both novice and experienced photographers. These models exemplify Samsung's commitment to delivering high-quality imaging experiences in a portable form.

At the heart of the EC-S1065 series lies a 10.2-megapixel CCD sensor, which yields vibrant images with impressive detail. The sensor size also ensures that low-light performance is enhanced, allowing users to capture moments in various lighting conditions without sacrificing image quality. The cameras feature a high-quality 5x optical zoom lens, enabling photographers to zoom in on subjects while maintaining clarity and sharpness.

One of the standout technologies in the EC-S1065 models is Smart Face Recognition. This feature identifies and prioritizes faces in a scene, ensuring that subjects are always in focus and properly exposed. Coupled with the Smile Shot function, this technology guarantees that users can easily capture authentic smiles and candid moments, making it perfect for family gatherings or social events.

Both models are equipped with a range of scene modes, allowing users to optimize their shots based on specific environments or subjects. This includes settings for landscape, portrait, macro, and night photography, ensuring versatility in various shooting conditions. Additionally, the built-in image stabilization technology helps reduce blurriness caused by camera shake, which is particularly helpful for capturing sharp images during handheld shots.

The EC-S1065 series also boasts a user-friendly interface, featuring a wide 2.7-inch LCD screen that provides clear visibility in different lighting situations. This display is part of a sleek and compact design, making the cameras easy to carry and handle. The cameras are lightweight, ensuring that they can be taken along on any adventure without adding bulk.

For those interested in video, the EC-S1065 models offer the ability to record VGA video at a resolution of 640x480 pixels, capturing precious memories in motion. With its battery life supporting extended shooting sessions, these cameras are perfect for day trips or vacations.

Combining high-resolution imaging, innovative technology, and user-friendly features, the Samsung EC-S1065PBA/FR and EC-S1065SBA/FR are excellent choices for capturing life's moments with ease and quality. Whether you’re a casual user or an aspiring photographer, these cameras deliver reliable performance that can meet a variety of photographic needs.