Analog TV Out

You can set the component or composite video output to match the TV you have connected.

PRECHECK!

Using the Component/AV Cable provided with your camcorder, connect the camcorder to your TV. page 119~123

This HD camcorder provides the two-in-one component/AV cable that fits the purpose of the component and the AV cable. Therefore, when using the component/AV cable, you must check the right method for the TV output by setting the “Analog TV Out” menu.

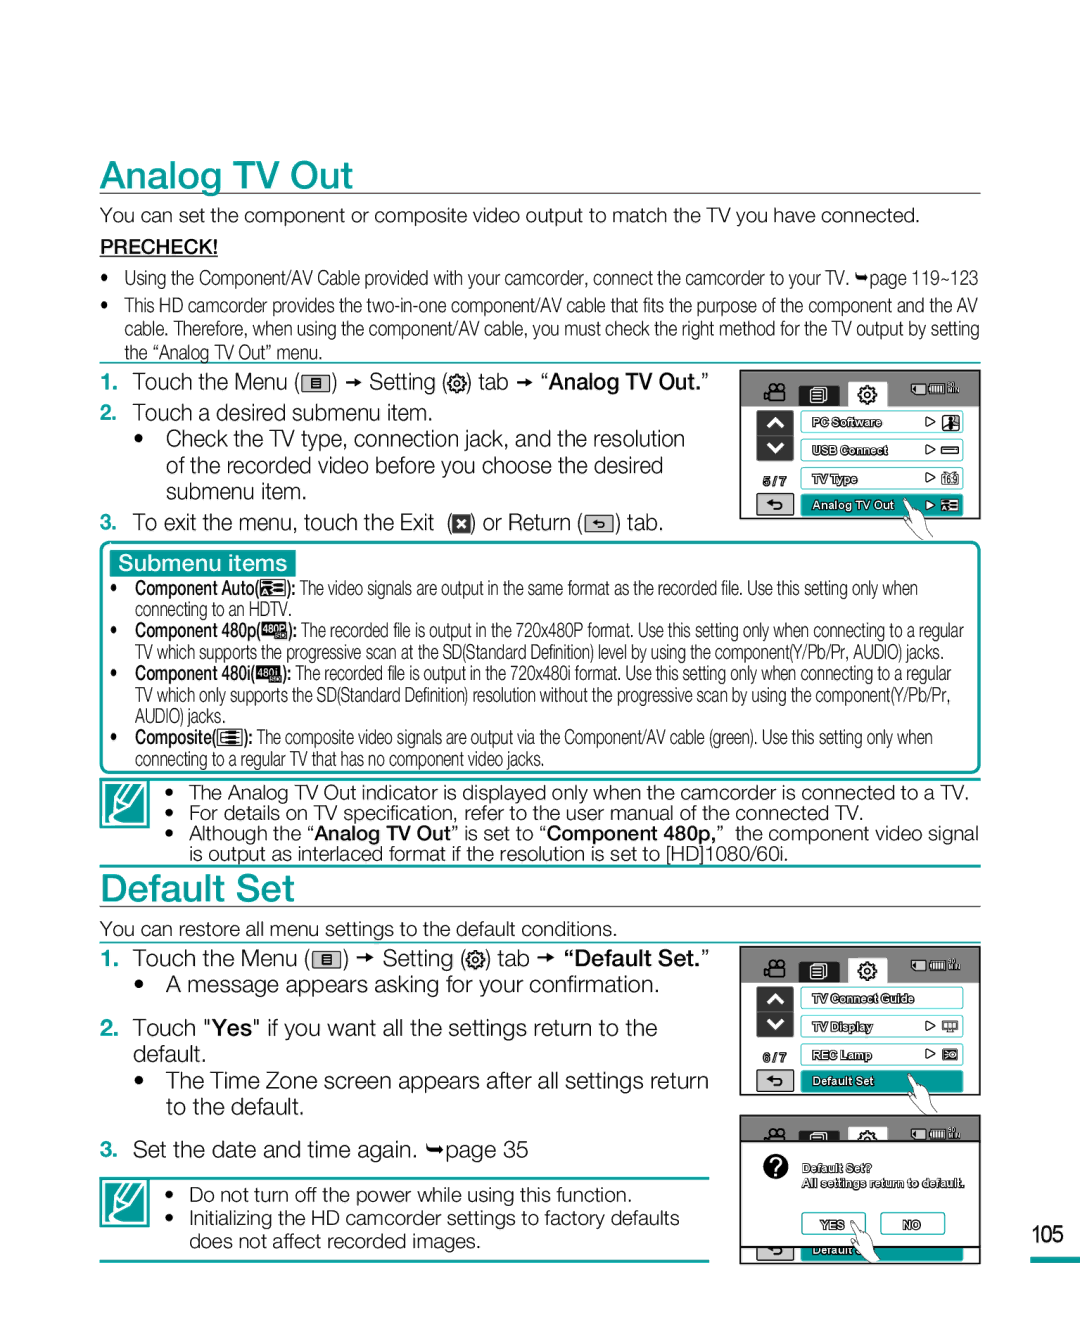
1.Touch the Menu () Setting () tab “Analog TV Out.”

2.Touch a desired submenu item.

Check the TV type, connection jack, and the resolution of the recorded video before you choose the desired submenu item.

3.To exit the menu, touch the Exit () or Return () tab.


90


MIN


PC Software


USB Connect

5 / 7

TV Type


Analog TV Out

Submenu items

Component Auto(): The video signals are output in the same format as the recorded file. Use this setting only when connecting to an HDTV.

Component 480p(): The recorded file is output in the 720x480P format. Use this setting only when connecting to a regular TV which supports the progressive scan at the SD(Standard Definition) level by using the component(Y/Pb/Pr, AUDIO) jacks.

Component 480i( 480i ): The recorded file is output in the 720x480i format. Use this setting only when connecting to a regular TV which only supports the SD(Standard Definition) resolution without the progressive scan by using the component(Y/Pb/Pr, AUDIO) jacks.

Composite(): The composite video signals are output via the Component/AV cable (green). Use this setting only when connecting to a regular TV that has no component video jacks.

The Analog TV Out indicator is displayed only when the camcorder is connected to a TV.

For details on TV specification, refer to the user manual of the connected TV.

Although the “Analog TV Out” is set to “Component 480p,” the component video signal is output as interlaced format if the resolution is set to [HD]1080/60i.

Default Set

You can restore all menu settings to the default conditions.

1.Touch the Menu () Setting () tab “Default Set.”

A message appears asking for your confirmation.

2.Touch "Yes" if you want all the settings return to the default.

The Time Zone screen appears after all settings return to the default.

3.Set the date and time again. page 35

Do not turn off the power while using this function.

Initializing the HD camcorder settings to factory defaults does not affect recorded images.


90


MIN


TV Connect Guide


TV Display

6 / 7

REC Lamp


Default Set


90


MIN


DefaultTV ConnectSet? Guide


All settings return to default.


TV Display


6 / 7

RECYESLamp

NO

105


Default Set


Page 109
Image 109
Samsung HMX-R10 user manual Analog TV Out, Default Set

HMX-R10 specifications

The Samsung HMX-R10 is a compact, high-definition camcorder that was launched as part of Samsung’s efforts to provide consumers with an easy-to-use device for capturing high-quality video content. Notable for its small size and lightweight construction, the HMX-R10 was designed with portability in mind, making it an excellent choice for both casual users and video enthusiasts.

One of the standout features of the HMX-R10 is its ability to record in full HD 1080p resolution. This ensures that users can capture crystal-clear video footage with vibrant colors and impressive detail. The camcorder employs advanced video compression technology, specifically H.264, which allows for efficient storage of high-definition content without compromising quality.

The HMX-R10 boasts a 10x optical zoom lens that brings subjects closer without losing detail, along with a 2.7-inch LCD touchscreen for easy navigation and playback. This user-friendly interface simplifies the process of recording and sharing videos. The touchscreen also enables users to quickly adjust settings and review recorded content, enhancing the overall user experience.

An important feature of the HMX-R10 is its Dual Memory System, allowing users to save recordings on both SD/SDHC memory cards and the built-in flash memory. This versatility provides ample storage options, catering to varying needs and preferences. Additionally, the camcorder offers the capability of capturing 9-megapixel still photos, integrating functionality that appeals to those who want a multi-purpose device.

The HMX-R10 is equipped with image stabilization technology to minimize blur and maintain steady shots even during movement. This feature is particularly valuable for users who enjoy shooting action-packed scenes or capturing dynamic moments on the go. The camcorder’s Smart Auto function further enhances video quality by automatically adjusting settings according to the environment, ensuring optimal results regardless of lighting conditions.

Lastly, the Samsung HMX-R10 supports HDMI output, facilitating easy connection to high-definition televisions and other digital devices for seamless viewing of recorded content. With its engaging blend of portability, advanced imaging technology, and user-friendly features, the HMX-R10 remains a notable option for those seeking an efficient camcorder for everyday use.