Connecting
 External Components
Connecting an External Digital Component
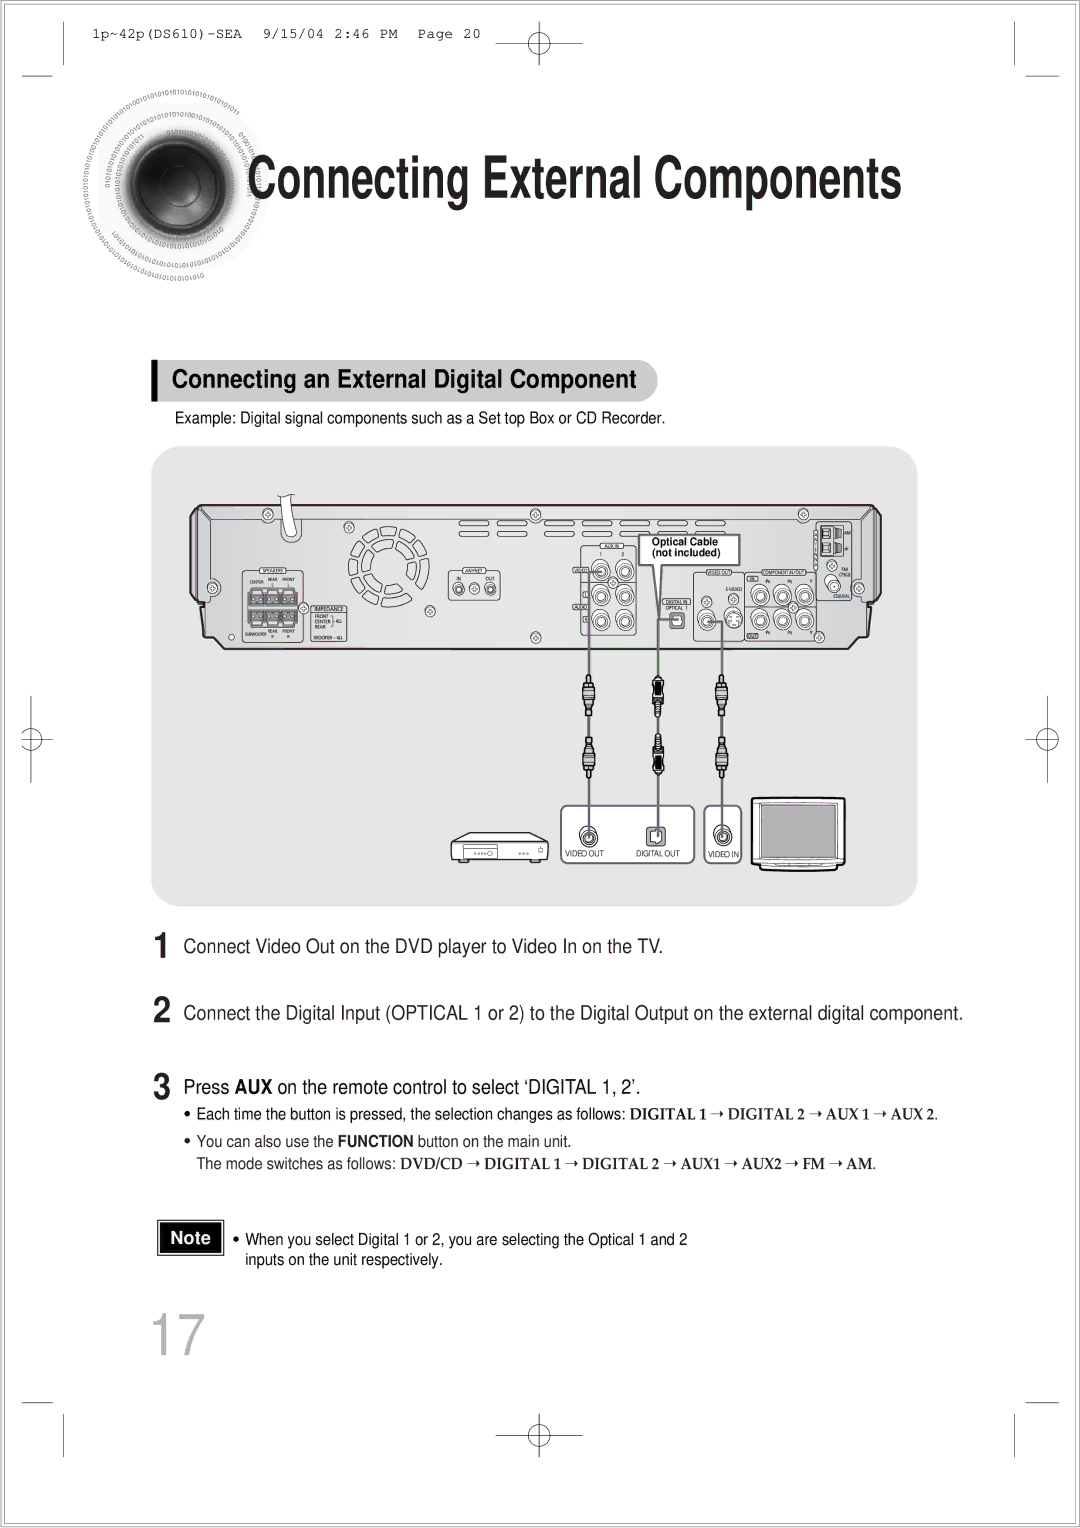
Example: Digital signal components such as a Set top Box or CD Recorder.
Optical Cable (not included)
VIDEO OUT | DIGITAL OUT | VIDEO IN |
1 Connect Video Out on the DVD player to Video In on the TV.
2 Connect the Digital Input (OPTICAL 1 or 2) to the Digital Output on the external digital component.
3 Press AUX on the remote control to select ‘DIGITAL 1, 2’.
•Each time the button is pressed, the selection changes as follows: DIGITAL 1 ➝ DIGITAL 2 ➝ AUX 1 ➝ AUX 2.
•You can also use the FUNCTION button on the main unit.
The mode switches as follows: DVD/CD ➝ DIGITAL 1 ➝ DIGITAL 2 ➝ AUX1 ➝ AUX2 ➝ FM ➝ AM.
Note | • | When you select Digital 1 or 2, you are selecting the Optical 1 and 2 |
|
| inputs on the unit respectively. |
17