
MM-D320/ZN, MM-E320/XE, MM-D320/SQ, MM-E320/ZF, MM-E330/EN specifications
The Samsung MM-E320/UM is a compact yet powerful audio system designed to deliver high-quality sound and a range of entertainment options. As part of Samsung’s impressive lineup of audio products, the MM-E320/UM stands out with its combination of modern features and user-friendly design.One of the key features of the MM-E320/UM is its robust sound system, which comprises a powerful amplifier paired with high-efficiency speakers. This combination creates an immersive audio experience, making it perfect for enjoying music, movies, or even gaming. The system supports various sound modes, allowing users to choose the best settings for their specific audio content, whether it’s stereo sound for music or more dynamic options for films.
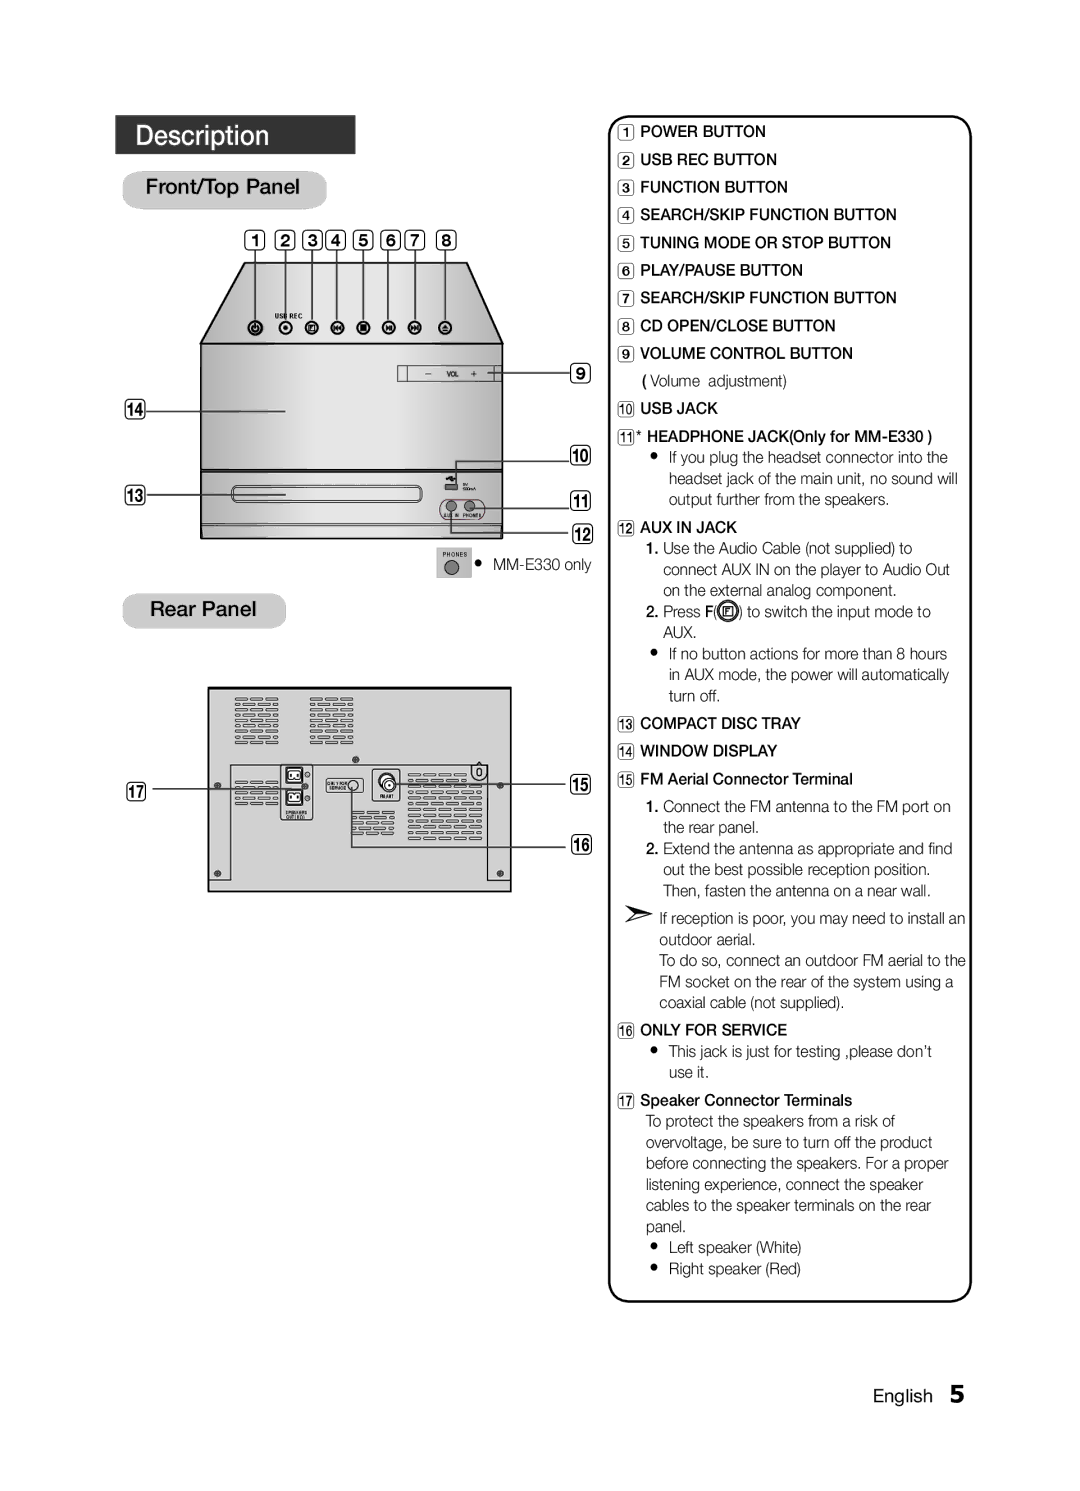
The MM-E320/UM supports multiple audio sources, including CD playback, USB input, and Bluetooth connectivity, making it versatile for different listening habits. With Bluetooth technology, users can easily pair their smartphones or tablets with the system, allowing them to stream music wirelessly and effortlessly. This functionality is complemented by the USB port, which supports direct playback from flash drives, perfect for those who enjoy curated playlists.
In terms of design, the Samsung MM-E320/UM boasts a sleek and modern look that fits seamlessly into any living space. The compact size makes it easy to place in various locations, while the intuitive controls ensure that users can navigate through their audio options with ease. The clear LCD display provides essential information, such as track details and source selection, enhancing the overall user experience.
Moreover, the MM-E320/UM incorporates advanced audio technologies, including Digital Sound Processing (DSP), which optimizes sound performance according to the environment and content type. This feature ensures that listeners can enjoy clear, balanced, and powerful audio without the need for extensive manual adjustments.
The system also includes a built-in FM tuner, providing users with access to their favorite radio stations. This functionality adds another layer of versatility, allowing for a variety of listening options.
In summary, the Samsung MM-E320/UM is an excellent choice for anyone seeking a compact yet powerful audio system. With its impressive sound capabilities, modern connectivity options, and user-friendly design, it caters to a wide array of audio needs, making it a valuable addition to any home entertainment setup.