Safety Precautions
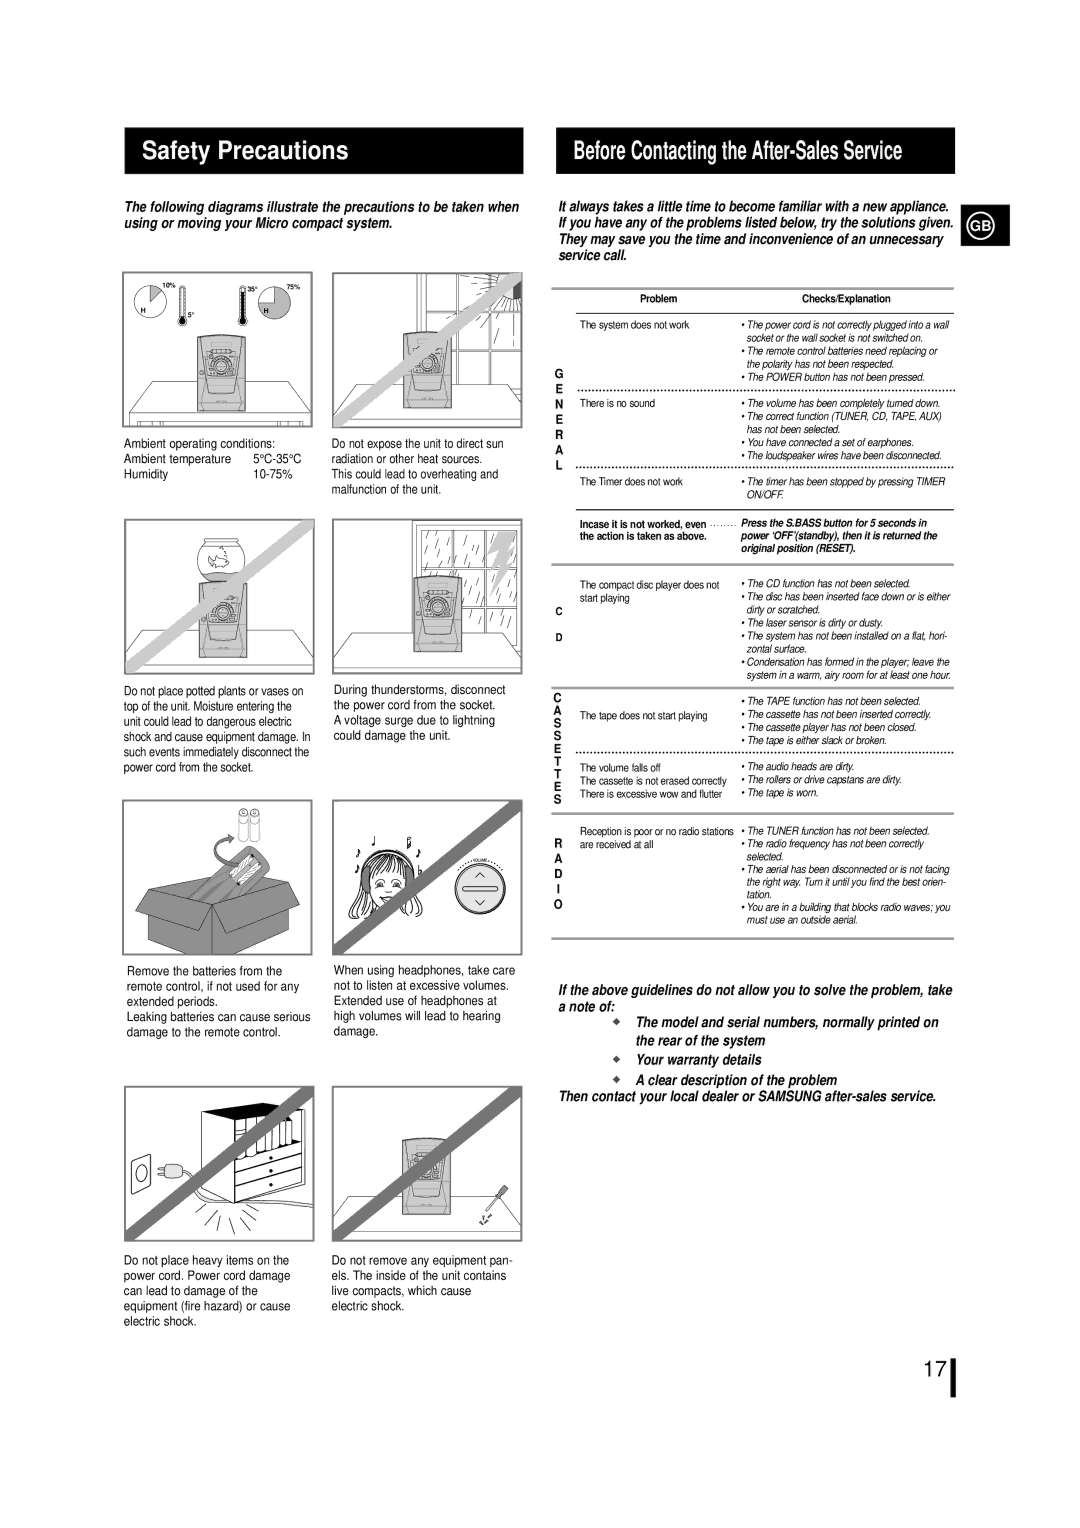
The following diagrams illustrate the precautions to be taken when using or moving your Micro compact system.
Before Contacting the After-Sales Service
It always takes a little time to become familiar with a new appliance.
If you have any of the problems listed below, try the solutions given. GB They may save you the time and inconvenience of an unnecessary service call.
10% | 35° | 75% |
H | 5° | H |
|
|
Ambient operating conditions: Ambient temperature
Humidity10-75%
Do not expose the unit to direct sun radiation or other heat sources. This could lead to overheating and malfunction of the unit.
| Problem | Checks/Explanation |
|
|
|
| The system does not work | • The power cord is not correctly plugged into a wall |
|
| socket or the wall socket is not switched on. |
|
| • The remote control batteries need replacing or |
G |
| the polarity has not been respected. |
| • The POWER button has not been pressed. | |
E |
|
|
N | There is no sound | • The volume has been completely turned down. |
E |
| • The correct function (TUNER, CD, TAPE, AUX) |
R |
| has not been selected. |
| • You have connected a set of earphones. | |
A |
| |
| • The loudspeaker wires have been disconnected. | |
L |
| |
|
| |
| The Timer does not work | • The timer has been stopped by pressing TIMER |
|
| ON/OFF. |
|
|
|
| Incase it is not worked, even | Press the S.BASS button for 5 seconds in |
| the action is taken as above. | power ‘OFF’(standby), then it is returned the |
|
| original position (RESET). |
|
|
|
| The compact disc player does not | • The CD function has not been selected. |
| start playing | • The disc has been inserted face down or is either |
C |
| dirty or scratched. |
|
| • The laser sensor is dirty or dusty. |
D |
| • The system has not been installed on a flat, hori- |
|
| zontal surface. |
|
| • Condensation has formed in the player; leave the |
|
| system in a warm, airy room for at least one hour. |
Do not place potted plants or vases on |
| During thunderstorms, disconnect |
top of the unit. Moisture entering the |
| the power cord from the socket. |
unit could lead to dangerous electric |
| A voltage surge due to lightning |
shock and cause equipment damage. In |
| could damage the unit. |
such events immediately disconnect the |
|
|
power cord from the socket. |
|
|
|
|
|
|
|
|
Remove the batteries from the | When using headphones, take care | ||||||
remote control, if not used for any | not to listen at excessive volumes. | ||||||
extended periods. | Extended use of headphones at | ||||||
Leaking batteries can cause serious | high volumes will lead to hearing | ||||||
damage to the remote control. | damage. | ||||||
|
|
|
|
|
|
|
|
|
|
|
|
|
|
|
|
|
|
|
|
|
|
|
|
|
|
|
|
|
|
|
|
|
|
|
|
|
|
|
|
|
|
|
|
|
|
|
|
|
|
|
|
|
|
|
|
|
|
|
|
|
|
|
|
|
|
|
|
|
|
|
|
Do not place heavy items on the | Do not remove any equipment pan- |
power cord. Power cord damage | els. The inside of the unit contains |
can lead to damage of the | live compacts, which cause |
equipment (fire hazard) or cause | electric shock. |
electric shock. |
|
C |
| • The TAPE function has not been selected. | |
A | The tape does not start playing | • The cassette has not been inserted correctly. | |
S | |||
| • The cassette player has not been closed. | ||
S |
| • The tape is either slack or broken. | |
E |
| ||
|
| ||
T | The volume falls off | • The audio heads are dirty. | |
T | |||
The cassette is not erased correctly | • The rollers or drive capstans are dirty. | ||
E | |||
There is excessive wow and flutter | • The tape is worn. | ||
S | |||
|
| ||
|
|
| |
R | Reception is poor or no radio stations | • The TUNER function has not been selected. | |
are received at all | • The radio frequency has not been correctly | ||
A |
| selected. | |
D |
| • The aerial has been disconnected or is not facing | |
| the right way. Turn it until you find the best orien- | ||
I |
| ||
| tation. | ||
O |
| ||
| • You are in a building that blocks radio waves; you | ||
|
| must use an outside aerial. | |
|
|
|
If the above guidelines do not allow you to solve the problem, take a note of:
The model and serial numbers, normally printed on the rear of the system
Your warranty details
A clear description of the problem
Then contact your local dealer or SAMSUNG
17
