01
02
 04
04  06
06
03![]()
![]() 05
05
L N
01
02
03 | 05 | 07 |
04![]()
![]() 06
06
L1 L2 N
01 |
| 04 |
|
|
|
| ||||||||||
02 |
|
|
|
|
| 05 |
|
|
|
|
|
|
|
|
| |
|
|
|
|
|
|
|
|
|
|
|
|
|
| |||
|
|
|
|
|
|
|
|
|
|
|
|
| 07 | |||
|
|
|
|
|
|
|
|
|
|
|
|
| ||||
03 |
|
|
|
|
|
| 06 |
|
|
|
|
|
| |||
|
|
|
|
|
|
|
|
|
| |||||||
|
|
|
|
|
|
|
|
|
|
|
|
| ||||
|
|
|
|
|
|
|
|
|
|
|
|
| ||||
|
|
|
|
|
|
|
|
|
|
|
|
|
|
|
|
|
|
|
|
|
|
|
|
|
|
|
|
|
|
|
|
|
|
|
| L1 | N1 |
|
| L2 | N2 | |||||||||
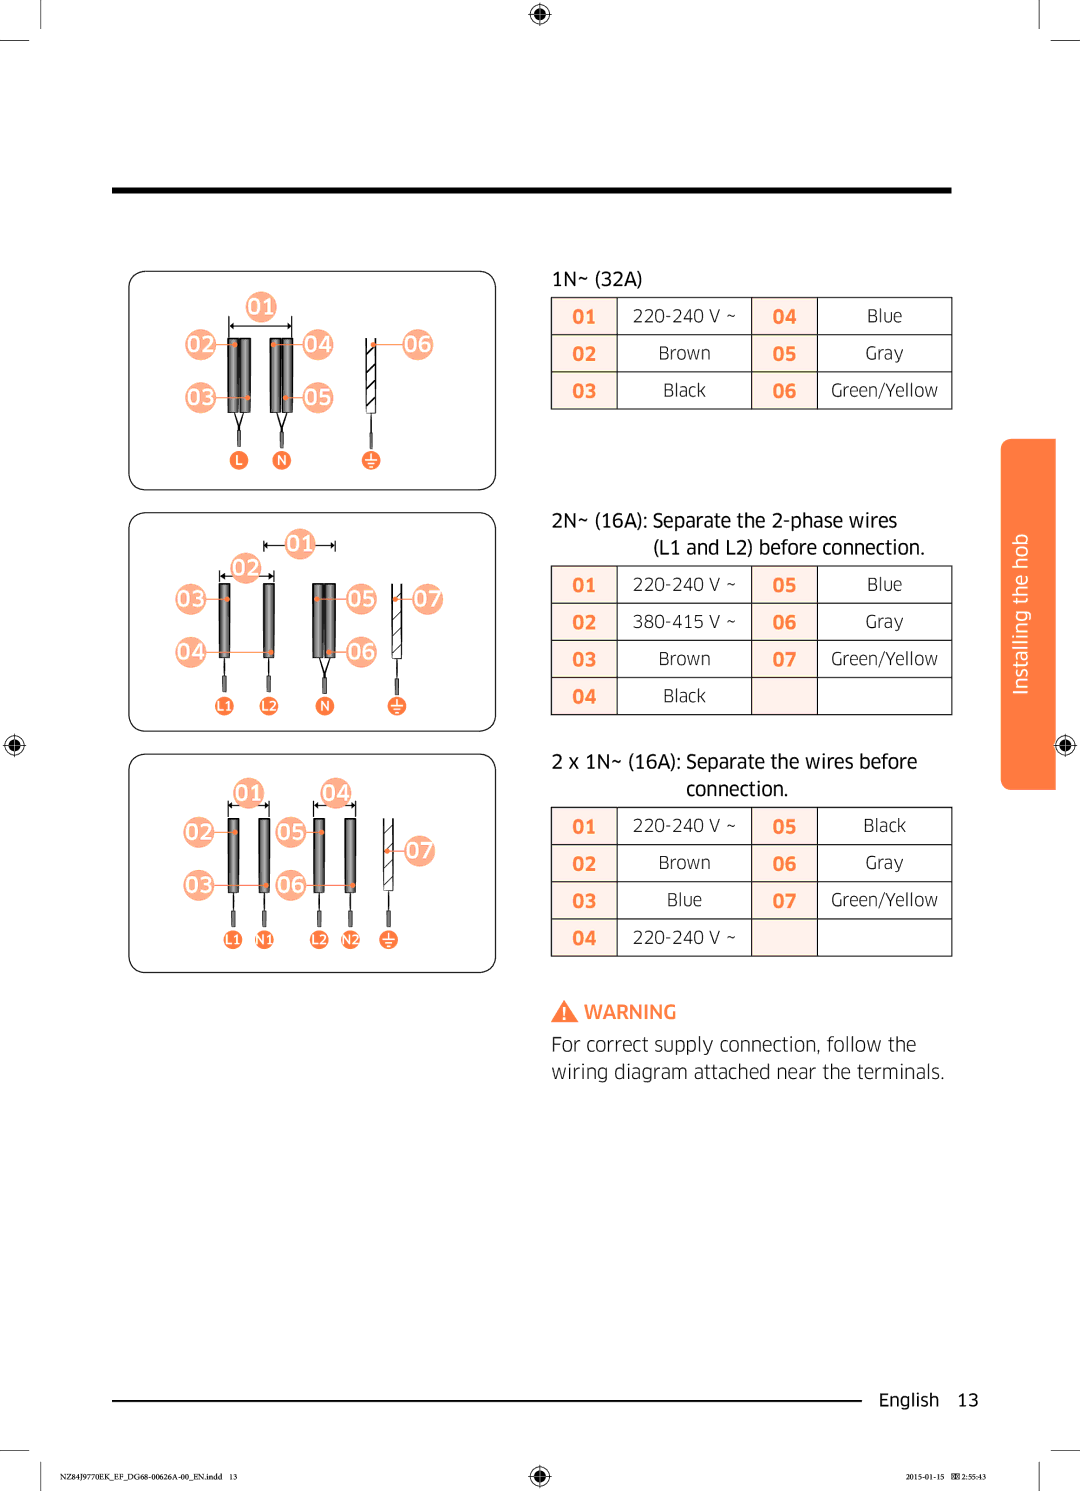
1N~ (32A)
01 | 04 | Blue | |
02 | Brown | 05 | Gray |
|
|
|
|
03 | Black | 06 | Green/Yellow |
|
|
|
|
2N~ (16A): Separate the | hob | |||
| (L1 and L2) before connection. | |||
|
| |||
|
|
|
| the |
01 | 05 | Blue | ||
02 | 06 | Gray | Installing | |
| ||||
03 | Brown | 07 | Green/Yellow |
|
|
|
|
|
|
04 | Black |
|
|
|
|
|
|
|
|
2 x 1N~ (16A): Separate the wires before |
| |||
| connection. |
|
| |
|
|
|
|
|
01 | 05 | Black |
| |
02 | Brown | 06 | Gray |
|
|
|
|
|
|
03 | Blue | 07 | Green/Yellow |
|
04
![]() WARNING
WARNING
For correct supply connection, follow the wiring diagram attached near the terminals.
English 13
