
RS26WUNS specifications
The Samsung RS26WUNS refrigerator is a compelling combination of style, functionality, and advanced technology, designed to meet the needs of modern households. This sleek side-by-side refrigerator showcases a stainless-steel finish that not only adds an element of sophistication to your kitchen but is also easy to clean and maintain.One of the standout features of the Samsung RS26WUNS is its spacious interior. With a total capacity of 25.5 cubic feet, it offers ample room for groceries, beverages, and large items like party platters. The refrigerator section includes adjustable shelves, crispers, and door bins that allow users to customize their storage solutions to accommodate various food items efficiently.
The refrigerator is equipped with Samsung's Twin Cooling Plus technology, which employs two separate cooling systems for the refrigerator and freezer compartments. This innovative system helps maintain optimal humidity levels in the fridge while preventing the transfer of odors between compartments. As a result, fruits and vegetables stay fresher for longer, and the flavors of stored food remain intact.
Another notable characteristic of the RS26WUNS is its energy efficiency. The appliance is Energy Star certified, ensuring it consumes less energy while providing excellent performance. This not only helps reduce electricity bills but also contributes to environmental sustainability.
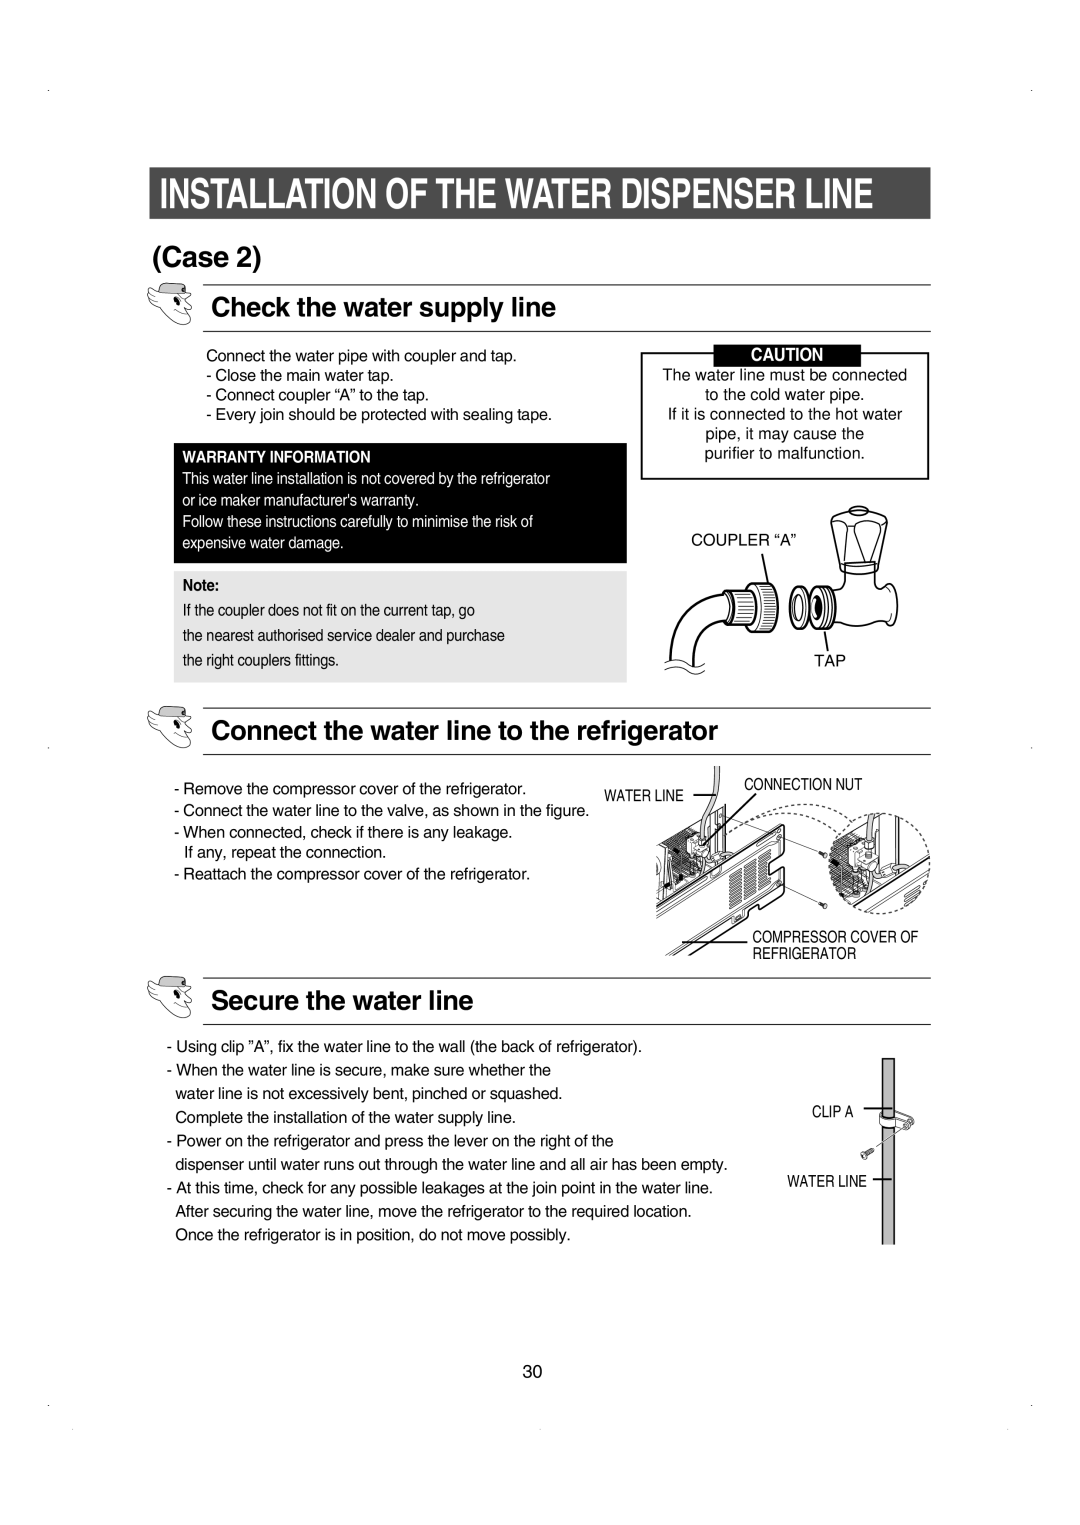
For those who enjoy the convenience of chilled beverages, the integrated water and ice dispenser is a highlight. Located on the front door, it delivers filtered water and produces both cubed and crushed ice, catering to various preferences. This feature is particularly appreciated during warmer months or when entertaining guests.
The Samsung RS26WUNS also boasts a digital display and intuitive controls, allowing users to adjust temperatures, set alarms, and monitor the appliance’s performance with ease. The bright LED lighting inside the refrigerator helps illuminate every corner, making it simple to locate items quickly.
In summary, the Samsung RS26WUNS refrigerator stands out with its stylish design, spacious interior, and advanced features like Twin Cooling Plus technology and an efficient water and ice dispensing system. With its focus on performance and energy efficiency, this appliance is an excellent choice for anyone looking to enhance their kitchen with a reliable, modern refrigerator.