High Definition Digital Camcorder
1920 720 1080i 480i
Key features of your HD camcorder
Enjoying Images with Full High Definition HD Quality
Features of Your NEW HD Camcorder
Mega pixel Gross Cmos sensor
Camcorder, follow these basic safety precautions
Safety warnings
Important safety instructions
Ventilation
Power Sources
See figure below
Power Lines
Viii English
Important information on use
Precautions
Before Using this Camcorder
Important information on use
Precautions when using
Important Note
Xii English
Contents
Recording Playback Connection
English
103
Introduction to basic features
Preparation
Recording
Playing back
Button type Quick start guide Battery Remote control Cradle
Getting to know your HD camcorder
WHAT’S Included with Your HD Camcorder
Pouch Core filters Hdmi cable Optional
Front & Left View
987
Right & TOP View
Rear & Bottom View
3 4
REC button
Using the Remote Control
Preparation
Installing the Button Type Battery
Using the Cradle
Angle adjustment
Holding the HD Camcorder
Attaching the grip belt
Attaching the Core Filter
Charging the battery pack
Charging the Battery Pack
Inserting the battery pack
Charging time Approx min
Charging indicator
Battery type
Ejecting the battery pack
Using the HD camcorder with the AC power adaptor
Turning the HD camcorder on and off
Setting the operating modes
Basic HD Camcorder Operation
Screen Indicators
Movie record mode
Movie play mode
3958
Photo play mode
LCD enhancer Photo image resolution Date/Time
Checking the remaining battery and recording capacity
Using the LCD Screen
Adjusting the LCD screen
Using the touch panel
Screen may cause a malfunction of the touch panel
Čeština Slovensky
Initial Setting OSD Language & Date and Time
Selecting the OSD language
Setting the date and time
Turning the date and time display on/off
Before recording
Selecting the Storage Media
INSERTING/EJECTING a Memory Card
Recordable number of photo images
Recordable Time and Number of Images
Recordable time for movie images
Selecting a Suitable Memory Card
Before recording
Recording
Recording Movie Images
Recording
Taking Photo Images
Recording with Ease for Beginners Easy Q Mode
Capturing Still Images in Movie Record Mode Dual Recording
Capturing Still Images During Movie Images Playback
Using the External Microphone
Zooming
Self Record Using the Remote Control
Using the BUILT-IN Flash
Flash mode
Changing the Playback Mode
Playback
Adjusting the volume
Playing Movie Images
Various playback operations
Viewing Photo Images
To view a Music slide show
Touch the Photo tab
Tab
Zooming during playback
Connection
Connecting to a TV
Connecting to a high definition TV
Connecting to a normal TV 169/43
Viewing on TV screen
HD Camcorder VCR or DVD/HDD Recorder
Using the menu items
Handling Menus and Quick Menus
Auto
Menu Items
Recording menu items
Possible
Not possible
Setting menu items
Playback menu items
Beep Sound
Operating mode Movie Photo Default value
Quick Menu Items
Highlight
Edit 80-84
Scene Mode AE
Recording Menu Items
Sports
As in a wedding or on stage Beach
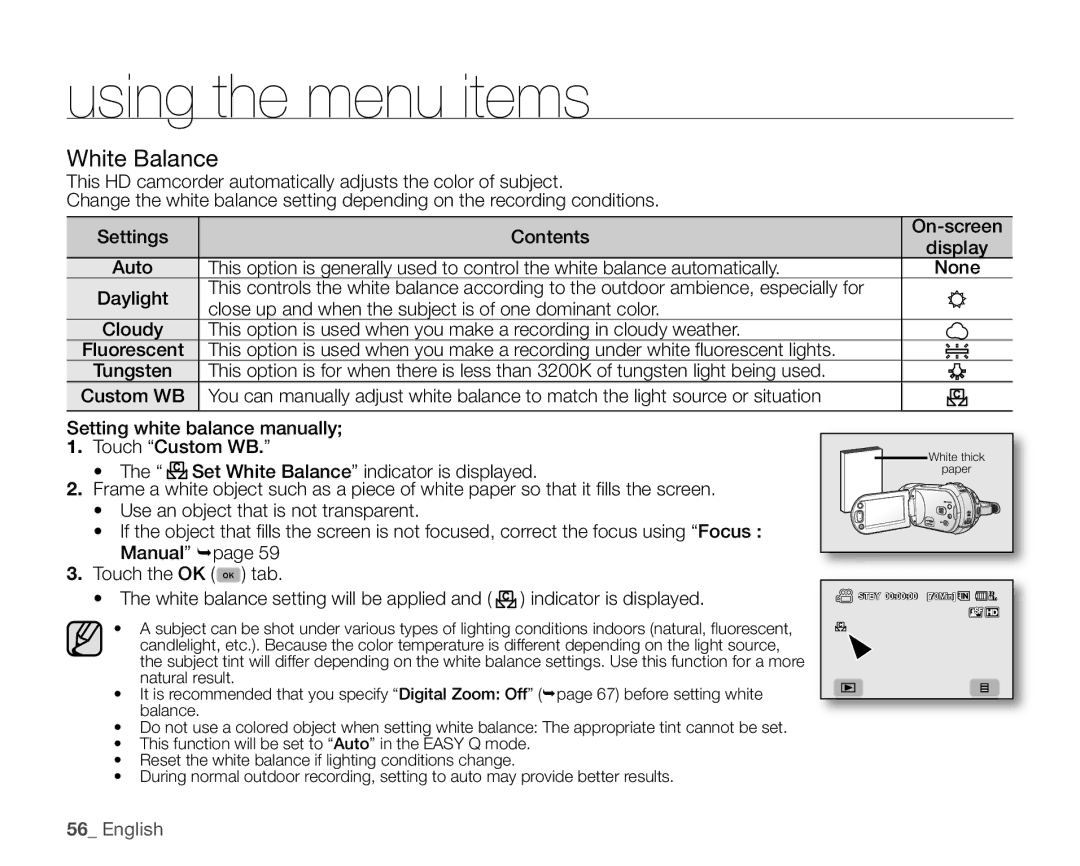
White Balance
Exposure
Super C.Nite
Anti-Shake EIS Electronic Image Stabilizer
Focus
Settings Contents
Digital Effect
Nearer subject
Or mercury-vapor lamp is reduced 250, 1/500 125, 1/250
Shutter
Motion
Tele Macro
Tele macro is executed
Resolution Movie images
Resolution Photo images
Wind Cut
Disable the function
Quality
Self Timer
Disable the function None 10 Sec
Back Light
Or Photo button
Fader
Face Detect
Up to 10X zoom is performed optically None
Guideline
Digital Zoom
Records only one photo image None
Sharpness
Cont. Shot
ISO
Playback Menu Items
Play Option
Auto
Highlight
Cont. Capture
Slide Show Interval
Resize
3Sec
Resizes the photo images by
Setting Menu Items
Date/Time Set
Date/Time
Date Type
LCD Enhancer
File No
LCD Control
Storage Type
Storage Info
Format
Card
Shutter Sound
Auto Power Off
Beep Sound
Recording indicator is off
Recording indicator is on during recording
REC Lamp
Remote
SD resolution TV that supports progressive scan
TV Type
Component Out
Appear on the screen SD 480p
Default Set
TV Display
Language
OSD appears in the LCD screen only
Anynet+ is executed
Demo
Anynet+ HDMI-CEC
Editing movie images
Deleting a Section of a Movie Image
Dividing a Movie Image
Or down tab to
Tabs
To delete a movie image you no longer need
~30 seconds
Combining TWO Movie Images
Playlist
What’s the Playlist?
Creating the playlist
Arranging the order of movie images within a playlist
Deleting movie images from a playlist
Image management
Protection from Accidental Erasure
Deleting Images
Copying Images
Dpof Print Setting
Printing photo images
Direct Printing with a Pictbridge Printer
PictBridge menu
Connecting to a PC
System Requirements
CyberLink DVD Suite
512 MB 1 GB and above recommended
Installing the CyberLink DVD Suite
Connecting to a PC
Connecting the USB Cable
Disconnecting the USB cable
Viewing the Contents of Storage Media
Structure of folders and files on the storage media
Misc Video
Image format
Transferring Files from the HD Camcorder to Your PC
To playback video files in the playlist
Playing Back the Video Files on Your PC
Programs in the DVD Suite Package
Setting ‘.MP4’ file format for Auto Play
Drag & Drop for easy playback
Cleaning the HD camcorder
Maintenance & additional information
Maintenance
LCD screen
Additional Information
Storage media
Battery packs
On charging the built-in rechargeable battery
To prevent damage and prolong service life
To avoid hazards
Using Your HD Camcorder Abroad
Storage media
Troubleshooting
Troubleshooting
Recording
Playback
Troubleshooting
Symptoms and solutions
Features used
Displays
TV screen or LCD display has
Estimated recording time
Unnecessary files
Some problems
Image on the device. page
Memory card is not supported on your camcorder or card has
File may be corrupted
Adjusting the image during recording
Set Focus to Auto. page
Flickering, or changes in color
Phenomenon. page
Secure
Playback on other devices TV, etc
Camcorder or connected device TV, HD recorder, etc
Red color- right, White color- left
Symptom Explanation/Solution
Connecting to a computer
USB cable to the USB jack on your camcorder firmly
Computer. Connect it again properly
Computer
FocusTouch Point, Resolution, White BalanceCustom WB
Quick Menu and Menu
Digital Effect Cinema Tone Scene Mode AE
Exposure Manual
System
Specifications
Model name SC-HMX20C
Warranty
Samsung Limited Warranty
Samsung
RoHS compliant