User Guide
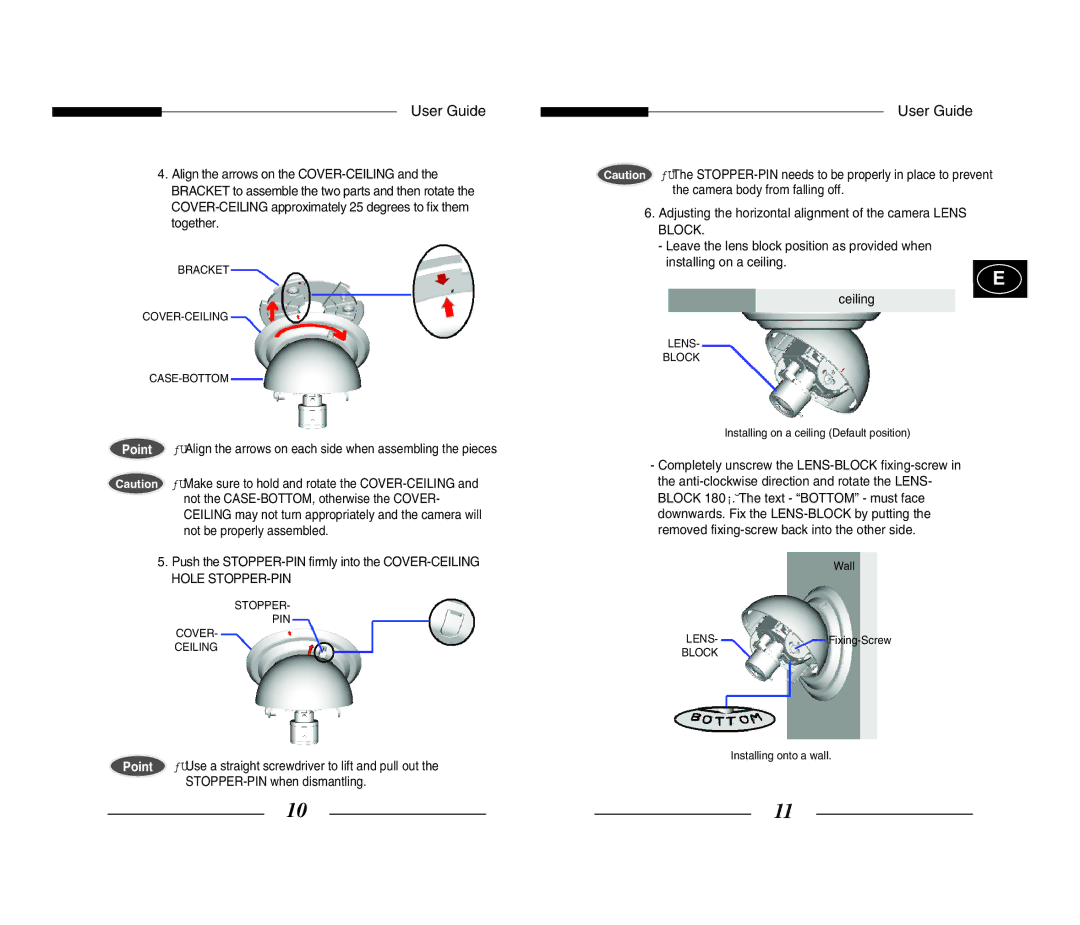
4.Align the arrows on the COVER-CEILING and the BRACKET to assemble the two parts and then rotate the COVER-CEILING approximately 25 degrees to fix them together.
BRACKET
COVER-CEILING
CASE-BOTTOM
Point ƒUAlign the arrows on each side when assembling the pieces
Caution ƒUMake sure to hold and rotate the COVER-CEILING and not the CASE-BOTTOM, otherwise the COVER- CEILING may not turn appropriately and the camera will not be properly assembled.
5.Push the STOPPER-PIN firmly into the COVER-CEILING HOLE STOPPER-PIN
STOPPER-
PIN
COVER-
CEILING
Point ƒUUse a straight screwdriver to lift and pull out the STOPPER-PIN when dismantling.
User Guide
Caution ƒUThe STOPPER-PIN needs to be properly in place to prevent the camera body from falling off.
6.Adjusting the horizontal alignment of the camera LENS BLOCK.
-Leave the lens block position as provided when installing on a ceiling.
E
ceiling
LENS-
BLOCK
Installing on a ceiling (Default position)
-Completely unscrew the LENS-BLOCK fixing-screw in the anti-clockwise direction and rotate the LENS- BLOCK 180¡˘. The text - “BOTTOM” - must face downwards. Fix the LENS-BLOCK by putting the removed fixing-screw back into the other side.
| Wall |
LENS- | Fixing-Screw |
BLOCK | |
Installing onto a wall.