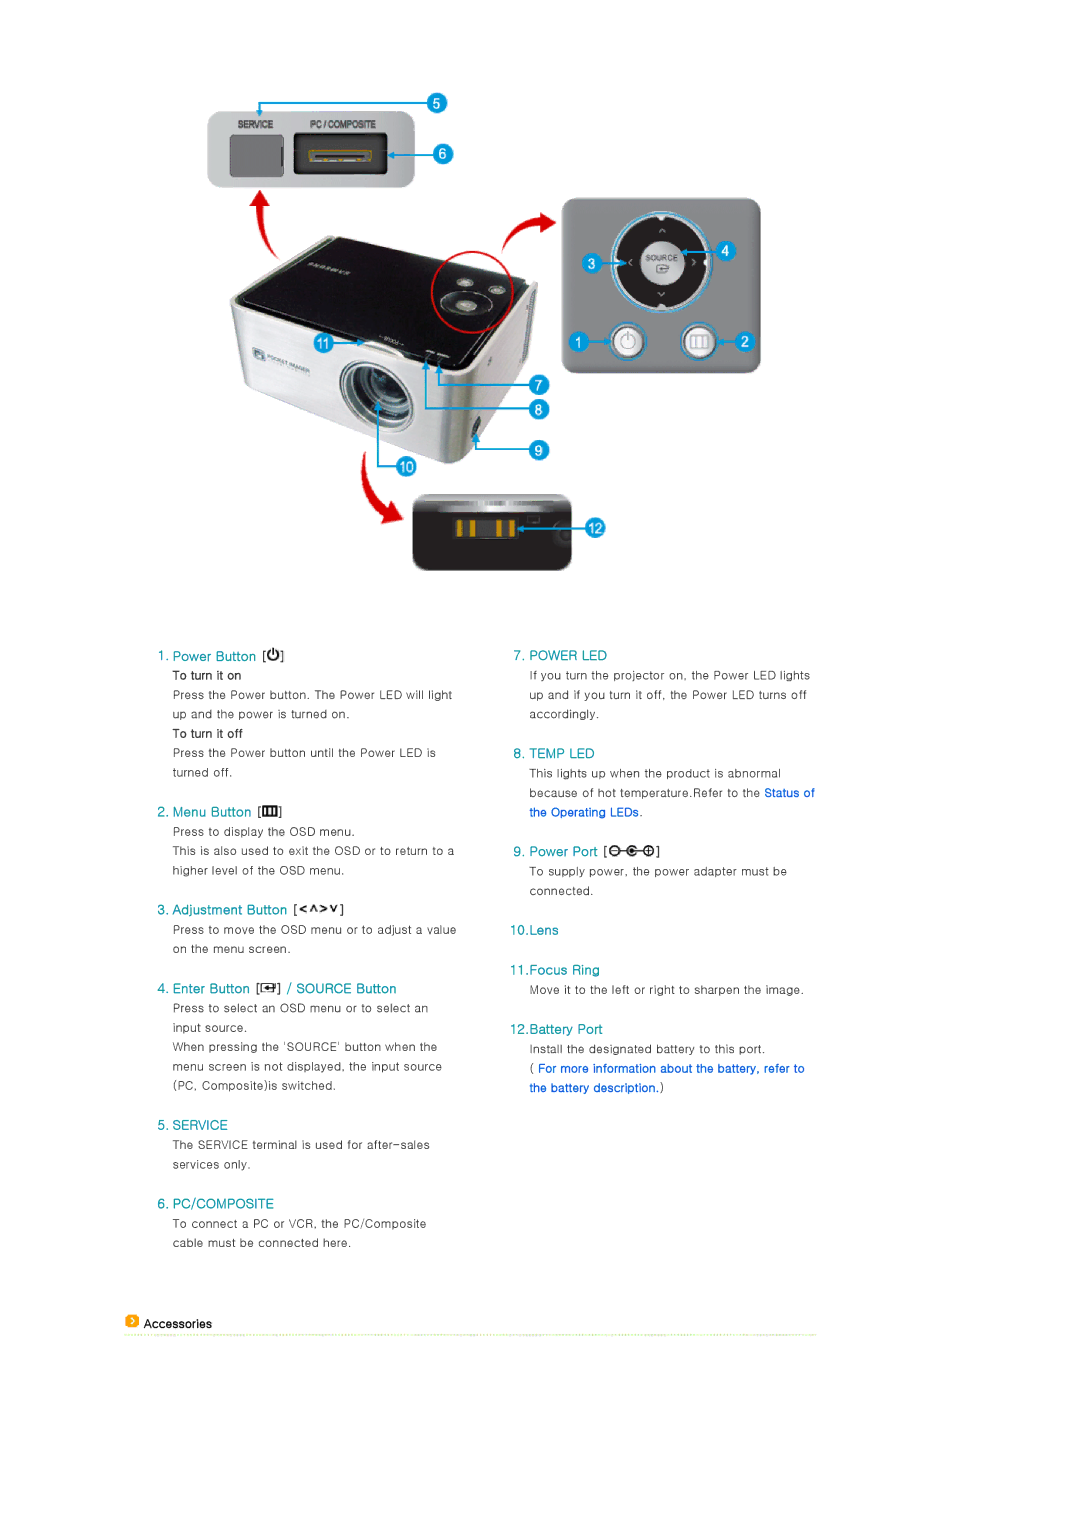
1.Power Button [![]() ] To turn it on
] To turn it on
Press the Power button. The Power LED will light up and the power is turned on.
To turn it off
Press the Power button until the Power LED is turned off.
2.Menu Button [ ]
]
Press to display the OSD menu.
This is also used to exit the OSD or to return to a higher level of the OSD menu.
3.Adjustment Button [ ]
]
Press to move the OSD menu or to adjust a value on the menu screen.
4.Enter Button [ ] / SOURCE Button
Press to select an OSD menu or to select an input source.
When pressing the 'SOURCE' button when the menu screen is not displayed, the input source (PC, Composite)is switched.
5.SERVICE
The SERVICE terminal is used for
6.PC/COMPOSITE
To connect a PC or VCR, the PC/Composite cable must be connected here.
![]() Accessories
Accessories
7.POWER LED
If you turn the projector on, the Power LED lights up and if you turn it off, the Power LED turns off accordingly.
8.TEMP LED
This lights up when the product is abnormal because of hot temperature.Refer to the Status of the Operating LEDs.
9.Power Port [ ]
]
To supply power, the power adapter must be connected.
10.Lens
11.Focus Ring
Move it to the left or right to sharpen the image.
12.Battery Port
Install the designated battery to this port.
(For more information about the battery, refer to the battery description.)