INSTALLING QUICK RELEASE BRACKET AND UNITIZED CAMERA ASSEMBLY
It is recommended that this be done before installing the housing.
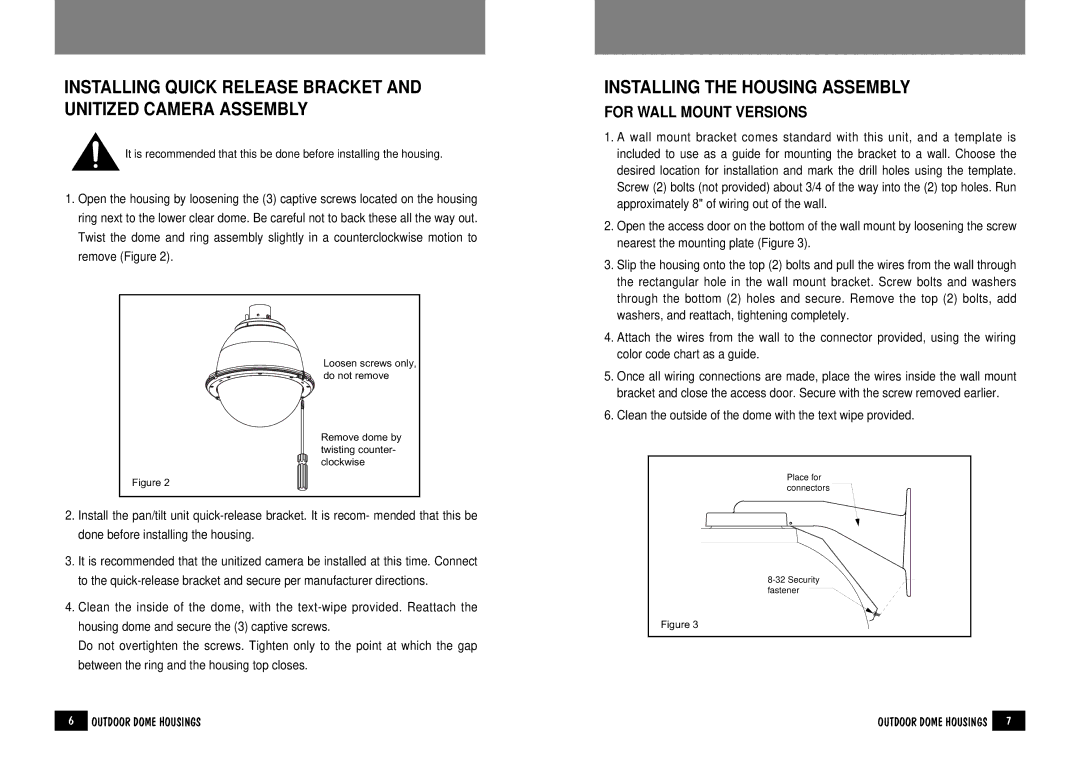
1.Open the housing by loosening the (3) captive screws located on the housing ring next to the lower clear dome. Be careful not to back these all the way out. Twist the dome and ring assembly slightly in a counterclockwise motion to remove (Figure 2).
Loosen screws only, do not remove
Remove dome by twisting counter- clockwise
Figure 2
2.Install the pan/tilt unit
3.It is recommended that the unitized camera be installed at this time. Connect to the
4.Clean the inside of the dome, with the
Do not overtighten the screws. Tighten only to the point at which the gap between the ring and the housing top closes.
INSTALLING THE HOUSING ASSEMBLY
FOR WALL MOUNT VERSIONS
1.A wall mount bracket comes standard with this unit, and a template is included to use as a guide for mounting the bracket to a wall. Choose the desired location for installation and mark the drill holes using the template. Screw (2) bolts (not provided) about 3/4 of the way into the (2) top holes. Run approximately 8" of wiring out of the wall.
2.Open the access door on the bottom of the wall mount by loosening the screw nearest the mounting plate (Figure 3).
3.Slip the housing onto the top (2) bolts and pull the wires from the wall through the rectangular hole in the wall mount bracket. Screw bolts and washers through the bottom (2) holes and secure. Remove the top (2) bolts, add washers, and reattach, tightening completely.
4.Attach the wires from the wall to the connector provided, using the wiring color code chart as a guide.
5.Once all wiring connections are made, place the wires inside the wall mount bracket and close the access door. Secure with the screw removed earlier.
6.Clean the outside of the dome with the text wipe provided.
Place for connectors
Figure 3
6 | OUTDOOR DOME HOUSINGS | OUTDOOR DOME HOUSINGS | 7 |