4.Select Personal Playlists from the dropdown menu on the left pane.
5.Highlight the playlists you want to transfer to your Sansa player, click Add, then Finish.
6.Synchronization will start as soon as you click Finish. To see the Sync progress, click on Sync Results.
Loading Photos and Videos
Your Sansa View player supports
Sansa Media Converter software lets you convert photos and videos as appropriate, and then transfer them to your Sansa player. Sansa Media Converter offers features such as cropping, rotating, and resizing before transferring them to your player as well as the ability to transfer photo and video files to your microSD card. Refer to the Sansa Media Converter software for file formats supported.
To transfer photos or video to your Sansa player using the Sansa Media Converter, follow these steps:
NOTE: Do not select both videos and photos to convert/transfer at the same time. Select one media type (photos or video) and complete the conversion/transfer process before selecting the second media type to convert/transfer.
1.Connect the Sansa View to the computer.
2.Select Sansa Media Converter using Sansa Media Converter on initial connection.
3.Click Add Media ![]() to select video or photo files to be converted.
to select video or photo files to be converted.
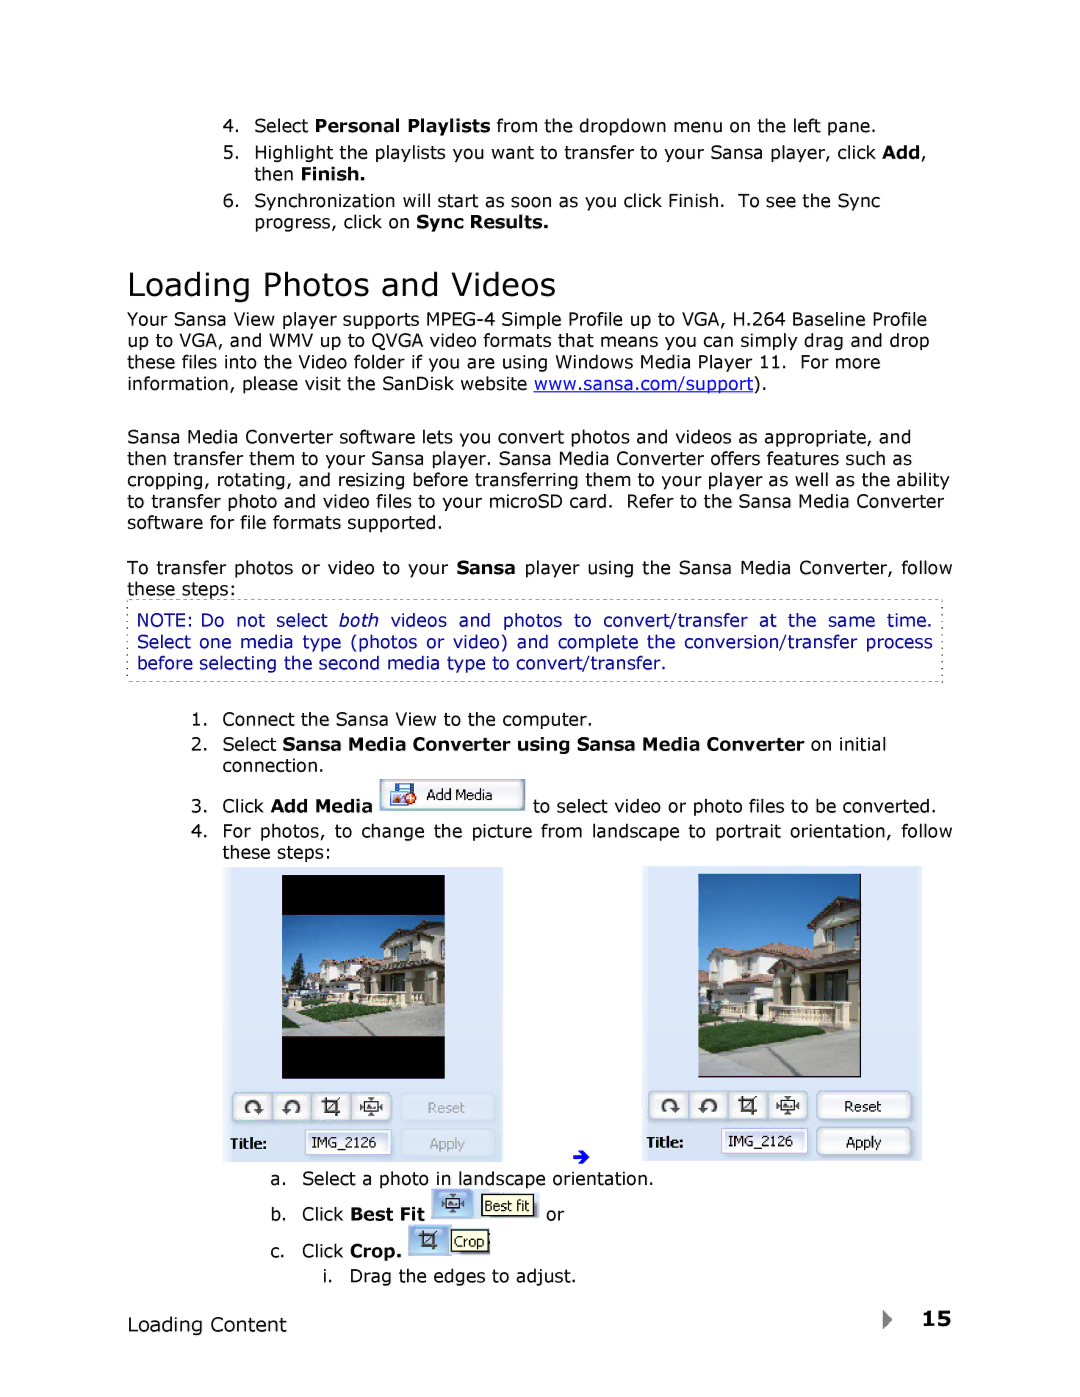
4.For photos, to change the picture from landscape to portrait orientation, follow these steps:
Î
a.Select a photo in landscape orientation.
b.Click Best Fit ![]() or
or
c.Click Crop. ![]()
i. Drag the edges to adjust.
Loading Content | 15 |