Identify Parts
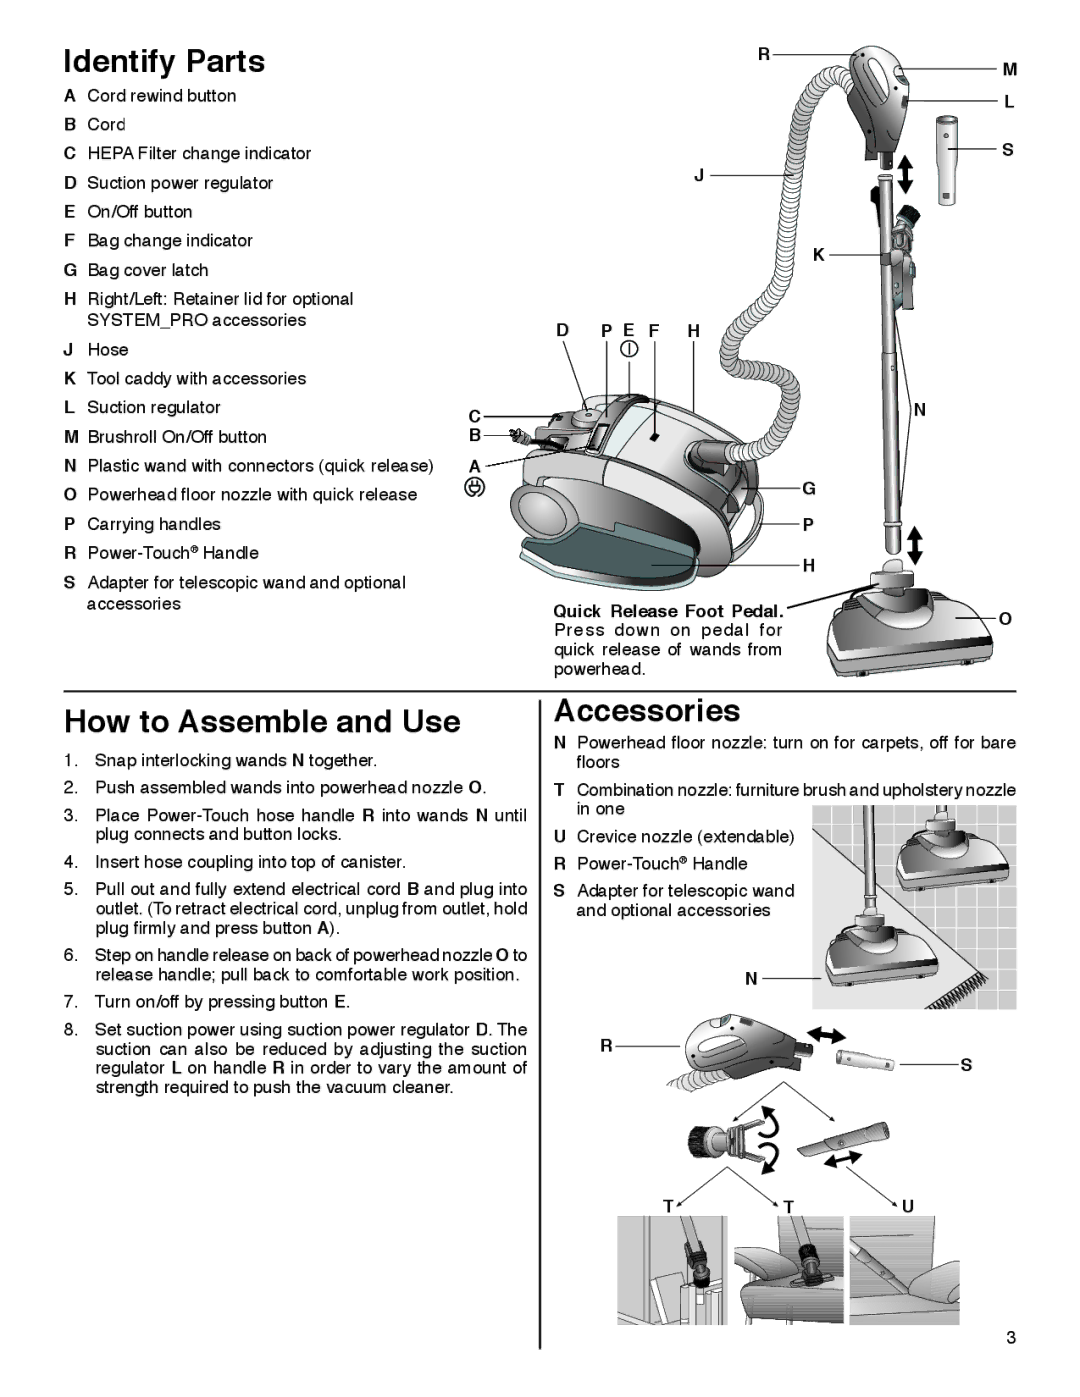
ACord rewind button
BCord
CHEPA Filter change indicator
DSuction power regulator
EOn/Off button
FBag change indicator
GBag cover latch
HRight/Left: Retainer lid for optional SYSTEM_PRO accessories
JHose
KTool caddy with accessories
LSuction regulator
MBrushroll On/Off button
NPlastic wand with connectors (quick release)
OPowerhead fl oor nozzle with quick release
PCarrying handles
R
SAdapter for telescopic wand and optional accessories
R ![]()
![]()
![]() M
M
![]()
![]() L
L
![]() S
S
J ![]()
K ![]()
![]()
![]()
D P E F H
C |
| N |
| ||
B |
|
|
|
|
A
![]()
![]() G
G
P
![]()
![]() H
H
Quick Release Foot Pedal. |
| O |
Press down on pedal for |
| |
|
| |
quick release of wands from |
|
|
powerhead. |
|
|
How to Assemble and Use
1.Snap interlocking wands N together.
2.Push assembled wands into powerhead nozzle O
3.Place
4.Insert hose coupling into top of canister.
5.Pull out and fully extend electrical cord B and plug into outlet. (To retract electrical cord, unplug from outlet, hold plug fi rmly and press button A).
6.Step on handle release on back of powerhead nozzle O to release handle; pull back to comfortable work position.
7.Turn on/off by pressing button E
8.Set suction power using suction power regulator D . The suction can also be reduced by adjusting the suction regulator L on handle R in order to vary the amount of strength required to push the vacuum cleaner.
Accessories
NPowerhead fl oor nozzle: turn on for carpets, off for bare
floors
TCombination nozzle: furniture brush and upholstery nozzle
in one
U Crevice nozzle (extendable)
R
S Adapter for telescopic wand
and optional accessories
N ![]()
![]()
R
![]()
![]() S
S
T ![]()
![]() T
T![]() U
U
3