Starting setup
The Auto Setup menu appears the first time you turn on the TV, and assists you to specify the Air/Cable setting, and program your channels automatically.
IMPORTANT: Make sure that the antenna or cable TV system connection is made!
1 To turn on the TV, press (POWER) (It may take approx. 10 seconds for a picture to appear on screen.). The Auto Setup function begins.
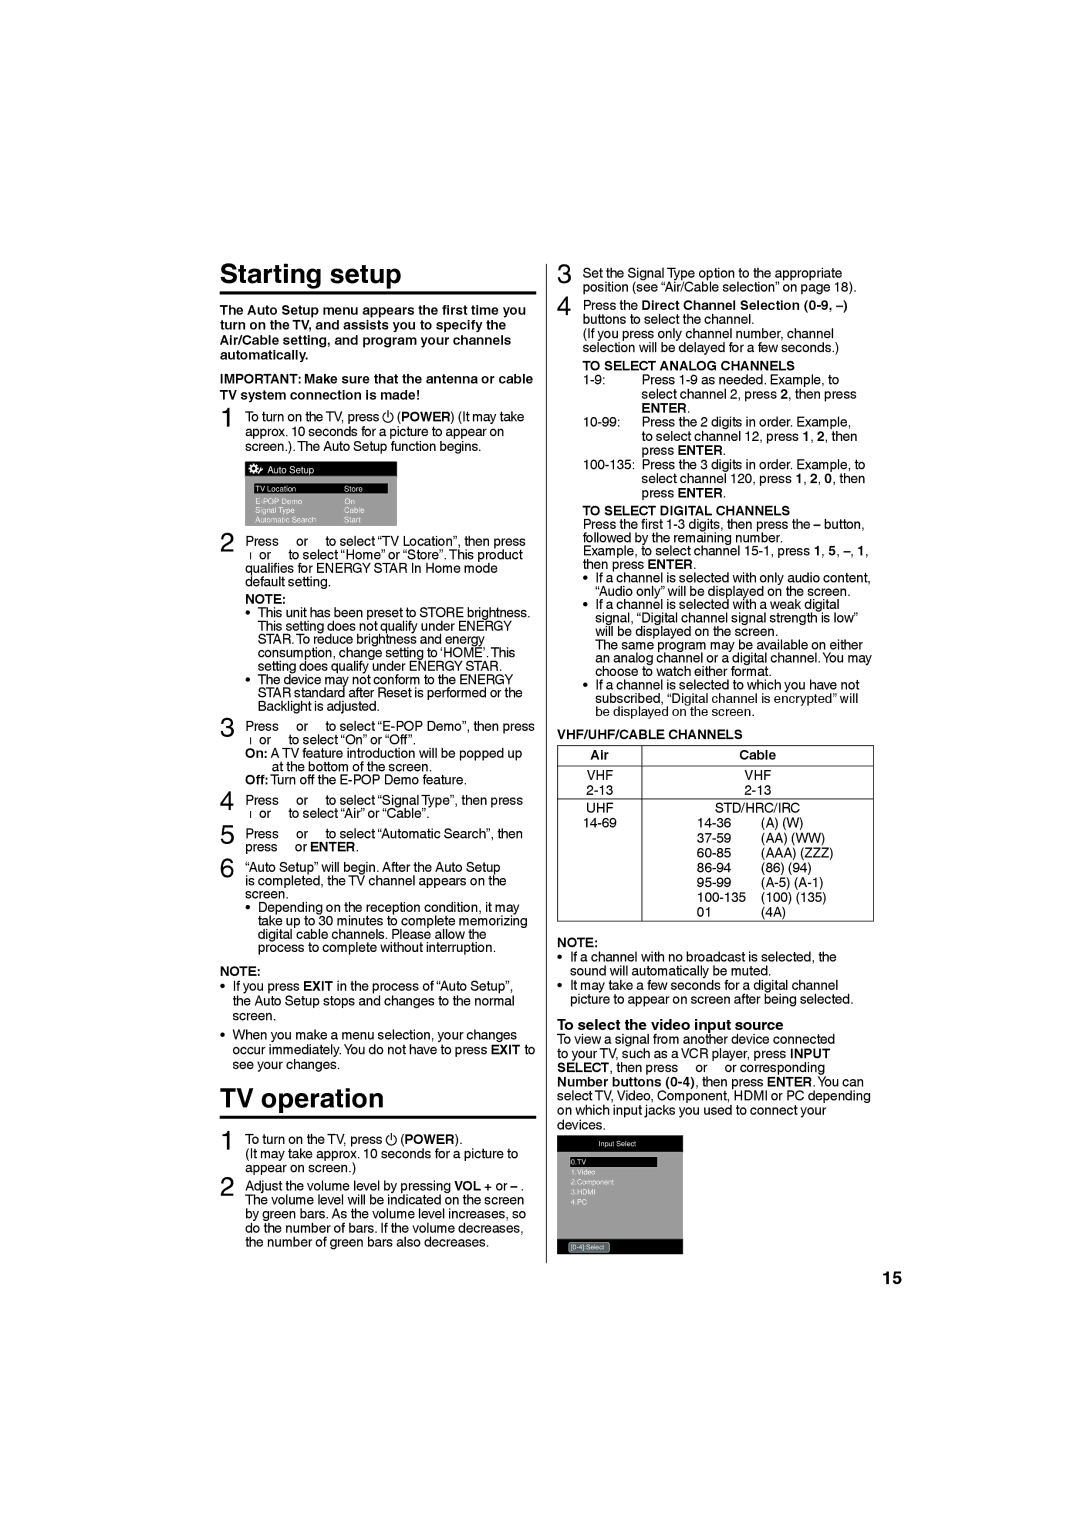
![]() Auto Setup
Auto Setup
| TV Location | Store |
|
| On |
| |
| Signal Type | Cable |
|
| Automatic Search | Start |
|
2 | Press ▲ or ▼ to select “TV Location”, then press |
◀ or ▶ to select “Home” or “Store”. This product | |
| qualifies for ENERGY STAR In Home mode |
| default setting. |
| NOTE: |
| • This unit has been preset to STORE brightness. |
| This setting does not qualify under ENERGY |
| STAR. To reduce brightness and energy |
| consumption, change setting to ‘HOME’. This |
| setting does qualify under ENERGY STAR. |
| • The device may not conform to the ENERGY |
| STAR standard after Reset is performed or the |
3 | Backlight is adjusted. |
Press ▲ or ▼ to select | |
◀ or ▶ to select “On” or “Off”. | |
| On: A TV feature introduction will be popped up |
| at the bottom of the screen. |
4 | Off: Turn off the |
Press ▲ or ▼ to select “Signal Type”, then press | |
◀ or ▶ to select “Air” or “Cable”. |
5 Press ▲ or ▼ to select “Automatic Search”, then press ▶ or ENTER.
6 “Auto Setup” will begin. After the Auto Setup is completed, the TV channel appears on the screen.
• Depending on the reception condition, it may take up to 30 minutes to complete memorizing digital cable channels. Please allow the process to complete without interruption.
NOTE:
• If you press EXIT in the process of “Auto Setup”, the Auto Setup stops and changes to the normal screen.
• When you make a menu selection, your changes occur immediately.You do not have to press EXIT to see your changes.
TV operation
1 | To turn on the TV, press |
| (POWER). |
| |||
| |||
(It may take approx. 10 seconds for a picture to | |||
2 | appear on screen.) | ||
Adjust the volume level by pressing VOL + or | |||
The volume level will be indicated on the screen | |||
| by green bars. As the volume level increases, so | ||
| do the number of bars. If the volume decreases, | ||
| the number of green bars also decreases. | ||
3 Set the Signal Type option to the appropriate position (see “Air/Cable selection” on page 18).
4 Press the Direct Channel Selection
(If you press only channel number, channel selection will be delayed for a few seconds.)
TO SELECT ANALOG CHANNELS
ENTER.
TO SELECT DIGITAL CHANNELS
Press the first
Example, to select channel
• If a channel is selected with only audio content, “Audio only” will be displayed on the screen.
• If a channel is selected with a weak digital signal, “Digital channel signal strength is low” will be displayed on the screen.
The same program may be available on either an analog channel or a digital channel.You may choose to watch either format.
• If a channel is selected to which you have not subscribed, “Digital channel is encrypted” will be displayed on the screen.
VHF/UHF/CABLE CHANNELS
Air |
| Cable |
VHF |
| VHF |
| ||
UHF | STD/HRC/IRC | |
(A) (W) | ||
| (AA) (WW) | |
| (AAA) (ZZZ) | |
| (86) (94) | |
| ||
| ||
| 01 | (4A) |
NOTE:
• If a channel with no broadcast is selected, the sound will automatically be muted.
• It may take a few seconds for a digital channel picture to appear on screen after being selected.
To select the video input source
To view a signal from another device connected to your TV, such as a VCR player, press INPUT SELECT, then press ▲ or ▼ or corresponding Number buttons
Input Select
0.TV
1.Video
2.Component
3.HDMI
4.PC
15