ENGLISH
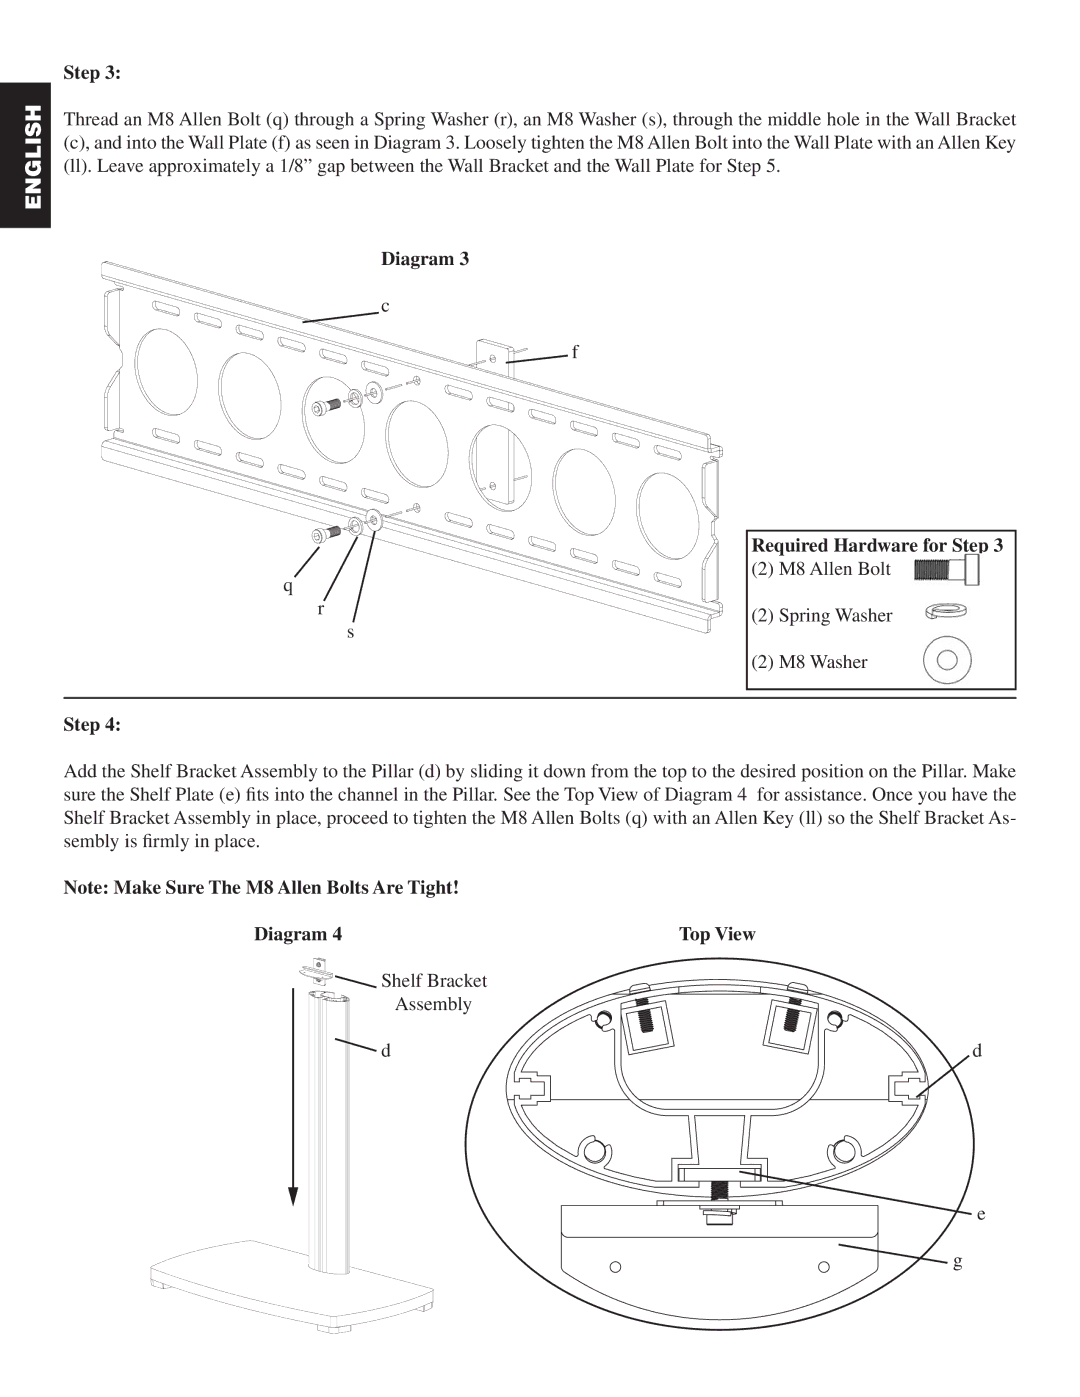
Step 3:
Thread an M8 Allen Bolt (q) through a Spring Washer (r), an M8 Washer (s), through the middle hole in the Wall Bracket (c), and into the Wall Plate (f) as seen in Diagram 3. Loosely tighten the M8 Allen Bolt into the Wall Plate with an Allen Key (ll). Leave approximately a 1/8” gap between the Wall Bracket and the Wall Plate for Step 5.
Diagram 3
c
f
q
r
s
Required Hardware for Step 3
(2) M8 Allen Bolt
(2) Spring Washer
(2) M8 Washer
Step 4:
Add the Shelf Bracket Assembly to the Pillar (d) by sliding it down from the top to the desired position on the Pillar. Make sure the Shelf Plate (e) fits into the channel in the Pillar. See the Top View of Diagram 4 for assistance. Once you have the Shelf Bracket Assembly in place, proceed to tighten the M8 Allen Bolts (q) with an Allen Key (ll) so the Shelf Bracket As- sembly is firmly in place.
Note: Make Sure The M8 Allen Bolts Are Tight!
Diagram 4 | Top View |
Shelf Bracket |
|
Assembly |
|
d | d |
![]()
![]() e
e
![]() g
g