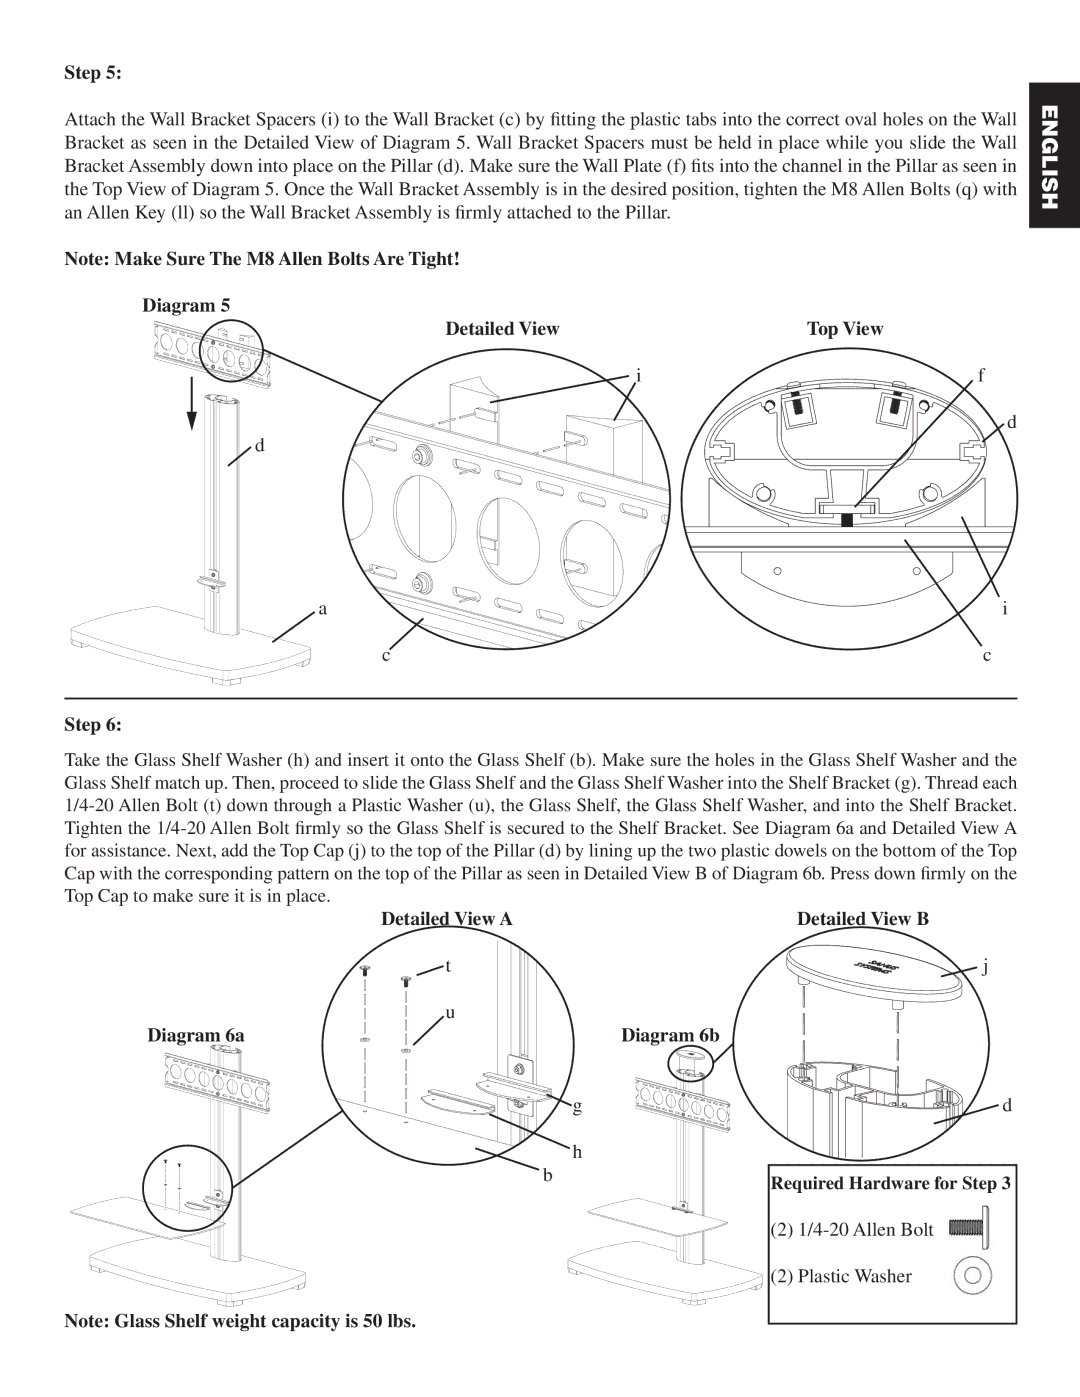
Step 5:
Attach the Wall Bracket Spacers (i) to the Wall Bracket (c) by fitting the plastic tabs into the correct oval holes on the Wall Bracket as seen in the Detailed View of Diagram 5. Wall Bracket Spacers must be held in place while you slide the Wall Bracket Assembly down into place on the Pillar (d). Make sure the Wall Plate (f) fits into the channel in the Pillar as seen in the Top View of Diagram 5. Once the Wall Bracket Assembly is in the desired position, tighten the M8 Allen Bolts (q) with an Allen Key (ll) so the Wall Bracket Assembly is firmly attached to the Pillar.
Note: Make Sure The M8 Allen Bolts Are Tight!
Diagram 5
Detailed View | Top View |
i | f |
d
d
a | i |
c | c |
ENGLISH
Step 6:
Take the Glass Shelf Washer (h) and insert it onto the Glass Shelf (b). Make sure the holes in the Glass Shelf Washer and the Glass Shelf match up. Then, proceed to slide the Glass Shelf and the Glass Shelf Washer into the Shelf Bracket (g). Thread each
Detailed View A | Detailed View B |
![]() t
t
u
Diagram 6a | Diagram 6b |
![]() g
g
h
b
Note: Glass Shelf weight capacity is 50 lbs.
j
d
Required Hardware for Step 3
(2)
(2)Plastic Washer