Step 8: Add Top
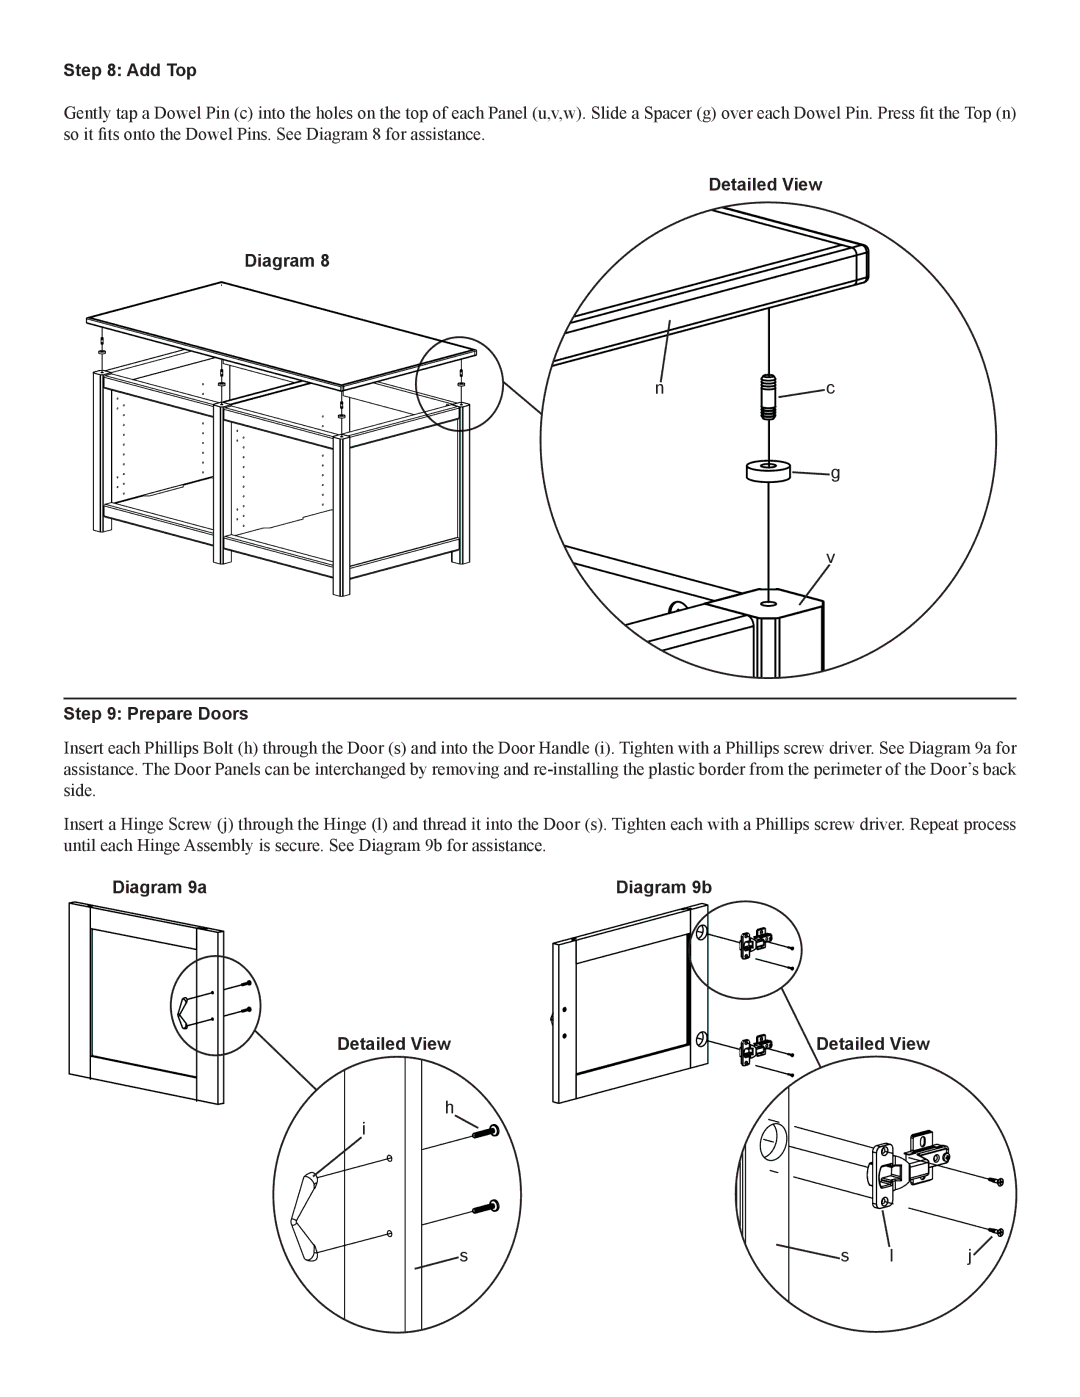
Gently tap a Dowel Pin (c) into the holes on the top of each Panel (u,v,w). Slide a Spacer (g) over each Dowel Pin. Press fit the Top (n) so it fits onto the Dowel Pins. See Diagram 8 for assistance.
Detailed View
Diagram 8
n![]() c
c
![]() g
g
v
Step 9: Prepare Doors
Insert each Phillips Bolt (h) through the Door (s) and into the Door Handle (i). Tighten with a Phillips screw driver. See Diagram 9a for assistance. The Door Panels can be interchanged by removing and
Insert a Hinge Screw (j) through the Hinge (l) and thread it into the Door (s). Tighten each with a Phillips screw driver. Repeat process until each Hinge Assembly is secure. See Diagram 9b for assistance.
Diagram 9a | Diagram 9b |
Detailed View
h
i
Detailed View
s | s | l | j |