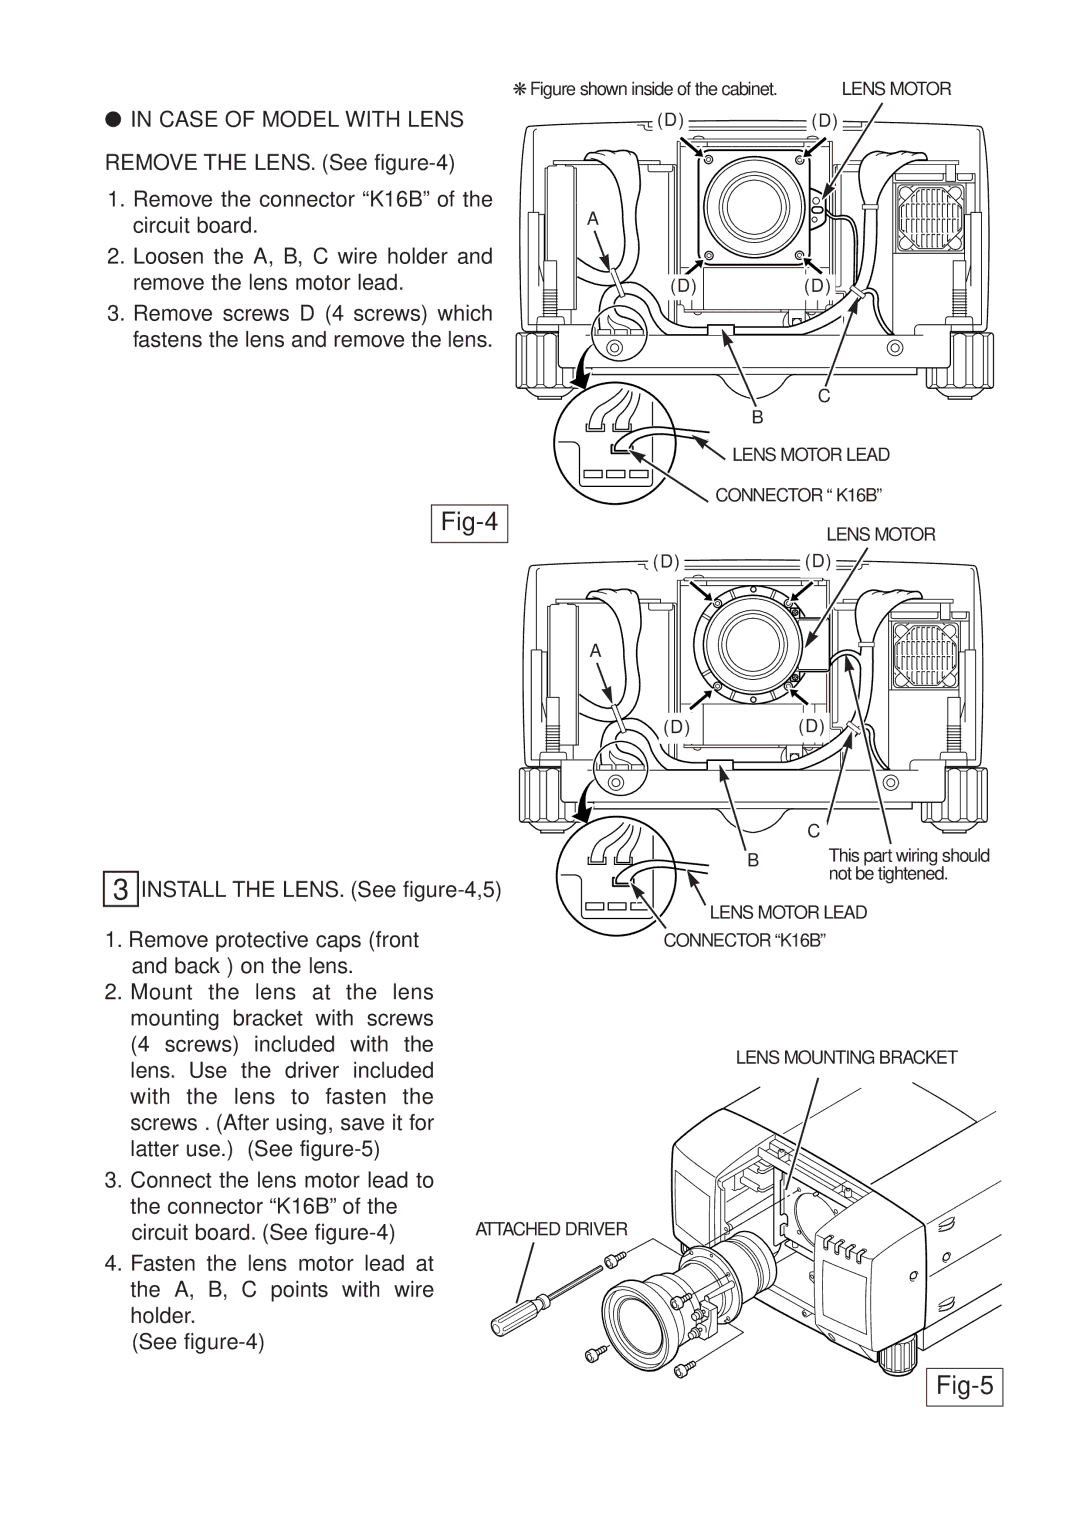
●IN CASE OF MODEL WITH LENS
REMOVE THE LENS. (See
1.Remove the connector “K16B” of the circuit board.
2.Loosen the A, B, C wire holder and remove the lens motor lead.
3.Remove screws D (4 screws) which fastens the lens and remove the lens.
❋ Figure shown inside of the cabinet. | LENS MOTOR |
(D)(D)
A
(D)(D)
C
B
![]() LENS MOTOR LEAD
LENS MOTOR LEAD
CONNECTOR “ K16B”
Fig-4
LENS MOTOR
(D)(D)
A
(D)(D)
|
| C | |
| B | This part wiring should | |
3 INSTALL THE LENS. (See | not be tightened. | ||
| |||
| LENS MOTOR LEAD | ||
1. Remove protective caps (front | CONNECTOR “K16B” | ||
and back ) on the lens. |
|
| |
2. Mount the lens at the lens |
|
| |
mounting bracket with screws |
|
| |
(4 screws) included with the | LENS MOUNTING BRACKET | ||
lens. Use the driver included | |||
|
| ||
with the lens to fasten the |
|
| |
screws . (After using, save it for |
|
| |
latter use.) (See |
|
| |
3. Connect the lens motor lead to |
|
| |
the connector “K16B” of the |
|
| |
circuit board. (See | ATTACHED DRIVER |
| |
4. Fasten the lens motor lead at |
|
| |
the A, B, C points with wire |
|
| |
holder.
(See