Appendix

Troubleshooting

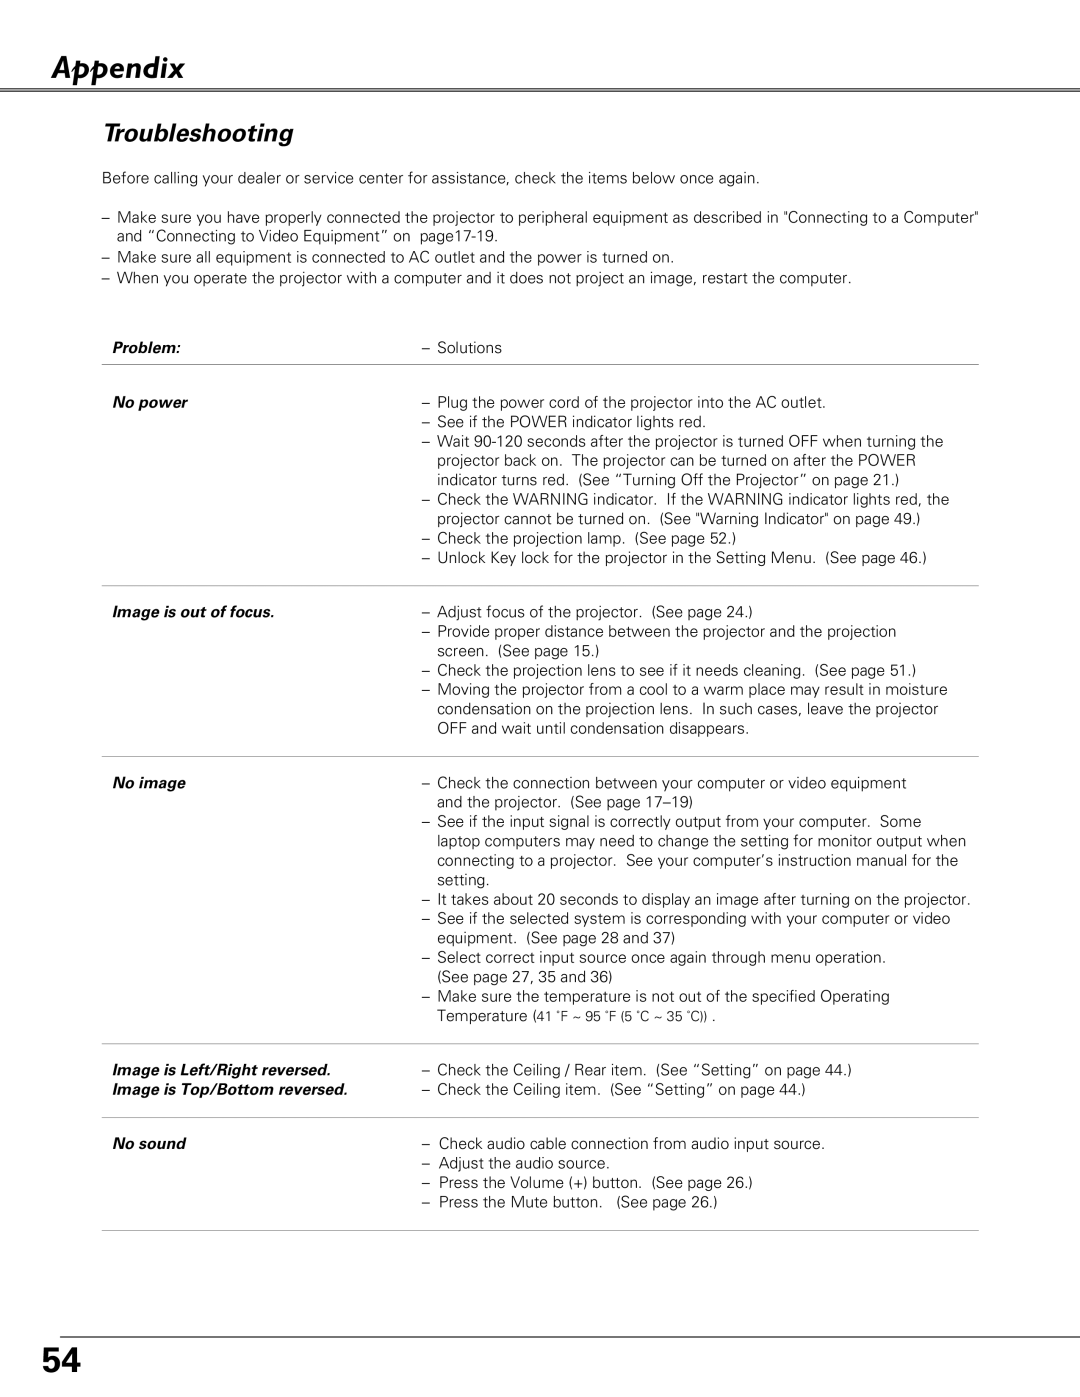
Before calling your dealer or service center for assistance, check the items below once again.

Make sure you have properly connected the projector to peripheral equipment as described in "Connecting to a Computer" and “Connecting to Video Equipment” on page17-19.

Make sure all equipment is connected to AC outlet and the power is turned on.

When you operate the projector with a computer and it does not project an image, restart the computer.

Problem:

– Solutions


No power

– Plug the power cord of the projector into the AC outlet.


– See if the POWER indicator lights red.


– Wait 90-120 seconds after the projector is turned OFF when turning the


projector back on. The projector can be turned on after the POWER


indicator turns red. (See “Turning Off the Projector” on page 21.)


– Check the WARNING indicator. If the WARNING indicator lights red, the


projector cannot be turned on. (See "Warning Indicator" on page 49.)


– Check the projection lamp. (See page 52.)


– Unlock Key lock for the projector in the Setting Menu. (See page 46.)

Image is out of focus.

Adjust focus of the projector. (See page 24.)

Provide proper distance between the projector and the projection screen. (See page 15.)

Check the projection lens to see if it needs cleaning. (See page 51.)

Moving the projector from a cool to a warm place may result in moisture condensation on the projection lens. In such cases, leave the projector OFF and wait until condensation disappears.

No image

– Check the connection between your computer or video equipment


and the projector. (See page 17–19)


– See if the input signal is correctly output from your computer. Some


laptop computers may need to change the setting for monitor output when


connecting to a projector. See your computer’s instruction manual for the


setting.


– It takes about 20 seconds to display an image after turning on the projector.


– See if the selected system is corresponding with your computer or video


equipment. (See page 28 and 37)


– Select correct input source once again through menu operation.


(See page 27, 35 and 36)


– Make sure the temperature is not out of the specified Operating


Temperature (41 ˚F ~ 95 ˚F (5 ˚C ~ 35 ˚C)) .


Image is Left/Right reversed.

– Check the Ceiling / Rear item. (See “Setting” on page 44.)

Image is Top/Bottom reversed.

– Check the Ceiling item. (See “Setting” on page 44.)


No sound

Check audio cable connection from audio input source.


Adjust the audio source.


Press the Volume (+) button. (See page 26.)


Press the Mute button. (See page 26.)


54

Page 54
Image 54
Sanyo PLC-XU58, PLC-XU51, PLC-SU51 owner manual Appendix, Troubleshooting

PLC-SU51, PLC-XU58, PLC-XU51 specifications

Sanyo has made significant strides in the field of projectors, and models like the PLC-XU51, PLC-XU58, and PLC-SU51 showcase the company’s commitment to quality and performance in diverse presentation environments. These models are designed to meet the needs of both educational and business settings, providing reliable, high-quality projection capabilities.

The Sanyo PLC-XU51 is known for its solid performance, offering XGA resolution of 1024 x 768 pixels, which ensures clear and detailed visuals. With a brightness of 3000 lumens, this projector excels in both dim and well-lit rooms, making it a versatile choice for different scenarios. The projector employs a 3LCD technology that enhances color accuracy and delivers vivid images, minimizing the rainbow effect often associated with single-chip DLP projectors. Additionally, the PLC-XU51 features a contrast ratio of 500:1, which allows for deep blacks and bright highlights, ensuring that presentations stand out.

Similarly, the PLC-XU58 builds on the strengths of the XU51 but offers even higher brightness at 4000 lumens, making it suitable for larger venues or spaces with significant ambient light. This model maintains the same XGA resolution, but the enhanced brightness ensures that images remain vibrant and clear, regardless of the lighting conditions. The PLC-XU58 also integrates advanced features like an automatic vertical keystone correction, which simplifies setup and alignment, ensuring that presentations appear straight and accurate.

The Sanyo PLC-SU51 diverges slightly with its enhanced SXGA+ resolution of 1400 x 1050 pixels, making it ideal for high-definition presentations. This projector is particularly advantageous for users requiring finer detail in their visuals, such as architects or graphic designers. The PLC-SU51 also boasts a brightness of 3000 lumens, complemented by a 600:1 contrast ratio, offering impressive image quality even in challenging lighting situations.

All three models come equipped with a variety of connectivity options, including HDMI, VGA, and audio inputs, allowing seamless integration with a range of devices. Furthermore, they feature a built-in speaker and remote control, enhancing user experience during presentations. The compact design and light weight of these projectors make them portable and easy to set up in various environments.

In summary, the Sanyo PLC-XU51, XU58, and SU51 projectors represent a blend of high performance, flexibility, and ease of use. Their advanced technologies, such as 3LCD for enhanced color reproduction, and high brightness levels, make them a reliable choice for educators and business professionals alike, ensuring that every presentation is delivered with clarity and impact.