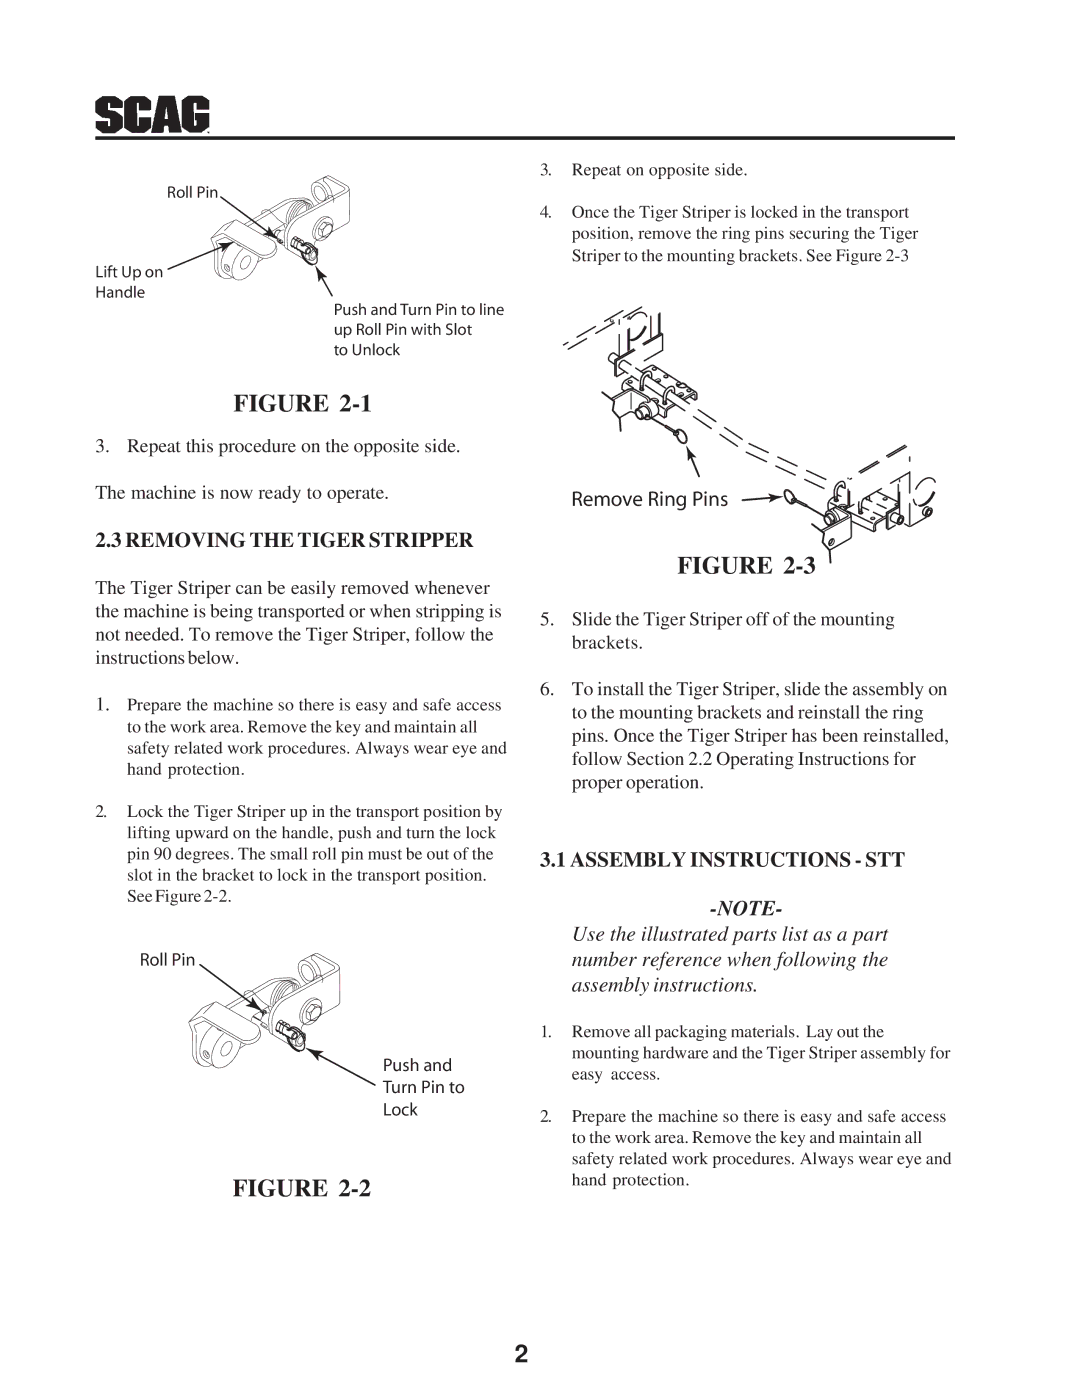
Roll Pin
Lift Up on
Handle
Push and Turn Pin to line up Roll Pin with Slot
to Unlock
FIGURE
3.Repeat this procedure on the opposite side.
The machine is now ready to operate.
2.3 REMOVING THE TIGER STRIPPER
The Tiger Striper can be easily removed whenever the machine is being transported or when stripping is not needed. To remove the Tiger Striper, follow the instructions below.
1.Prepare the machine so there is easy and safe access to the work area. Remove the key and maintain all safety related work procedures. Always wear eye and hand protection.
2.Lock the Tiger Striper up in the transport position by lifting upward on the handle, push and turn the lock pin 90 degrees. The small roll pin must be out of the slot in the bracket to lock in the transport position. See Figure
Roll Pin
Push and
Turn Pin to
Lock
FIGURE
3.Repeat on opposite side.
4.Once the Tiger Striper is locked in the transport position, remove the ring pins securing the Tiger Striper to the mounting brackets. See Figure
Remove Ring Pins
FIGURE
5.Slide the Tiger Striper off of the mounting brackets.
6.To install the Tiger Striper, slide the assembly on to the mounting brackets and reinstall the ring pins. Once the Tiger Striper has been reinstalled, follow Section 2.2 Operating Instructions for proper operation.
3.1 ASSEMBLY INSTRUCTIONS - STT
Use the illustrated parts list as a part number reference when following the
assembly instructions.
1.Remove all packaging materials. Lay out the mounting hardware and the Tiger Striper assembly for easy access.
2.Prepare the machine so there is easy and safe access to the work area. Remove the key and maintain all safety related work procedures. Always wear eye and hand protection.
2
