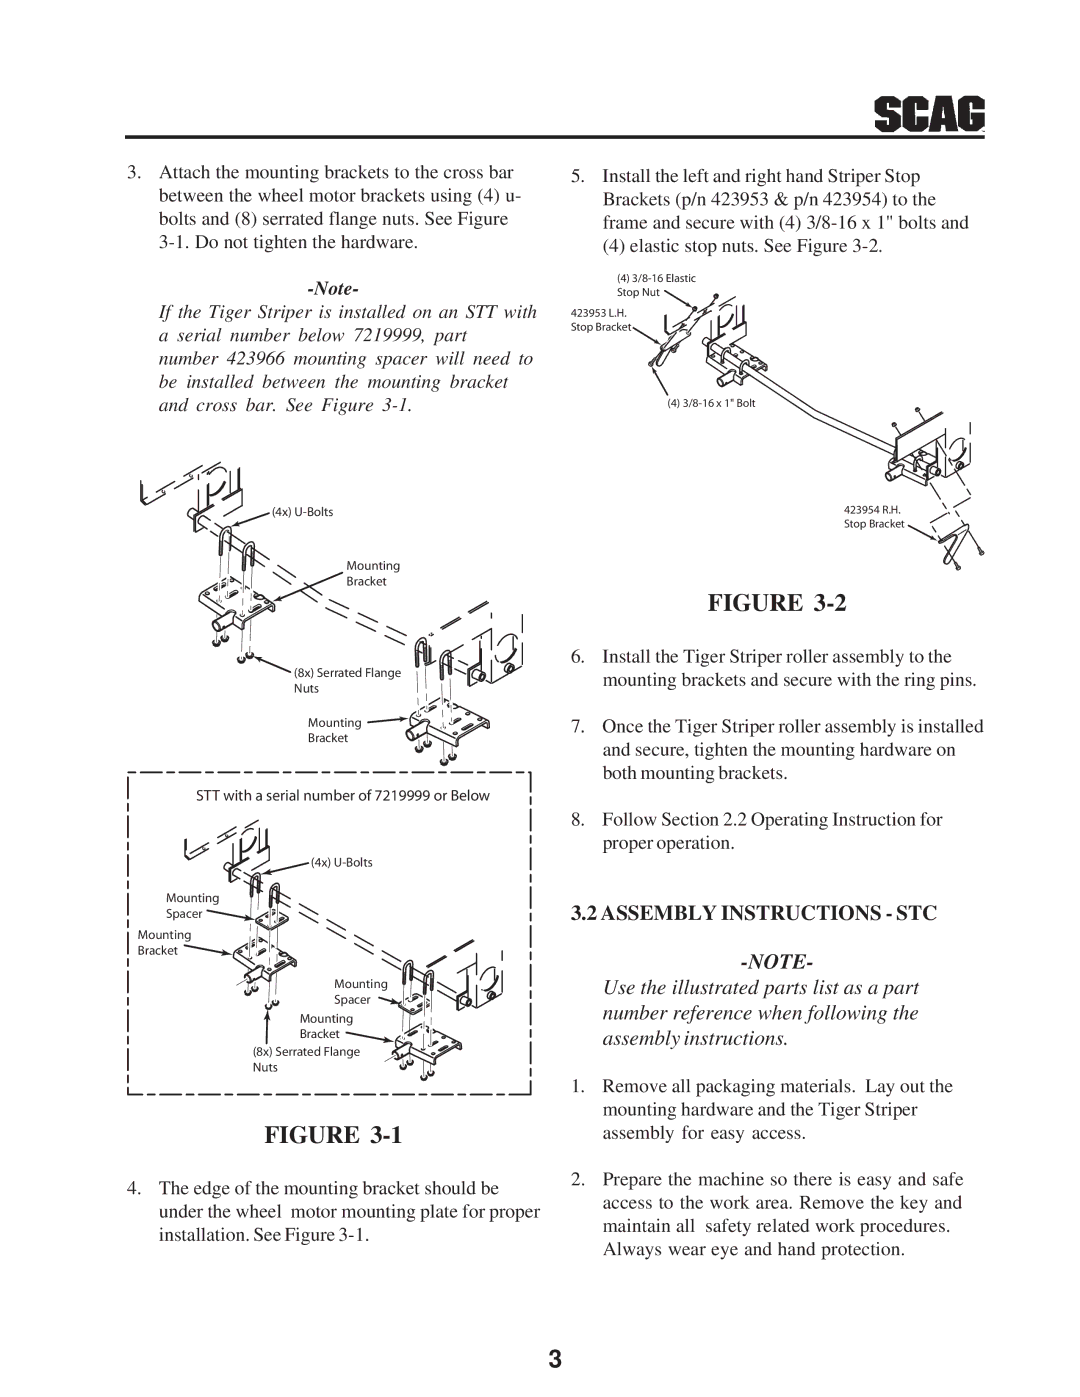
3.Attach the mounting brackets to the cross bar between the wheel motor brackets using (4) u- bolts and (8) serrated flange nuts. See Figure
If the Tiger Striper is installed on an STT with a serial number below 7219999, part number 423966 mounting spacer will need to be installed between the mounting bracket and cross bar. See Figure
(4x)
Mounting
![]() Bracket
Bracket
![]() (8x) Serrated Flange
(8x) Serrated Flange
Nuts
Mounting
Bracket
STT with a serial number of 7219999 or Below
(4x)
Mounting
Spacer ![]()
![]()
Mounting
Bracket
Mounting
Spacer
Mounting
Bracket
(8x) Serrated Flange
Nuts
FIGURE
4.The edge of the mounting bracket should be under the wheel motor mounting plate for proper installation. See Figure
5.Install the left and right hand Striper Stop Brackets (p/n 423953 & p/n 423954) to the frame and secure with (4)
(4) elastic stop nuts. See Figure
(4)
Stop Nut ![]()
423953 L.H.
Stop Bracket
(4)
423954 R.H. Stop Bracket
FIGURE
6.Install the Tiger Striper roller assembly to the mounting brackets and secure with the ring pins.
7.Once the Tiger Striper roller assembly is installed and secure, tighten the mounting hardware on both mounting brackets.
8.Follow Section 2.2 Operating Instruction for proper operation.
3.2 ASSEMBLY INSTRUCTIONS - STC
Use the illustrated parts list as a part
number reference when following the assembly instructions.
1.Remove all packaging materials. Lay out the mounting hardware and the Tiger Striper assembly for easy access.
2.Prepare the machine so there is easy and safe access to the work area. Remove the key and maintain all safety related work procedures.
Always wear eye and hand protection.
3
