9.Configure DIP switches SW1 and SW2 located on the top of the dome drive. For DIP switch settings, refer to the labels located on the top of the dome drive or to Switch Settings on page 8.
NOTE: When connecting more than one Spectra® dome to a single controller, terminate the unit farthest from the controller. To terminate the dome drive set the
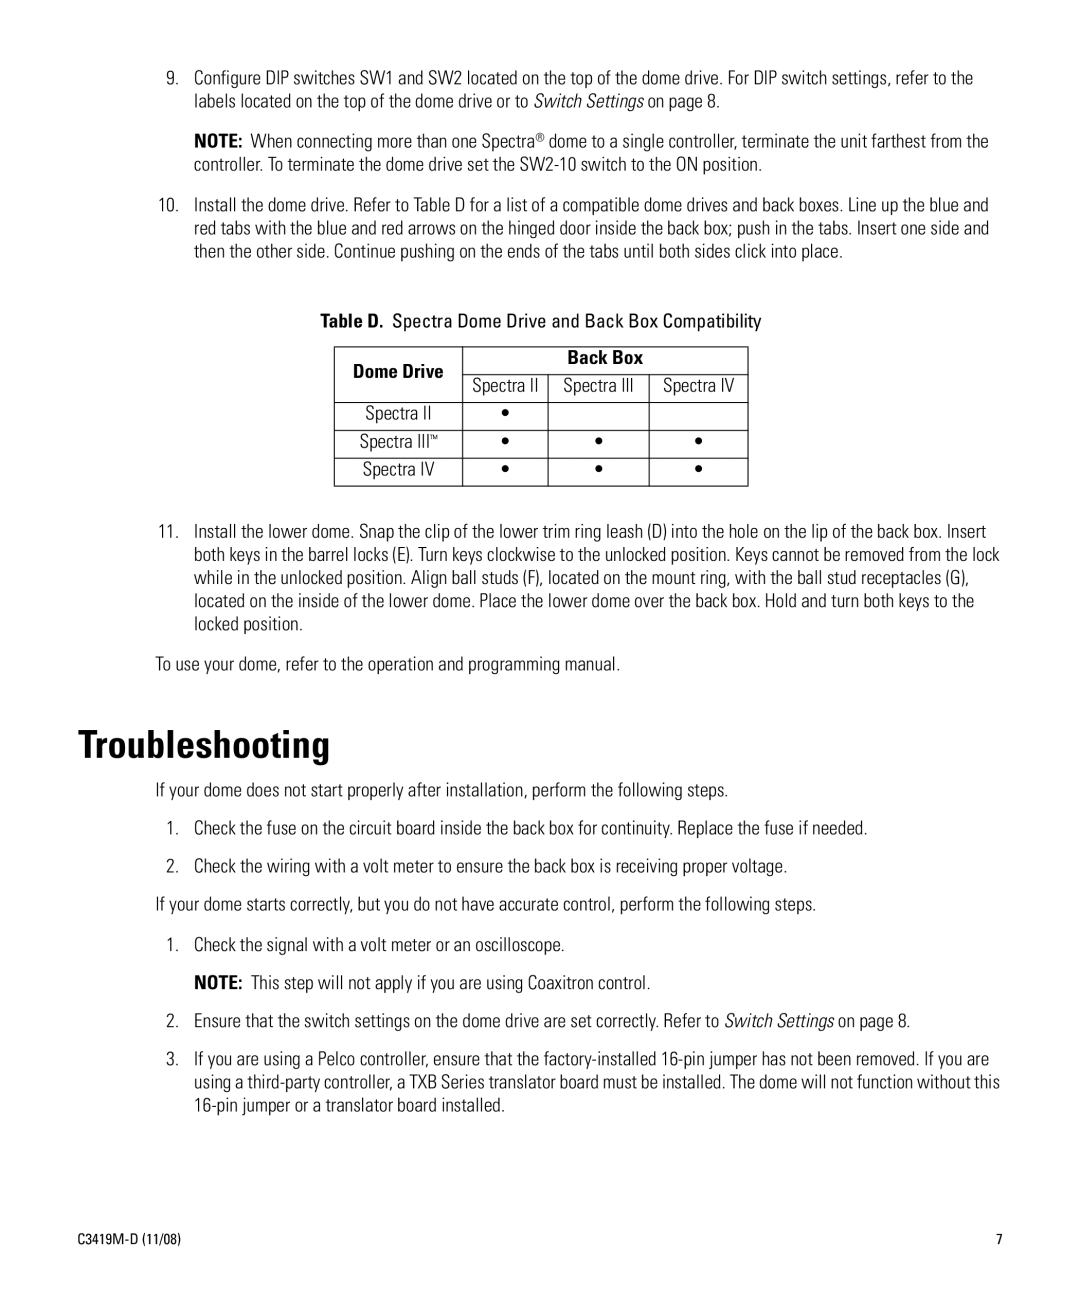
10.Install the dome drive. Refer to Table D for a list of a compatible dome drives and back boxes. Line up the blue and red tabs with the blue and red arrows on the hinged door inside the back box; push in the tabs. Insert one side and then the other side. Continue pushing on the ends of the tabs until both sides click into place.
Table D. Spectra Dome Drive and Back Box Compatibility
Dome Drive |
| Back Box |
|
|
|
| |
| Spectra II | Spectra III | Spectra IV |
|
|
|
|
Spectra II | • |
|
|
|
|
|
|
Spectra III™ | • | • | • |
|
|
|
|
Spectra IV | • | • | • |
|
|
|
|
11.Install the lower dome. Snap the clip of the lower trim ring leash (D) into the hole on the lip of the back box. Insert both keys in the barrel locks (E). Turn keys clockwise to the unlocked position. Keys cannot be removed from the lock while in the unlocked position. Align ball studs (F), located on the mount ring, with the ball stud receptacles (G), located on the inside of the lower dome. Place the lower dome over the back box. Hold and turn both keys to the locked position.
To use your dome, refer to the operation and programming manual.
Troubleshooting
If your dome does not start properly after installation, perform the following steps.
1.Check the fuse on the circuit board inside the back box for continuity. Replace the fuse if needed.
2.Check the wiring with a volt meter to ensure the back box is receiving proper voltage.
If your dome starts correctly, but you do not have accurate control, perform the following steps.
1.Check the signal with a volt meter or an oscilloscope.
NOTE: This step will not apply if you are using Coaxitron control.
2.Ensure that the switch settings on the dome drive are set correctly. Refer to Switch Settings on page 8.
3.If you are using a Pelco controller, ensure that the
| 7 |