|
|
| CHARGE RATE/CHARGING | ||||
|
|
|
|
| TIME - HOURS | ||
BATTERY SIZE/RATING | 2 AMP |
| 20 AMP | 55 AMP | |||
SMALL | Motorcycle, Garden | 6 - 12 AH | 2 | - 4 |
| NR | NR |
BATTERIES | Tractor, etc. | 12 - 32 AH | 4 - 10 |
| NR | NR | |
CAR/TRUCKS | 200 - 315 CCA | 40 - 60 RC | 11 | - 14 |
| ||
315 - 550 CCA | 60 - 85 RC | 14 | - 18 |
| |||
|
| ||||||
| 550 - 875 CCA | 85 - 125 RC | 18 | - 35 |
| 2.5 - 4.5 hrs. | |
MARINE/ |
| 80 RC | 18 |
| 130 min. | 120 min. | |
| 140 RC | 27 |
| 3.5 | 3 | ||
DEEP CYCLE |
|
| |||||
| 160 RC | 30 |
| 4.0 | 3.5 | ||
|
|
| |||||
|
| 180 RC | 33 |
| 4.5 | 4 | |
K. ASSEMBLY INSTRUCTIONS
It is important to fully assemble your charger before use. Follow these instructions for easy assembly.
PARTS | TOOLS NEEDED |
Two, 10 | 3/8" wrench (for mounting |
screws | foot) |
Two, | 5/16" wrench (for wheels) |
screws |
|
Two wheels | Hammer |
One axle | Screwdriver (for handle |
| assembly) |
Two axle caps |
|
Two axle brackets |
|
One handle |
|
One handle clamp rod |
|
One handle grip |
|
One mounting foot |
|
Attach Foot:
Remove charger from packing materials and place charger face down. Attach mounting foot and secure with the two,
Axle Assembly:
Hold axle upright on floor or work surface. Then, using a hammer, tap one of the axle caps onto the top end of the axle. Be sure to tap the hub on straight. Slide both wheels onto the axle with the hubs facing inward. Tap the other axle cap onto the opposite end of the axle and place the axle assembly onto the bottom of the charger.
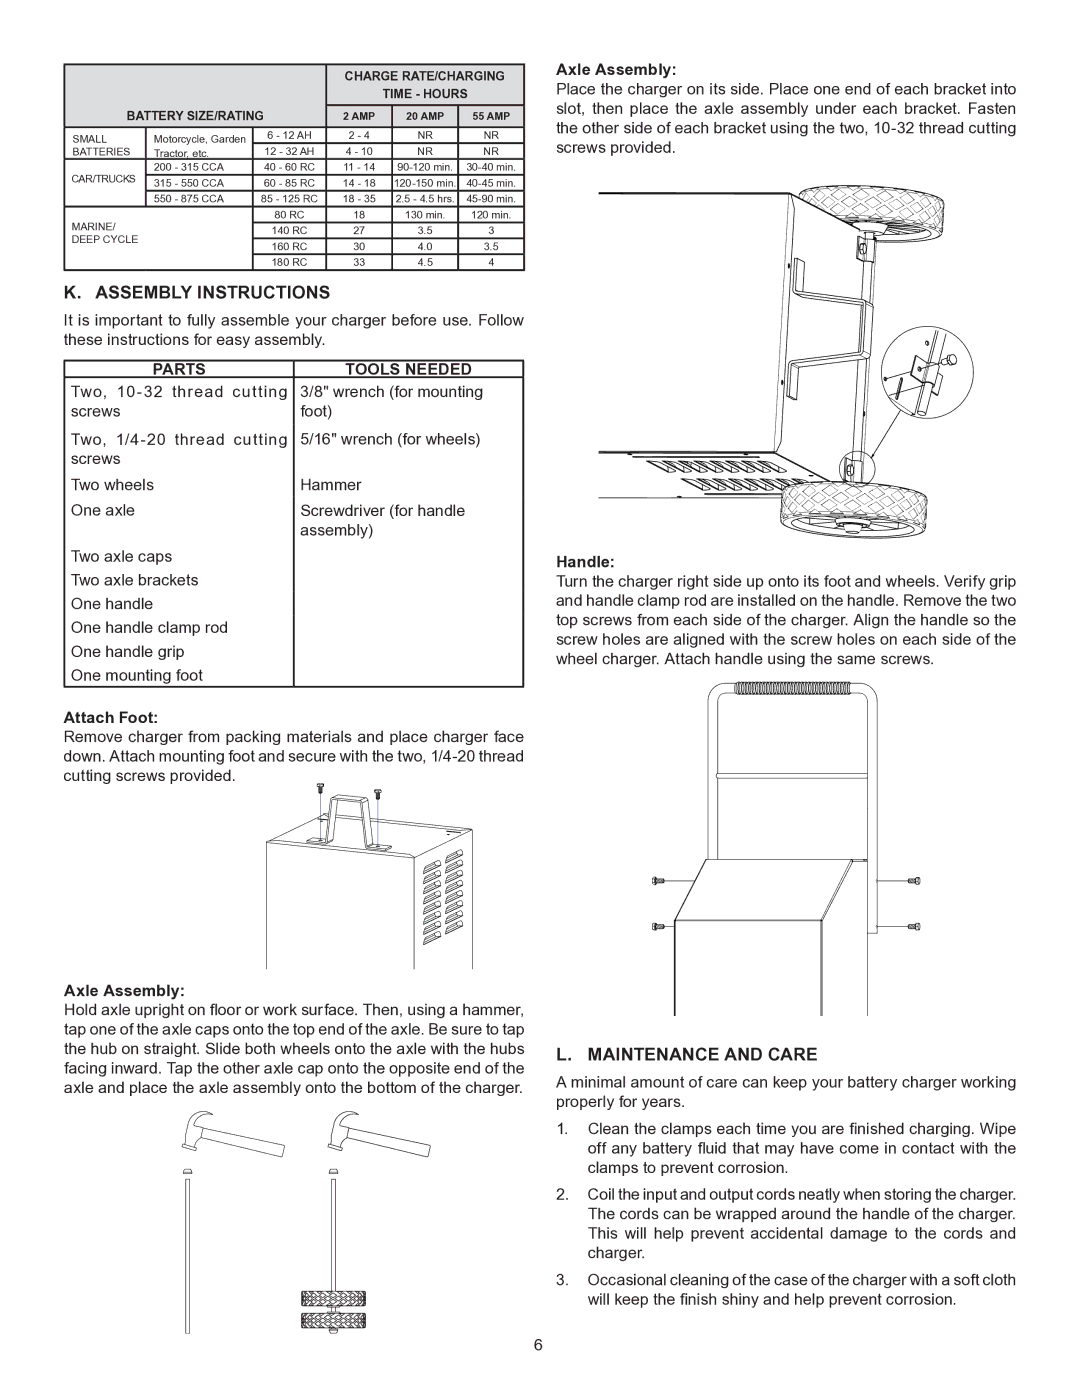
Axle Assembly:
Place the charger on its side. Place one end of each bracket into slot, then place the axle assembly under each bracket. Fasten the other side of each bracket using the two,
Handle:
Turn the charger right side up onto its foot and wheels. Verify grip and handle clamp rod are installed on the handle. Remove the two top screws from each side of the charger. Align the handle so the screw holes are aligned with the screw holes on each side of the wheel charger. Attach handle using the same screws.
L. MAINTENANCE AND CARE
A minimal amount of care can keep your battery charger working properly for years.
1.Clean the clamps each time you are finished charging. Wipe off any battery fluid that may have come in contact with the clamps to prevent corrosion.
2.Coil the input and output cords neatly when storing the charger. The cords can be wrapped around the handle of the charger. This will help prevent accidental damage to the cords and charger.
3.Occasional cleaning of the case of the charger with a soft cloth will keep the finish shiny and help prevent corrosion.