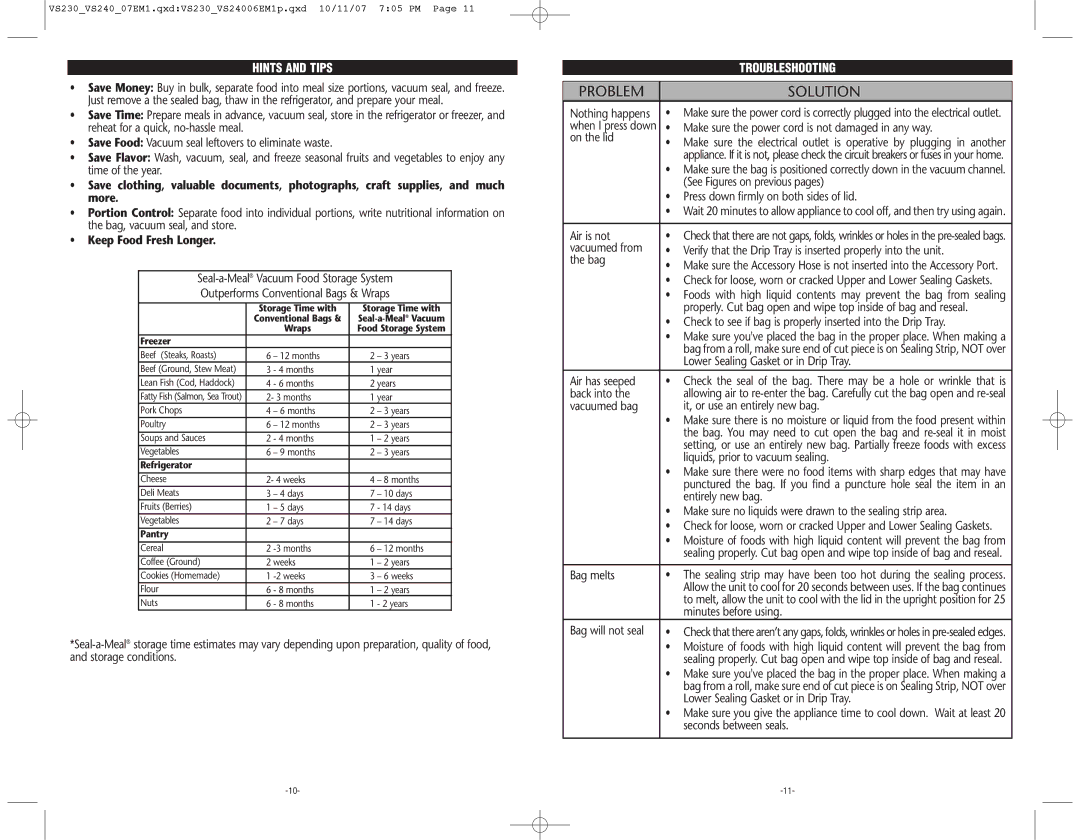
Seal-a-Meal VS240 Hints And Tips, Keep Food Fresh Longer, Troubleshooting, Problem, Solution

Models: VS240

1 7
Download 7 pages 11.94 Kb
Page 6
Image 6
HINTS AND TIPS

VS230_VS240_07EM1.qxd:VS230_VS24006EM1p.qxd 10/11/07 7:05 PM Page 11

HINTS AND TIPS

Save Money: Buy in bulk, separate food into meal size portions, vacuum seal, and freeze. Just remove a the sealed bag, thaw in the refrigerator, and prepare your meal.

Save Time: Prepare meals in advance, vacuum seal, store in the refrigerator or freezer, and reheat for a quick, no-hassle meal.

Save Food: Vacuum seal leftovers to eliminate waste.

Save Flavor: Wash, vacuum, seal, and freeze seasonal fruits and vegetables to enjoy any time of the year.

Save clothing, valuable documents, photographs, craft supplies, and much more.

Portion Control: Separate food into individual portions, write nutritional information on the bag, vacuum seal, and store.

Keep Food Fresh Longer.

Seal-a-Meal®Vacuum Food Storage System

Outperforms Conventional Bags & Wraps


Storage Time with

Storage Time with


Conventional Bags &

Seal-a-Meal®Vacuum


Wraps

Food Storage System


Freezer


Beef (Steaks, Roasts)

6

– 12 months

2

– 3 years


Beef (Ground, Stew Meat)

3

- 4 months

1 year


Lean Fish (Cod, Haddock)

4

- 6 months

2 years


Fatty Fish (Salmon, Sea Trout)

2- 3 months

1 year


Pork Chops

4

– 6 months

2

– 3 years


Poultry

6

– 12 months

2

– 3 years


Soups and Sauces

2

- 4 months

1

– 2 years


Vegetables

6

– 9 months

2

– 3 years


Refrigerator


Cheese

2- 4 weeks

4

– 8 months


Deli Meats

3

– 4 days

7

– 10 days


Fruits (Berries)

1

– 5 days

7

- 14 days


Vegetables

2

– 7 days

7

– 14 days


Pantry


Cereal

2

-3 months

6

– 12 months


Coffee (Ground)

2 weeks

1

– 2 years


Cookies (Homemade)

1

-2 weeks

3

– 6 weeks


Flour

6

- 8 months

1

– 2 years


Nuts

6

- 8 months

1

- 2 years

*Seal-a-Meal®storage time estimates may vary depending upon preparation, quality of food, and storage conditions.


TROUBLESHOOTING


PROBLEM

SOLUTION

Nothing happens

• Make sure the power cord is correctly plugged into the electrical outlet.

when I press down

• Make sure the power cord is not damaged in any way.

on the lid

• Make sure the electrical outlet is operative by plugging in another


appliance. If it is not, please check the circuit breakers or fuses in your home.


• Make sure the bag is positioned correctly down in the vacuum channel.


(See Figures on previous pages)


• Press down firmly on both sides of lid.


• Wait 20 minutes to allow appliance to cool off, and then try using again.


Air is not

• Check that there are not gaps, folds, wrinkles or holes in the pre-sealed bags.

vacuumed from

• Verify that the Drip Tray is inserted properly into the unit.

the bag

• Make sure the Accessory Hose is not inserted into the Accessory Port.


• Check for loose, worn or cracked Upper and Lower Sealing Gaskets.


• Foods with high liquid contents may prevent the bag from sealing


properly. Cut bag open and wipe top inside of bag and reseal.


• Check to see if bag is properly inserted into the Drip Tray.


• Make sure you've placed the bag in the proper place. When making a


bag from a roll, make sure end of cut piece is on Sealing Strip, NOT over


Lower Sealing Gasket or in Drip Tray.

Air has seeped

• Check the seal of the bag. There may be a hole or wrinkle that is

back into the

allowing air to re-enter the bag. Carefully cut the bag open and re-seal

vacuumed bag

it, or use an entirely new bag.


• Make sure there is no moisture or liquid from the food present within


the bag. You may need to cut open the bag and re-seal it in moist


setting, or use an entirely new bag. Partially freeze foods with excess


liquids, prior to vacuum sealing.


• Make sure there were no food items with sharp edges that may have


punctured the bag. If you find a puncture hole seal the item in an


entirely new bag.


• Make sure no liquids were drawn to the sealing strip area.


• Check for loose, worn or cracked Upper and Lower Sealing Gaskets.


• Moisture of foods with high liquid content will prevent the bag from


sealing properly. Cut bag open and wipe top inside of bag and reseal.


Bag melts

• The sealing strip may have been too hot during the sealing process.


Allow the unit to cool for 20 seconds between uses. If the bag continues


to melt, allow the unit to cool with the lid in the upright position for 25


minutes before using.

Bag will not seal

• Check that there aren’t any gaps, folds, wrinkles or holes in pre-sealed edges.


• Moisture of foods with high liquid content will prevent the bag from


sealing properly. Cut bag open and wipe top inside of bag and reseal.


• Make sure you've placed the bag in the proper place. When making a


bag from a roll, make sure end of cut piece is on Sealing Strip, NOT over


Lower Sealing Gasket or in Drip Tray.


• Make sure you give the appliance time to cool down. Wait at least 20


seconds between seals.


-10-

-11-

Page 6
Image 6
Seal-a-Meal VS240 warranty Hints And Tips, Keep Food Fresh Longer, Troubleshooting, Problem, Solution