
VS240 specifications
The Seal-a-Meal VS240 is a popular vacuum sealer designed for home users looking to preserve food freshness, flavor, and nutrition. This appliance serves both practical and economic purposes, making it a valuable addition to any kitchen.One of its main features is its compact design, which ensures that it occupies minimal counter space while still delivering powerful performance. The VS240 is made to fit seamlessly into a modern kitchen, allowing for easy storage without sacrificing functionality.
Equipped with an intuitive control panel, the Seal-a-Meal VS240 enables users to vacuum seal various food items with just the push of a button. The two suction speeds allow for customized sealing, making it suitable for both delicate items like fruits and vegetables and more robust options such as meats and fish. The versatility of this vacuum sealer caters to a wide range of food preservation needs.
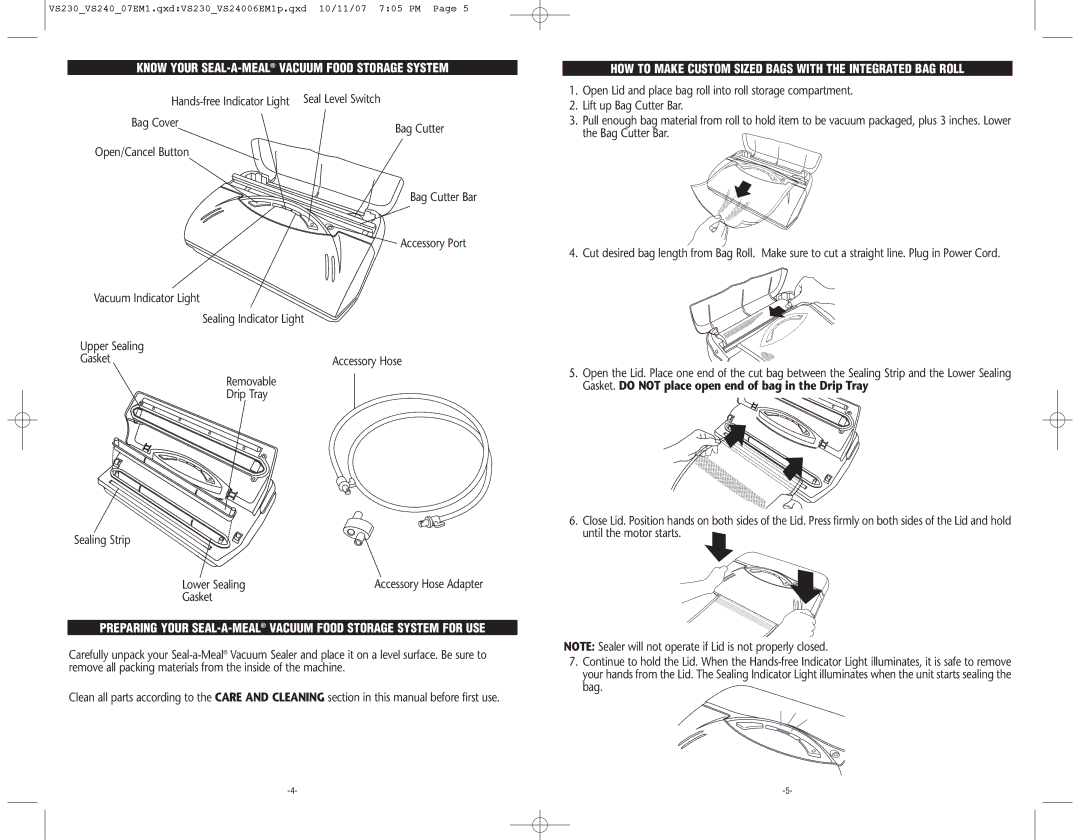
Another notable feature is the integrated roll storage and cutter. This technology allows users to cut custom-sized vacuum bags from rolls, enabling efficient use of storage space while minimizing waste. Users can create bags of any length and perfectly fit their food items, ensuring a secure seal every time.
The Seal-a-Meal VS240 also includes a double seal feature that provides an extra layer of assurance against leaks, making it ideal for long-term storage. Additionally, the appliance offers an option to seal non-food items, making it useful beyond just food preservation.
Easy cleanup is another benefit, as the VS240 has a drip tray that captures excess moisture or food particles, and it is removable for simple washing. The user-friendly design also simplifies maintenance and attention to hygiene.
Furthermore, the vacuum sealer employs a robust motor that enhances its longevity and effectiveness. With a powerful suction force, it removes air efficiently, significantly extending the shelf life of stored items, preventing freezer burn, and reducing food waste in the long run.
In summary, the Seal-a-Meal VS240 is a highly functional vacuum sealer packed with features that make food preservation easy and efficient. From its compact design, customizable suction speeds, integrated storage, and effective sealing technology, it stands out as a versatile tool for anyone looking to elevate their food storage solutions while minimizing waste and maximizing freshness.