5.Select the desired OPTIONS. Not all Options are available with all cycles. See “Options.”

6.Select the desired MODIFIERS. Not all Modifiers are available with all Cycles and Options. See “Modifiers.”

7.If desired, select the CYCLE SIGNAL. The signal is helpful when you are washing items that should be removed from the washer as soon as it stops. Select LOUD, SOFT or OFF.

8.To begin the wash cycle immediately

Select and hold START (for approximately 1 second).

If you do not select START within 5 minutes of choosing a cycle, the washer automatically shuts off.

When the wash cycle is complete, the CLOTHES CLEAN status light glows, the door unlocks, and the wash load can be removed from the washer. The washer powers down automatically 60 minutes after the cycle is complete and the CLOTHES CLEAN light goes off.

9.To begin the wash cycle later

Select DELAY until the desired delay time (in hours) shows in the Estimated Time Remaining display. Select START. The countdown to the wash cycle will show in the display window, and the button indicator will blink until the cycle begins.

IMPORTANT: When delaying a cycle, use only powdered detergents in the main wash compartment since liquid detergents may seep out of the compartment during Delay, before the wash cycle begins.

Using the Dispenser

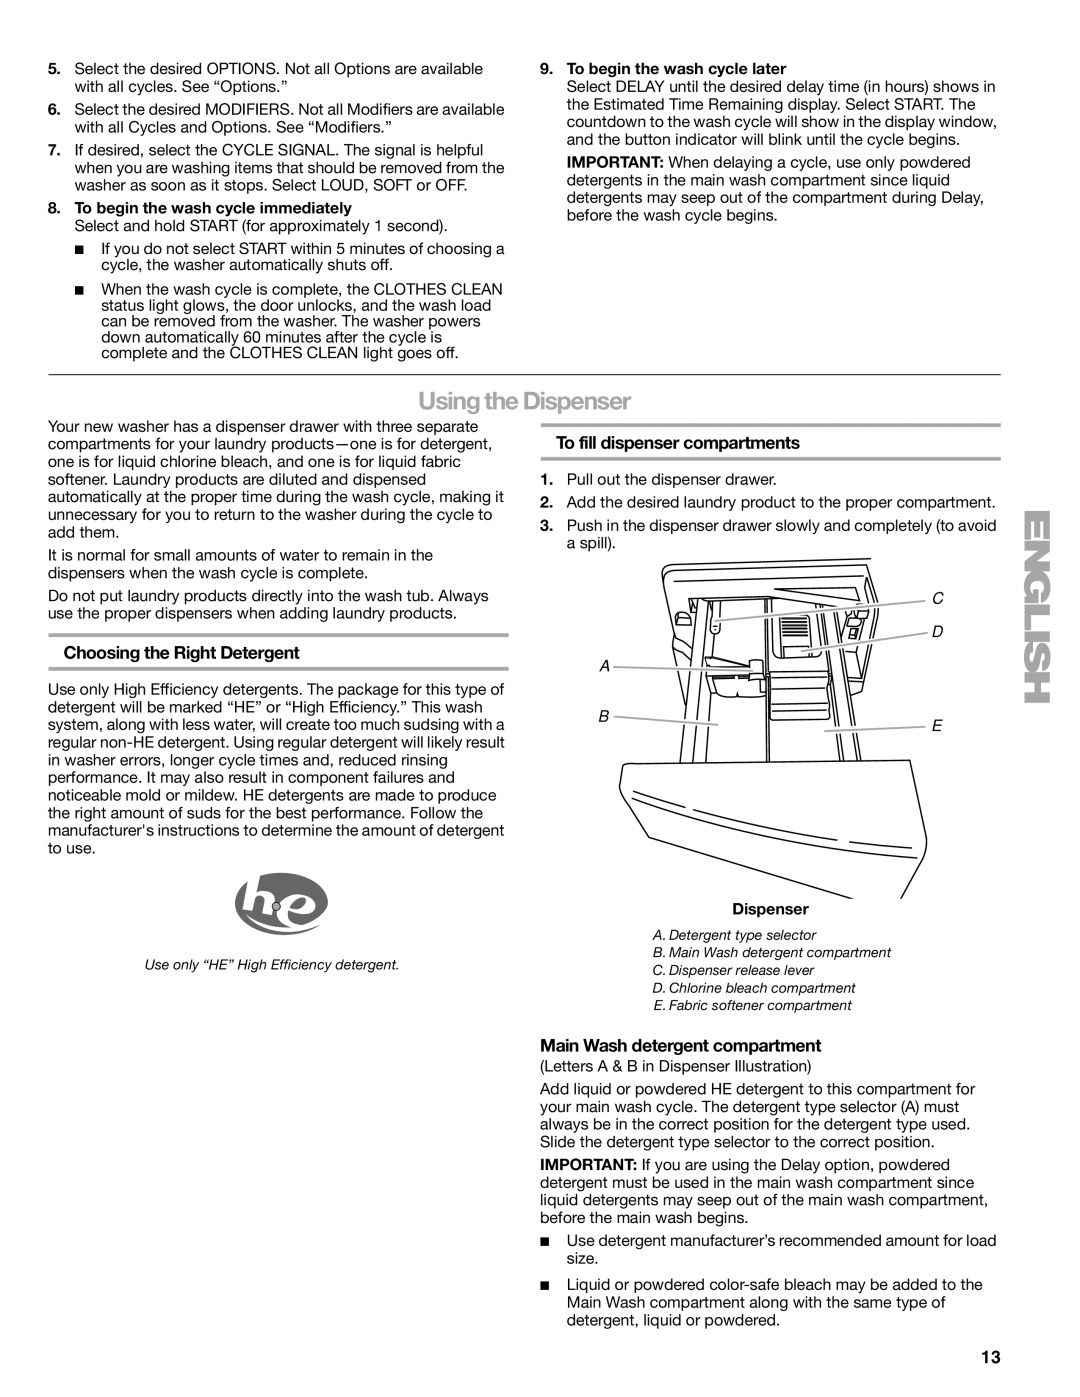
Your new washer has a dispenser drawer with three separate compartments for your laundry products—one is for detergent, one is for liquid chlorine bleach, and one is for liquid fabric softener. Laundry products are diluted and dispensed automatically at the proper time during the wash cycle, making it unnecessary for you to return to the washer during the cycle to add them.

It is normal for small amounts of water to remain in the dispensers when the wash cycle is complete.

Do not put laundry products directly into the wash tub. Always use the proper dispensers when adding laundry products.

Choosing the Right Detergent

Use only High Efficiency detergents. The package for this type of detergent will be marked “HE” or “High Efficiency.” This wash system, along with less water, will create too much sudsing with a regular non-HE detergent. Using regular detergent will likely result in washer errors, longer cycle times and, reduced rinsing performance. It may also result in component failures and noticeable mold or mildew. HE detergents are made to produce the right amount of suds for the best performance. Follow the manufacturer's instructions to determine the amount of detergent to use.

Use only “HE” High Efficiency detergent.

To fill dispenser compartments

1.Pull out the dispenser drawer.

2.Add the desired laundry product to the proper compartment.

3.Push in the dispenser drawer slowly and completely (to avoid a spill).

C

D

A

B

E

Dispenser

A. Detergent type selector

B. Main Wash detergent compartment

C. Dispenser release lever

D. Chlorine bleach compartment

E. Fabric softener compartment

Main Wash detergent compartment

(Letters A & B in Dispenser Illustration)

Add liquid or powdered HE detergent to this compartment for your main wash cycle. The detergent type selector (A) must always be in the correct position for the detergent type used. Slide the detergent type selector to the correct position.

IMPORTANT: If you are using the Delay option, powdered detergent must be used in the main wash compartment since liquid detergents may seep out of the main wash compartment, before the main wash begins.

Use detergent manufacturer’s recommended amount for load size.

Liquid or powdered color-safe bleach may be added to the Main Wash compartment along with the same type of detergent, liquid or powdered.

13

Page 13
Image 13
Sears 110.4996, 110.4997 manual Using the Dispenser, Choosing the Right Detergent, To fill dispenser compartments

110.4997, 110.4996 specifications

Sears has long been recognized as a brand synonymous with quality and innovation in the realm of tools and equipment. Among its trusted range, the models 110.4996 and 110.4997 stand out as exemplary representations of Sears' commitment to durability and performance.

The Sears 110.4996 is characterized by its robust design and versatile functionality. This model features a solid construction that can withstand rigorous usage, making it ideal for both professional tradespeople and DIY enthusiasts. The 110.4996 is equipped with advanced technology that enhances user experience and efficiency. One of its standout features is the ergonomic handle, which ensures a comfortable grip and reduces fatigue during extended use. This model also incorporates a precision adjustment mechanism, allowing users to make fine-tuned modifications easily.

On the other hand, the Sears 110.4997 includes many benefits that cater to both novice and experienced users. One of its hallmark characteristics is its impressive power output, enabling it to handle a wide range of materials and applications. This model is also equipped with an innovative cooling system that prevents overheating, ensuring longevity and sustained performance over time. The intuitive design simplifies operation, making it accessible for users of all skill levels.

Both models feature high-quality components that contribute to their reliability. They are built with durable materials that resist wear and tear, thus assuring longevity. Additionally, Sears ensures that these models are compatible with a variety of attachments, further expanding their utility across different tasks.

Moreover, Sears emphasizes safety with integrated features in both models. They are designed with protective mechanisms to prevent accidental engagement, giving users peace of mind during operation.

In summary, the Sears models 110.4996 and 110.4997 encapsulate a blend of durability, efficiency, and user-friendly features. With ergonomic designs, powerful performance, and impressive functionality, they cater to a diverse range of users, from professionals to home improvement aficionados. These models reflect Sears' legacy of quality craftsmanship and innovation, making them valuable tools in any toolkit.