
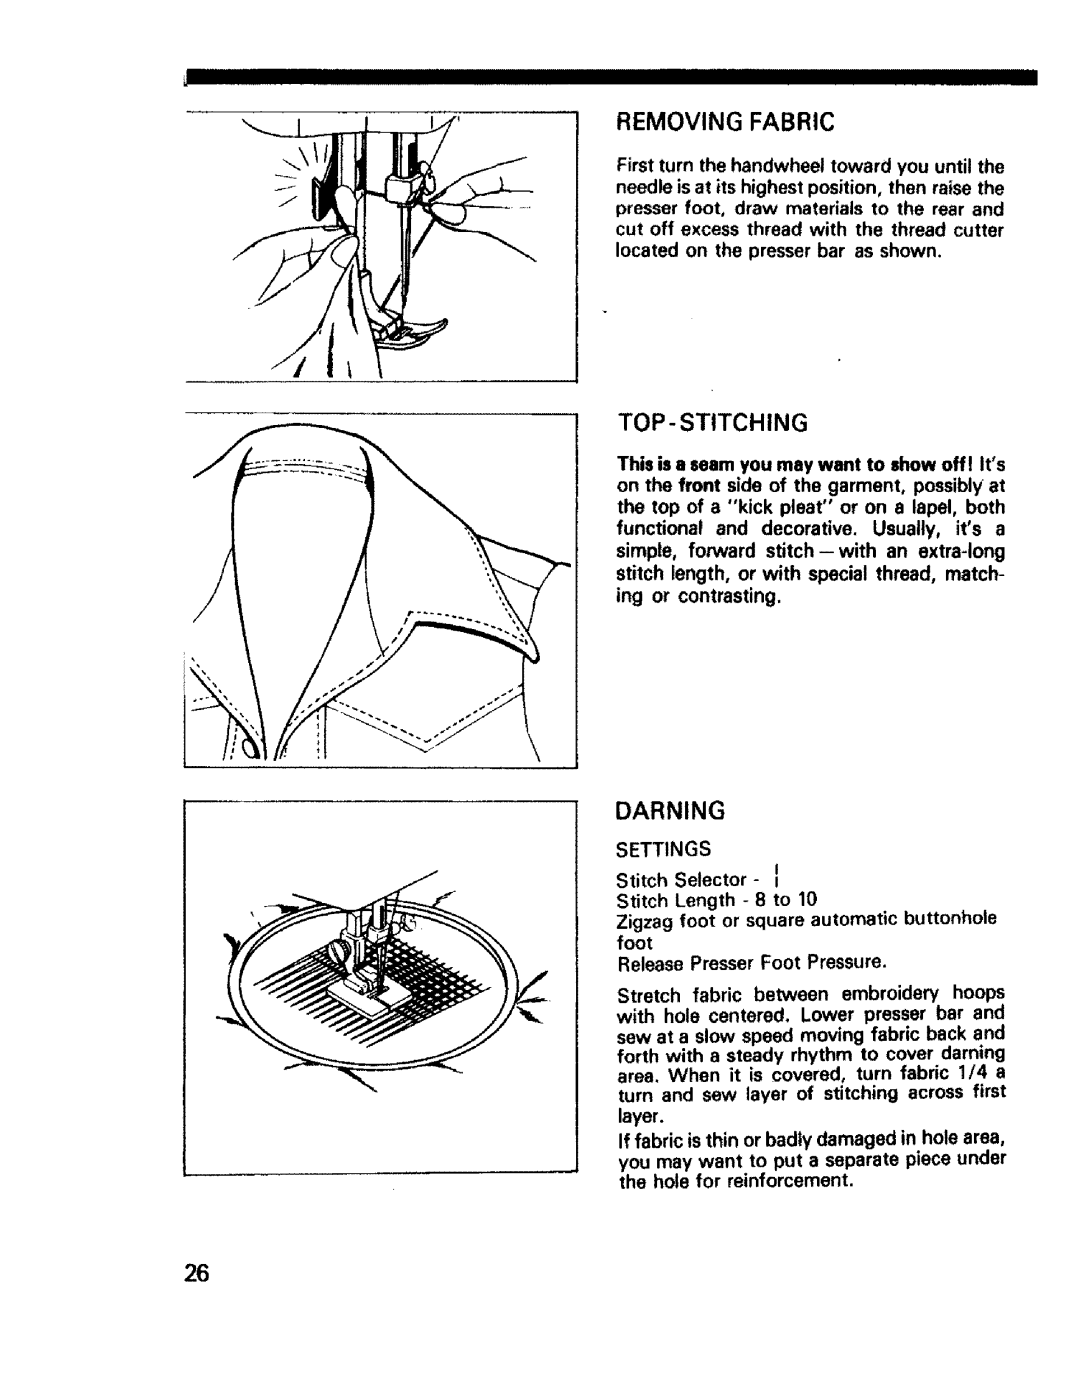
1345, 1350, 1561, 1340, 1595 specifications
Sears, a prominent name in the retail industry, has long been synonymous with quality, innovation, and a commitment to customer satisfaction. Among its noteworthy offerings are the models 1355, 1358, 1595, 1340, and 1561, each designed with specific features and technologies to cater to a diverse range of consumer needs.The Sears Model 1355 is known for its robust construction and versatile performance. It often comes equipped with a powerful motor, allowing it to handle various tasks with ease. Its user-friendly interface makes it accessible for both beginners and seasoned professionals. The 1355’s durability is a standout feature, ensuring it stands the test of time even in demanding environments.
Model 1358 builds upon the strengths of its predecessor while introducing advanced technology. This model features enhanced safety mechanisms, such as an automatic shut-off feature and reinforced components that minimize the risk of accidents. Additionally, its ergonomic design allows for comfortable handling, making it ideal for prolonged use. The efficiency of the 1358 is further exemplified by its energy-saving capabilities, appealing to eco-conscious consumers.
The Sears Model 1595 is designed with precision and accuracy in mind. It incorporates cutting-edge measurement technologies, enabling users to achieve precise results. The digital display is a significant upgrade, allowing for easy reading and tracking of measurements, while the advanced calibration system ensures consistent performance. This model is particularly favored by DIY enthusiasts and professionals who require exactitude in their projects.
Model 1340, on the other hand, emphasizes versatility. Its multifunctional capabilities allow it to perform numerous tasks, from simple repairs to complex assembly. With a range of attachments available, users can customize their experience according to their needs. The lightweight design makes it portable and easy to use for various applications.
Finally, the Sears Model 1561 stands out for its innovative connectivity features. Designed for the modern consumer, this model integrates smart technology that allows for remote operation and monitoring via mobile devices. Users can track performance metrics and receive maintenance alerts, enhancing the overall user experience.
Each of these models showcases Sears' commitment to quality and innovation, ensuring that there is a suitable option for every type of user. From durability and safety to precision and connectivity, the 1355, 1358, 1595, 1340, and 1561 embody the brand's legacy of excellence.