........ | ASSEMBLY |
| INSTRUCTIONS |
|
I | I IIIIIIIIIIIIIIIIIIIII IIIIIIII iiii IIII IIIIIII | g | i liB mUiR | ,,,H ,,,,,, ,,, ,,,,m ,,,,,,, |
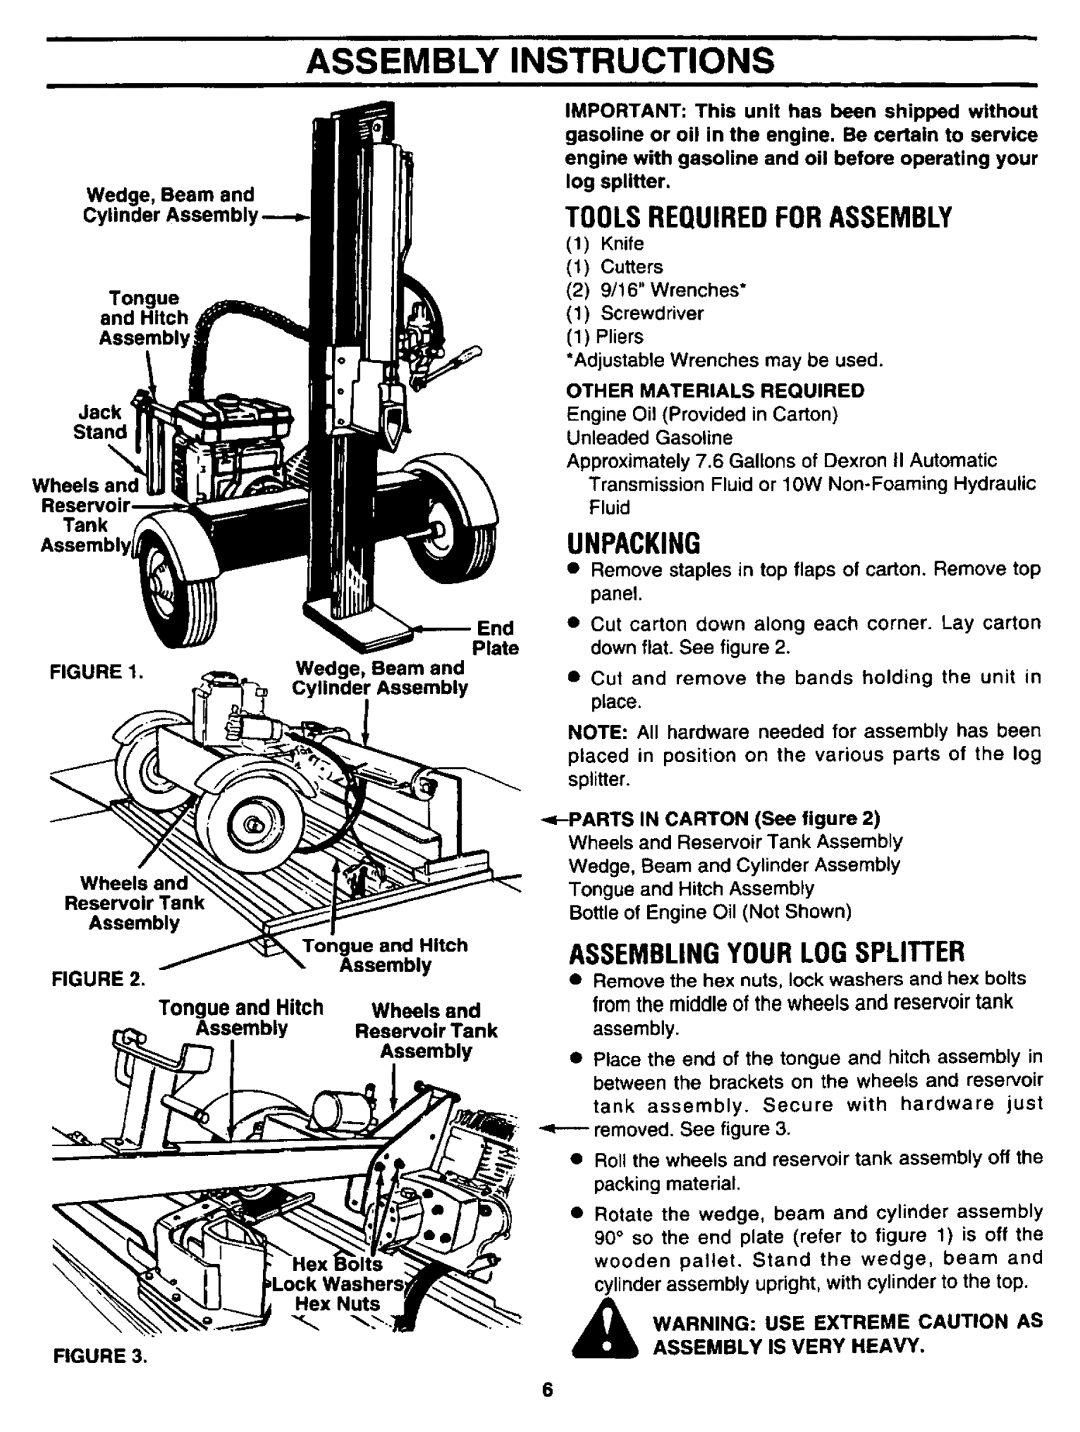
Wedge, Beam and
Cylinder
Tongue
and Hitch
Assembly
Jack
Wheels and
Tank
End
Plate
FIGURE 1. | Wedge, | Beam and |
| Cylinder | Assembly |
Wheels
Reservoir Tank
Assembly
Tongue and Hitch
IMPORTANT: This unit has been shipped without gasoline or oil in the engine. Be certain to service engine with gasoline and oil before operating your log splitter.
TOOLSREQUIREDFORASSEMBLY
(1)Knife
(1)Cutters
(2)9/16" Wrenches*
(1)Screwdriver
(1)Pliers
*Adjustable Wrenches may be used.
OTHER MATERIALS REQUIRED
Engine Oil (Provided in Carton)
Unleaded Gasoline
Approximately 7,6 Gallons of Dexron 11Automatic Transmission Fluid or 10W
UNPACKING
•Remove staples in top flaps of carton. Remove top panel.
•Cut carton down along each corner. Lay carton down flat. See figure 2.
•Cut and remove the bands holding the unit in place.
NOTE: All hardware needed for assembly has been placed in position on the various parts of the log splitter.
Wedge, Beam and Cylinder Assembly
Tongue and Hitch Assembly
Bottle of Engine Oil (Not Shown)
ASSEMBLINGYOUR LOG SPLITTER
FIGURE 2.
Assembly
• Remove the hex nuts, lock washers and hex bolts |
from the middle of the wheels and reservoir tank |
Tongue and Hitch Wheels and
AssemblyReservoir Tank
Assembly
Hex Nuts
FIGURE 3.
assembly. |
|
• Place the end of the tongue and hitch assembly in | |
between the brackets on the wheels and reservoir | |
tank assembly. | Secure with hardware just |
•Roll the wheels and reservoir tank assembly off the packing material.
•Rotate the wedge, beam and cylinder assembly 90 ° so the end plate (refer to figure 1) is off the wooden pallet. Stand the wedge, beam and cylinder assembly upright, with cylinder to the top.
_ARNING: USE EXTREME CAUTION AS
ASSEMBLY IS VERY HEAVY.
6