SERVICE AND MAINTENANCE
Shave Plate and Skid Shoes
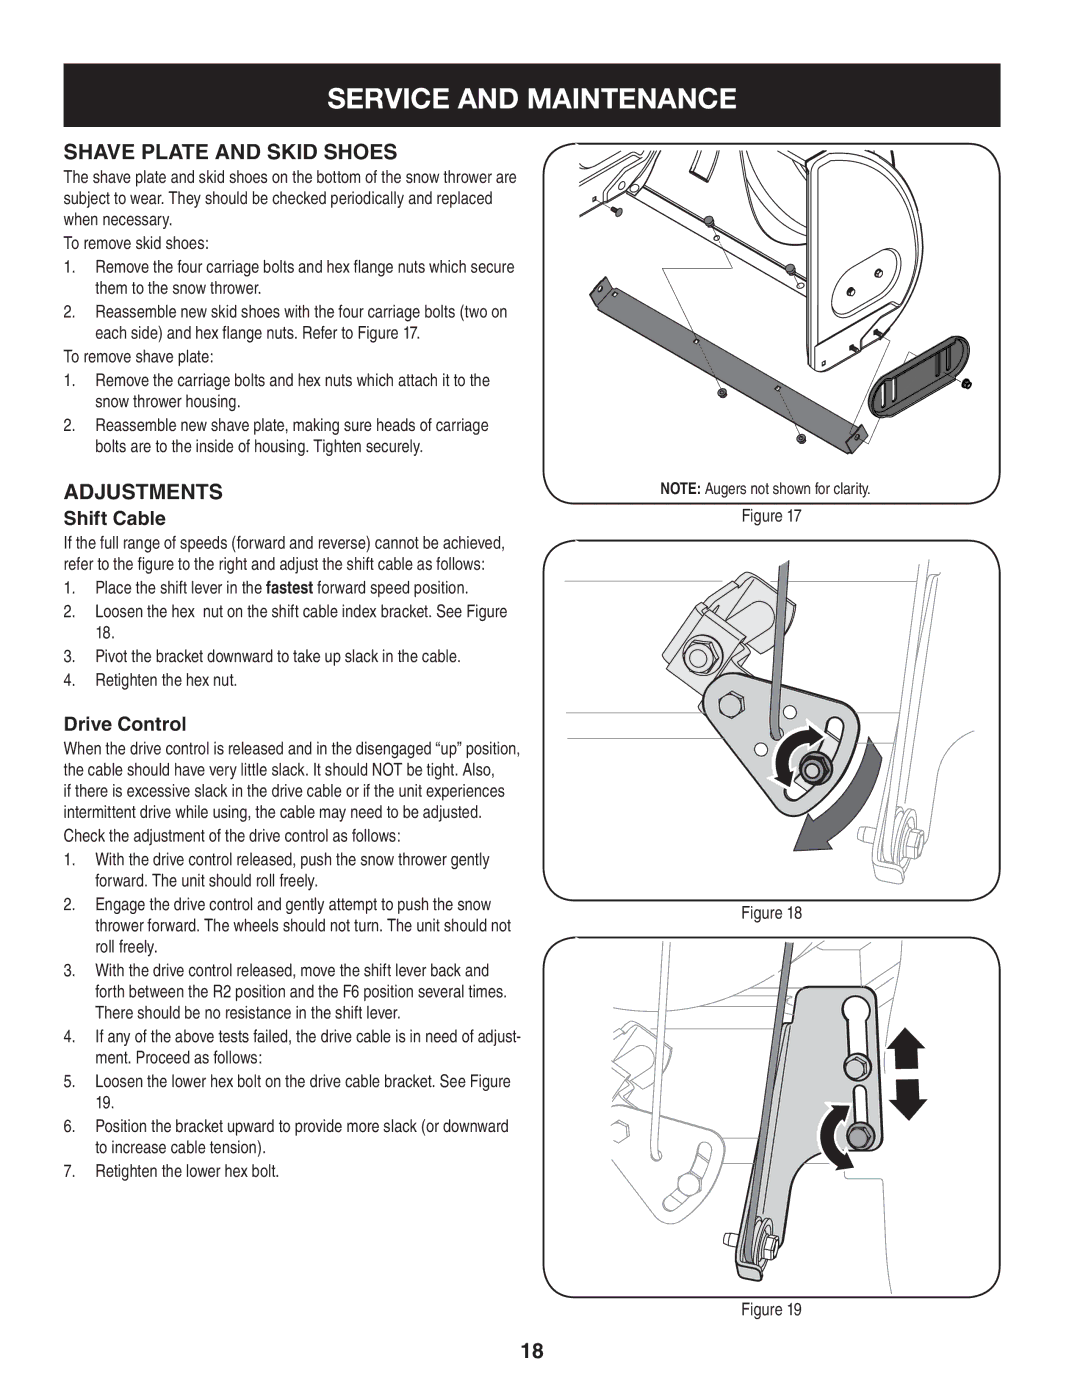
The shave plate and skid shoes on the bottom of the snow thrower are subject to wear. They should be checked periodically and replaced when necessary.
To remove skid shoes:
1.Remove the four carriage bolts and hex flange nuts which secure them to the snow thrower.
2.Reassemble new skid shoes with the four carriage bolts (two on each side) and hex flange nuts. Refer to Figure 17.
To remove shave plate:
1.Remove the carriage bolts and hex nuts which attach it to the snow thrower housing.
2.Reassemble new shave plate, making sure heads of carriage bolts are to the inside of housing. Tighten securely.
Adjustments
Shift Cable
If the full range of speeds (forward and reverse) cannot be achieved, refer to the figure to the right and adjust the shift cable as follows:
1.Place the shift lever in the fastest forward speed position.
2.Loosen the hex nut on the shift cable index bracket. See Figure 18.
3.Pivot the bracket downward to take up slack in the cable.
4.Retighten the hex nut.
Drive Control
When the drive control is released and in the disengaged “up” position, the cable should have very little slack. It should NOT be tight. Also,
if there is excessive slack in the drive cable or if the unit experiences intermittent drive while using, the cable may need to be adjusted.
Check the adjustment of the drive control as follows:
1.With the drive control released, push the snow thrower gently forward. The unit should roll freely.
2.Engage the drive control and gently attempt to push the snow thrower forward. The wheels should not turn. The unit should not roll freely.
3.With the drive control released, move the shift lever back and forth between the R2 position and the F6 position several times. There should be no resistance in the shift lever.
4.If any of the above tests failed, the drive cable is in need of adjust- ment. Proceed as follows:
5.Loosen the lower hex bolt on the drive cable bracket. See Figure 19.
6.Position the bracket upward to provide more slack (or downward to increase cable tension).
7.Retighten the lower hex bolt.
NOTE: Augers not shown for clarity.
Figure 17
Figure 18
Figure 19
18