surface before use. Failure to do so could cause the router table to tip over or slide, resulting in property damage and/or serious personal injury.

1. Set the router table on a workbench or other stable

and sturdy surface.

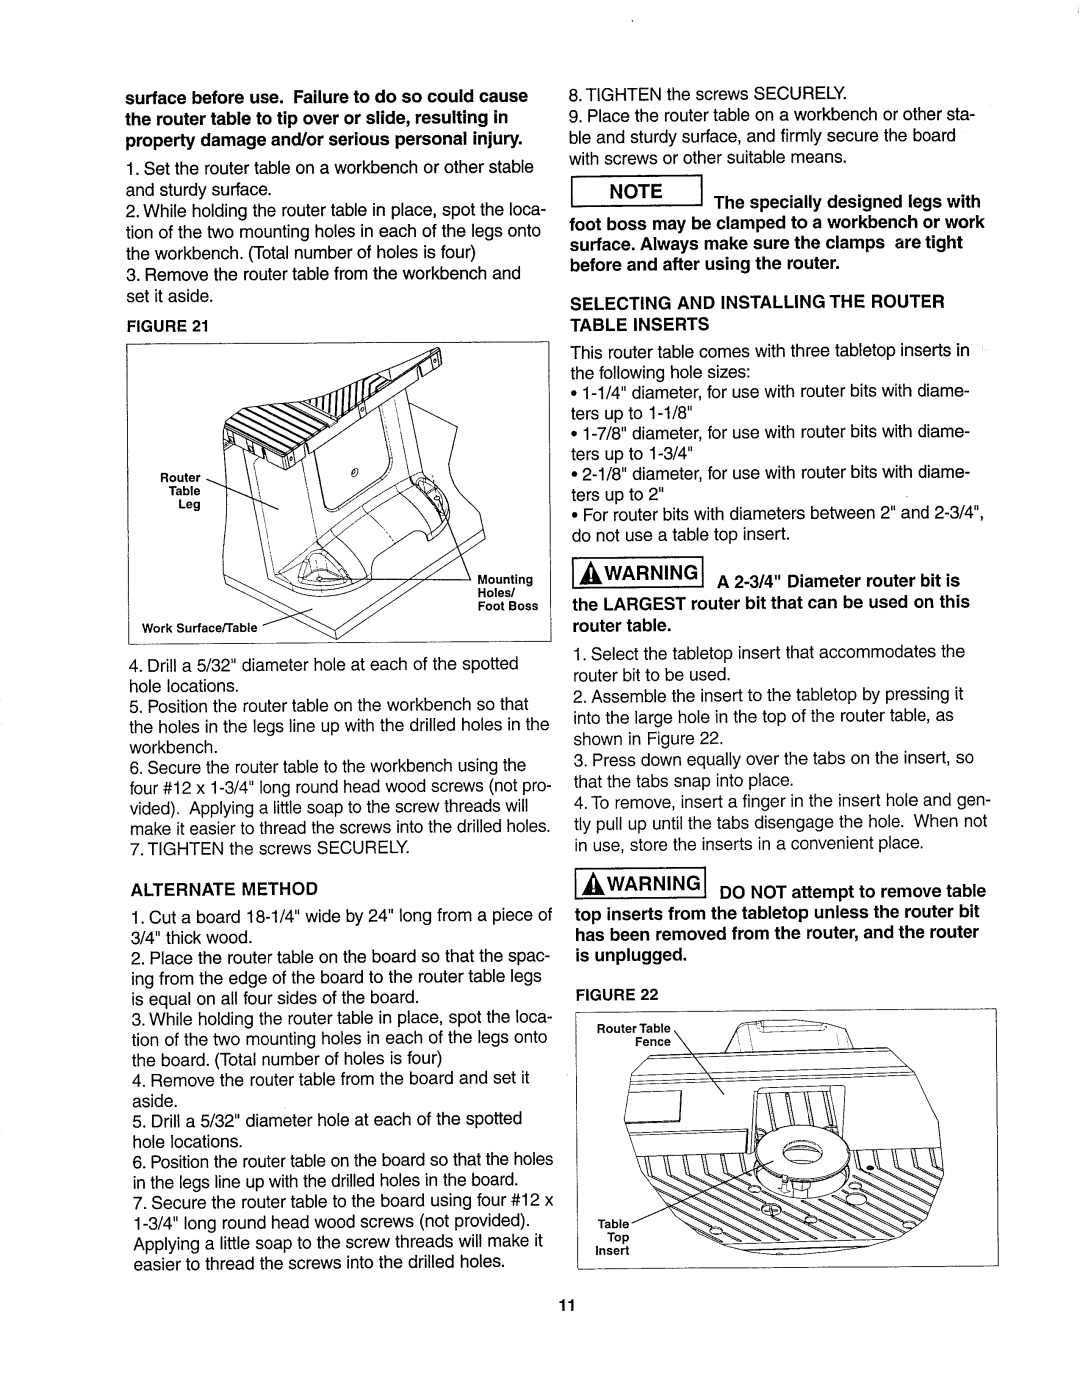
2, While holding the router table in place, spot the loca- tion of the two mounting holes in each of the legs onto the workbench. (Total number of holes is four)

3.Remove the router table from the workbench and set it aside.

FIGURE 21

Router

Table

Leg

Mounting

Holes/

Foot Boss

Work Surface/Table

4.Drill a 5/32" diameter hole at each of the spotted hole locations.

5.Position the router table on the workbench so that

the holes in the legs line up with the drilled holes in the workbench.

6.Secure the router table to the workbench using the four #12 x 1-3/4" long round head wood screws (not pro-

vided). Applying a little soap to the screw threads will make it easier to thread the screws into the drilled holes. 7. TIGHTEN the screws SECURELY.

ALTERNATE METHOD

1.Cut a board 18-1/4" wide by 24" long from a piece of 3/4" thick wood.

2, Place the router table on the board so that the spac- ing from the edge of the board to the router table legs is equal on all four sides of the board.

3.While holding the router table in place, spot the loca- tion of the two mounting holes in each of the legs onto the board. (Total number of holes is four)

4.Remove the router table from the board and set it aside.

5.Drill a 5/32" diameter hole at each of the spotted hole locations.

6.Position the router table on the board so that the holes

in the legs line up with the drilled holes in the board.

7.Secure the router table to the board using four #12 x 1-3/4" long round head wood screws (not provided).

Applying a little soap to the screw threads will make it easier to thread the screws into the drilled holes.

8.TIGHTEN the screws SECURELY.

9.Place the router table on a workbench or other sta-

ble and sturdy surface, and firmly secure the board with screws or other suitable means.

m

I

INOTE I The specially designed legs with foot boss may be clamped to a workbench or work surface. Always make sure the clamps are tight before and after using the router.

SELECTING AND INSTALLING THE ROUTER TABLE INSERTS

This router table comes with three tabletop inserts in the following hole sizes:

1-1/4" diameter, for use with router bits with diame-

ters up to 1-1/8"

1-7/8" diameter, for use with router bits with diame- ters up to 1-3/4"

2-1/8" diameter, for use with router bits with diame- ters up to 2"

For router bits with diameters between 2" and 2-3/4", do not use a table top insert.

I _'WARNINGI A 2-3/4" Diameter router bit is

the LARGEST router bit that can be used on this router table.

1.Select the tabletop insert that accommodates the router bit to be used.

2.Assemble the insert to the tabletop by pressing it into the large hole in the top of the router table, as shown in Figure 22.

3.Press down equally over the tabs on the insert, so that the tabs snap into place.

4.To remove, insert a finger in the insert hole and gen- tly pull up until the tabs disengage the hole. When not in use, store the inserts in a convenient place.

I _WARNINGI DO NOT attempt to remove table

top inserts from the tabletop unless the router bit has been removed from the router, and the router is unplugged.

FIGURE 22

Router Table,

Fence_

/,

_, --

,\

,

11

Page 11
Image 11
Sears 26462_0 owner manual Alternate Method, Selecting and Installing the Router Table Inserts

26462_0 specifications

Sears 26462_0 is a notable product designed to meet the needs of a diverse range of consumers, offering a blend of functionality, style, and performance. One of the standout features of this model is its sleek and modern design, making it an attractive addition to any home or workspace. The aesthetic appeal is complemented by a sturdy construction that ensures durability, providing users with a reliable product that will stand the test of time.

The 26462_0 is equipped with advanced technologies that enhance its usability. One such technology is its energy-efficient operation, which allows users to reduce their energy consumption while still enjoying optimal performance. This feature not only helps in lowering electricity bills but also contributes to environmental sustainability, making it an appealing choice for eco-conscious consumers.

Another key characteristic of the Sears 26462_0 is its user-friendly interface. The controls are intuitive and accessible, allowing users to quickly familiarize themselves with the product and maximize its features. Additionally, its compact design makes it suitable for small spaces, further increasing its versatility.

Performance-wise, the 26462_0 excels in delivering consistent results. Whether it’s related to its primary function or supplementary features, users can expect reliable performance that meets or exceeds expectations. This model's robust engineering ensures that it can handle a variety of tasks efficiently, catering to both light and heavy-duty requirements.

In terms of maintenance, the Sears 26462_0 has been designed with ease of care in mind. Its materials are easy to clean, and the components are accessible for repairs if necessary. This practicality contributes to a lower total cost of ownership, as users can manage and maintain their product without costly interventions.

Overall, the Sears 26462_0 is a well-rounded choice for anyone in the market for a dependable and stylish addition to their home or office. Its blend of modern design, user-friendly features, energy efficiency, and durable construction positions it as a product that truly meets the evolving needs of today’s consumers. With its solid performance and practical characteristics, the 26462_0 emerges as a commendable option for those seeking quality and reliability in a singular offering.