ii
ASSEMBLY
RUSH TRI-BLADE CONFIGURATION
_utting Line Head configuration is located before this
i | ii |
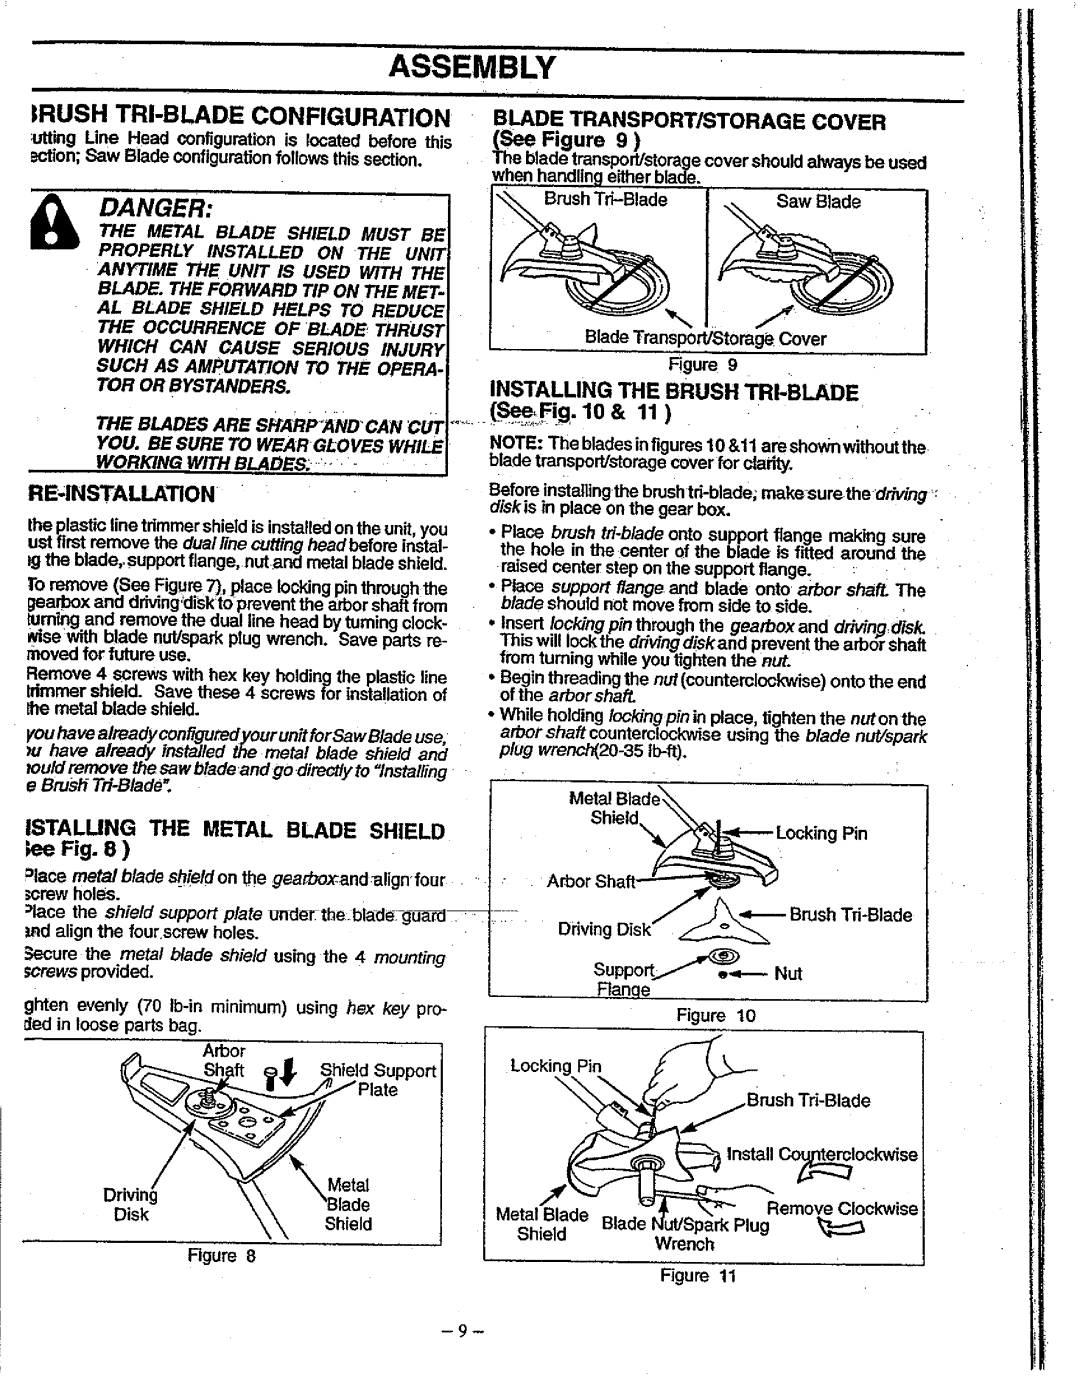
BLADETRANSPORT/STORAGE COVER
(1See Figure 9 )
e blade transport/storagecover should always be used when handling either blade.
DANGER:THE METAL BLADE SHIELD MUST BE
PROPERLY INSTALLED ON THE UNIT
ANYTIME THE UNIT IS USED WITH THE |
| Saw Blade |
|
BLADE. THE FORWARD TIP ON THE MET- |
|
| |
| J |
| |
AL BLADE SHIELD HELPS TO REDUCE |
|
| |
THE OCCURRENCE OF BLADE THRUST |
| Blade TrensporVStorag_ Cover | . |
WHICH CAN CAUSE SERIOUS INJURY |
| ||
| Figure 9 |
| |
SUCH AS AMPUTATION TO THE OPERA- |
|
| |
INSTALLING THE BRUSH |
| ||
TOR OR BYSTANDERS. |
| ||
..... | 10& 11) |
| |
THE BLADES ARE SHARFAND'CAN cuT |
| ||
|
|
| |
YOU. BE SURE TO WEARGLOVES WHILE WORKING WITH BLADES; '"
RE_;INSTALLATiON
the plastic line trimmer shield is installedon the unit, you ust first remove the dualline cutting headbefore instal- Ig the blade,,support flange, nut and metal blade shield.
To remove (See Figure7), place locking pinthrough the gearbox and driving.'diskt0 prevent the arbor shaft from tumtng and remove the dual Ine head by turning c_ock- wise with blade nut/spark plug wrench. Save parts re- moved for future use.
Remove 4 screws with hex key holding the plastic line trimmer shield. Save these 4 screws for installation of
NOTE: The bladesin figures 10 &11 are shown without the blade transport/storage cover for clarity.
Before installing the brush
•Place brush
raised center step on the support flange. | : |
•Place support flange and blade onto arbor shaft. The blade should not move from side to side.
•Insert/ocking pin through the gearbox and driw'ngdls_
This will lock the driving diskand prevent the arbor shall from turning while you tighten the Rut.
•Begin threading the nut (counterclockwise) onto the end of the arbor shafL
Ihe metal blade shield.
Fou have already conliguredyour unitfor Saw Blade use,
_u have already installed the metal blade sh=ieldand rould remove the saw b/adeand go directlyto Installing
e Bnisfi
•While holding loctdngp_nin place, tighten the nut onthe arbor shaft counterclockwise using the blade nut/spark plug
Metal Blade\Nx.
ISTALUNG THE METAL BLADE SHIELD
lee Fig. 8 ) |
| Sh=eld__: | Locking Pin | |||
=lace met'a/blade s_hietdonme gearbo_cand_alignfour | Arbor | _" | ||||
_crew holes. |
|
|
| Brush | ||
:_lacethe shield support plate L]ndeT.the_blade | _: |
| ||||
|
|
| ||||
3rodalign the four,screw | holes. | Driving Disk |
| |||
|
|
|
| |||
_ecure the metal blade shield using the 4 mounting |
| Nut | ||||
screws provided. |
|
| ||||
|
| Flanqe |
| |||
|
|
|
| |||
ghten evenly (70 | minimum) using hex key pro- |
|
| Figure | 10 | |
ded in loose parts bag. |
|
|
|
|
| |
| Arbor | Locking Pin |
|
| ||
| Shield Support |
|
| |||
|
|
|
|
| ||
|
|
|
|
| Brush | |
| Metal | ,_ |
|
| Co_lockwise | |
Driving | _,_ __'_ | _ | _'Remove Clockwise | |||
| ||||||
Disk | Shield | Metal Blade | Blede N_'ut/Sp'Plugrk | |||
Rgure 8 | Shield |
| Wrench |
| ||
|
|
|
| |||
Figure 11