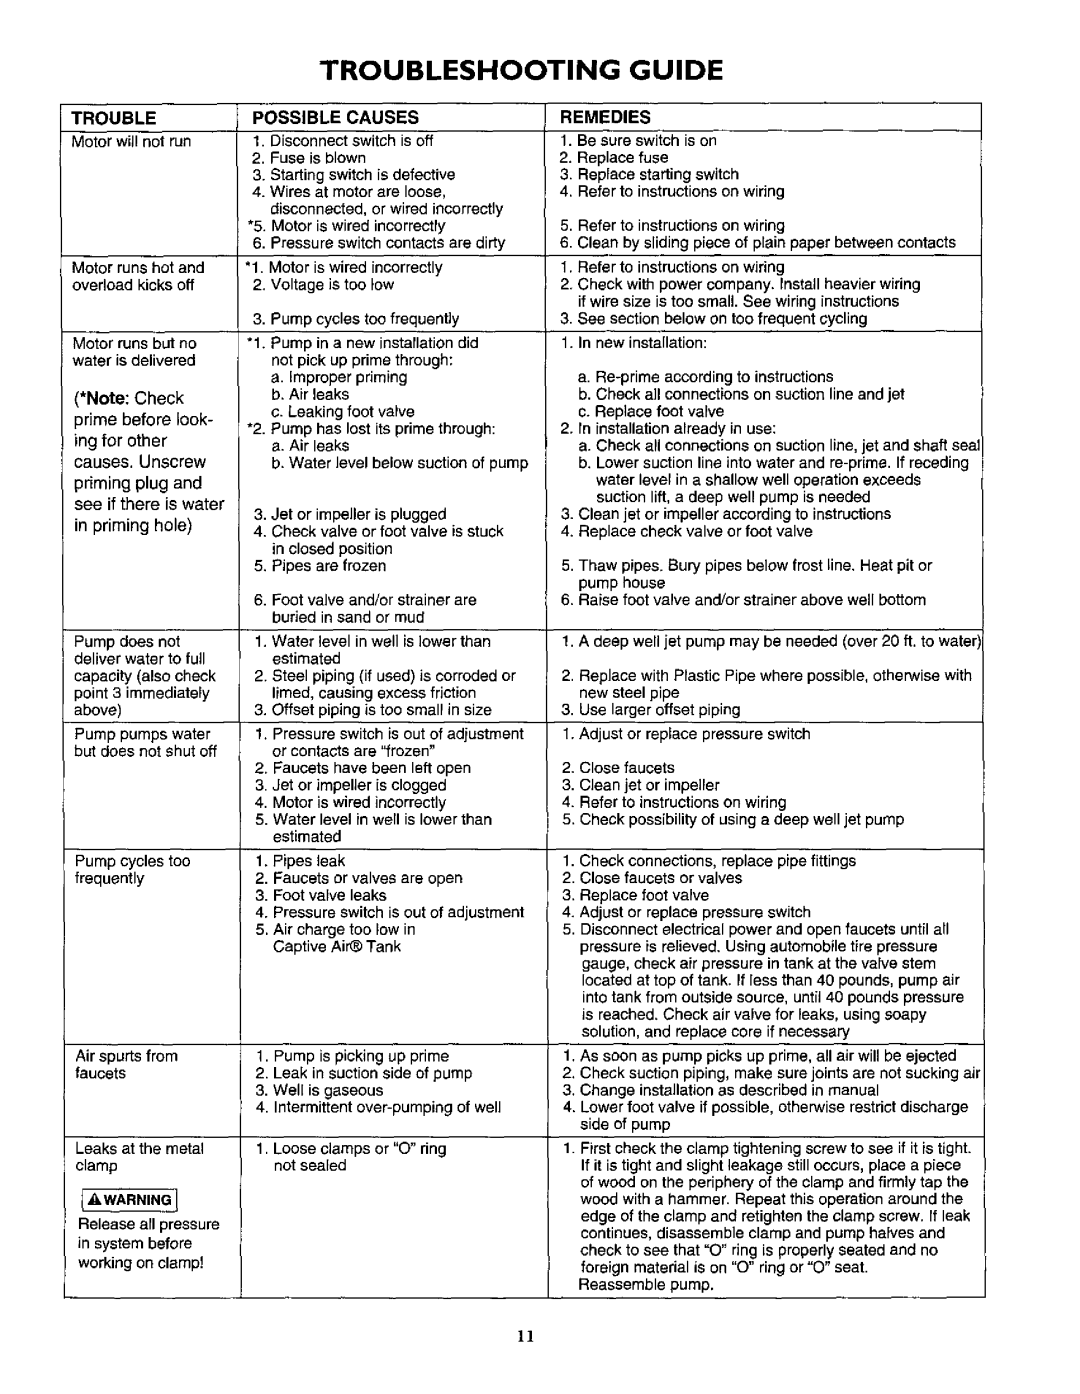
390.2521 specifications
The Sears 390.2521 is a notable addition to the world of household appliances, particularly recognized for its versatility and user-friendly design. This multi-functional device is primarily known as a microwave oven, making it a staple in many kitchens. With its compact build and efficient performance, the 390.2521 caters to various cooking needs, from heating leftovers to preparing entire meals.One of the main features of the Sears 390.2521 is its powerful microwave generator, which typically operates at a wattage of around 900 watts. This ensures that food heats evenly and efficiently, reducing cooking time and energy consumption. The model's sleek design includes a spacious interior that can accommodate large dishes, making it suitable for family meals or batch cooking.
The 390.2521 comes equipped with a variety of cooking presets, allowing users to quickly select the appropriate settings for different types of food. These presets include options for popcorn, pizza, and beverages, among others. The intuitive control panel is designed for ease of use, featuring soft-touch buttons and a digital display that clearly indicates cooking times and power levels.
In terms of safety features, the Sears 390.2521 includes a child lock function to prevent accidental operation, making it a trustworthy option for families with young children. Additionally, the appliance is fitted with an automatic shut-off system, which activates at the end of the cooking cycle to prevent overheating and ensure safe use.
Technologically, the 390.2521 leverages the latest advancements in microwave technology. Its sleek interior design is easy to clean, thanks to a non-stick coating that resists food buildup. The turntable feature ensures even cooking by rotating food for optimal heat distribution, which is particularly beneficial when reheating or defrosting.
Another noteworthy characteristic of the Sears 390.2521 is its energy efficiency. The appliance is designed to minimize energy consumption, which is an essential consideration for environmentally conscious consumers. Its compact size also makes it easy to fit into various kitchen layouts, offering both functionality and aesthetic appeal.
In conclusion, the Sears 390.2521 microwave oven stands out in the competitive kitchen appliance market due to its combination of power, safety features, and user-centric design. Whether for quick heating, defrosting, or cooking, this model serves as a reliable and stylish option for any modern kitchen, making meal preparation faster and more convenient.