To make cleaning easier, the tanks should
be completely.dried _.
MANUALDRY O_
(a)Loop switch actuator ring around plas- tic hook located directly above the switch actuator. (See Figure 7.)
(b)Set Humidity Control to CONSTANT ON, and Air Flow Control to HIGH.
Run until tank is dry.
e
NOTE: With the switch actuator ring m place unit will continue to run until the
ring is released. Depending upon humidity levels, once the tank is empty the average dry out time is approxi- mately 2 hours.
JLID
__HINGED ACCESS
j HO01(
SWITCHACTUATOR
J RING
SWITCHACTUATOR
ACCESSLW
PUSHUPONDETENTlaid
SUOESTATIONARYUO
TOTHESlOE IT
REMOVEU0
STATIONARY
LID
SCREWDRIVER
OROTHERTHINBLADEDTOOL
ELECTRICALCORD
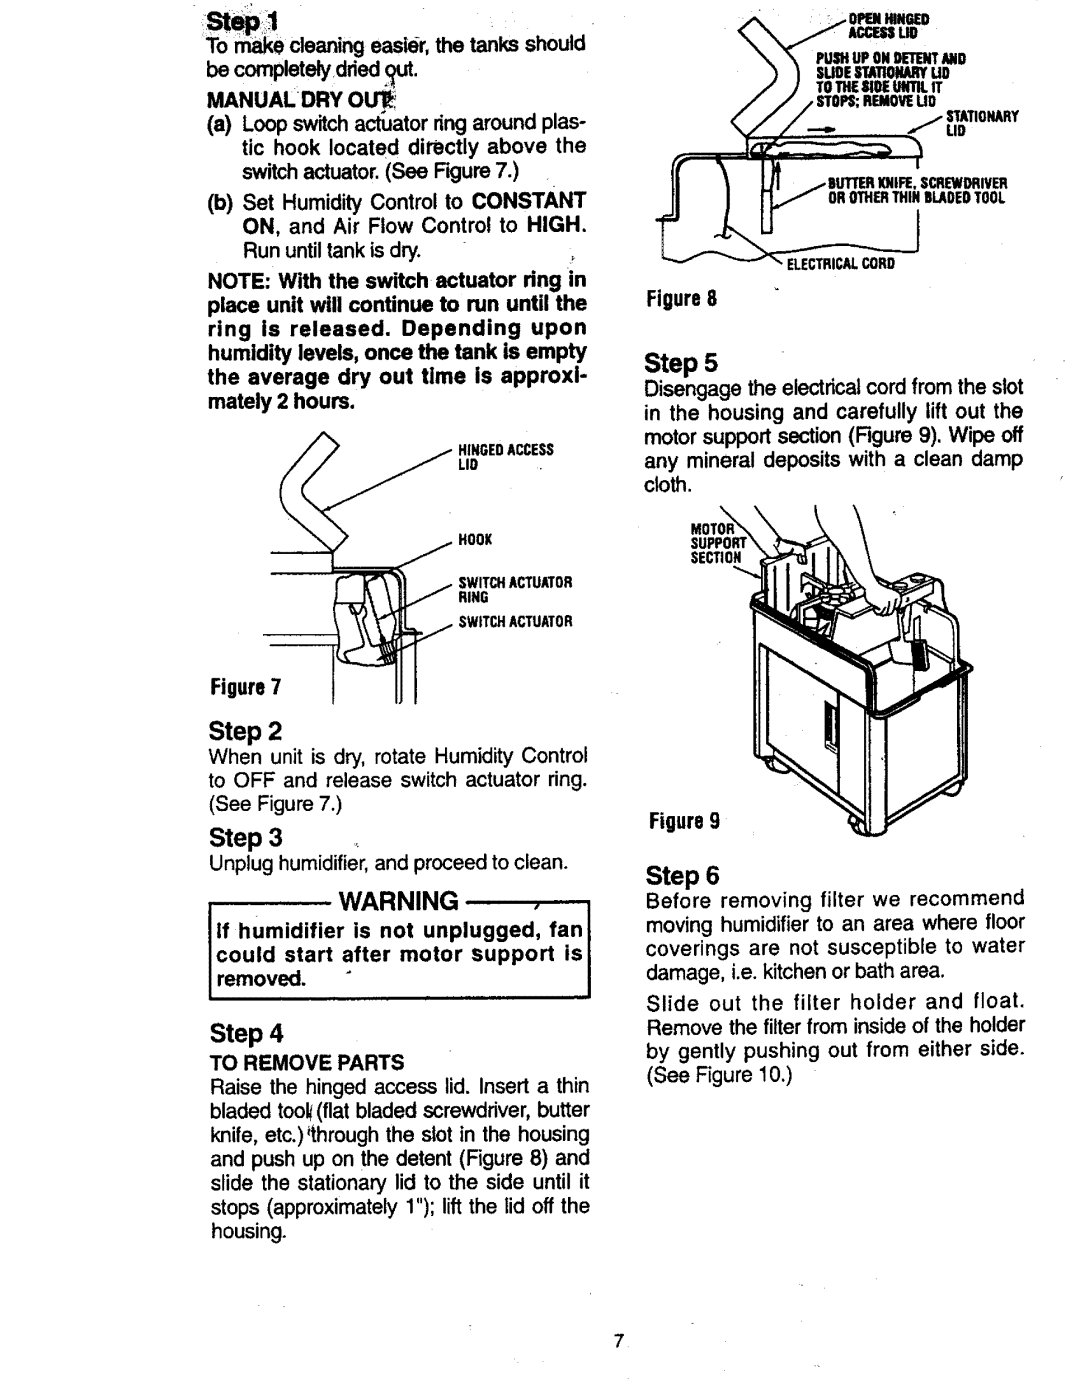
Figure8
Step 5
Disengage the electrical cord from the slot in the housing and carefully rift out the motor support section (Figure 9). Wipe off any mineral deposits with a clean damp cloth.
SECTION
Figure7
Step 2
When unit is dry, rotate Humidity Control to OFF and release switch actuator ring. (See Figure 7.)
Step 3
Unplug humidifier, and proceed to clean.
WARNING
If humidifier is not unplugged, fan could start after motor support is
removed. "
i | J | n |
Step 4
TO REMOVE PARTS
Raise the hinged access lid. Insert a thin
bladed took(flat bladed screwdriver,butter knife, etc.)*throughthe slot in the housing and push up on the detent (Figure 8) and slide the stationary lid to the side until it stops (approximately1"); lift the lid off the housing.
Figure9
Step 6
Before removing filter we recommend moving humidifier to an area where floor coverings are not susceptible to water damage, i.e. kitchen or bath area.
Slide out the filter holder and float. Remove the filter from inside of the holder by gently pushing out from either side.
(See Figure 10.)
7