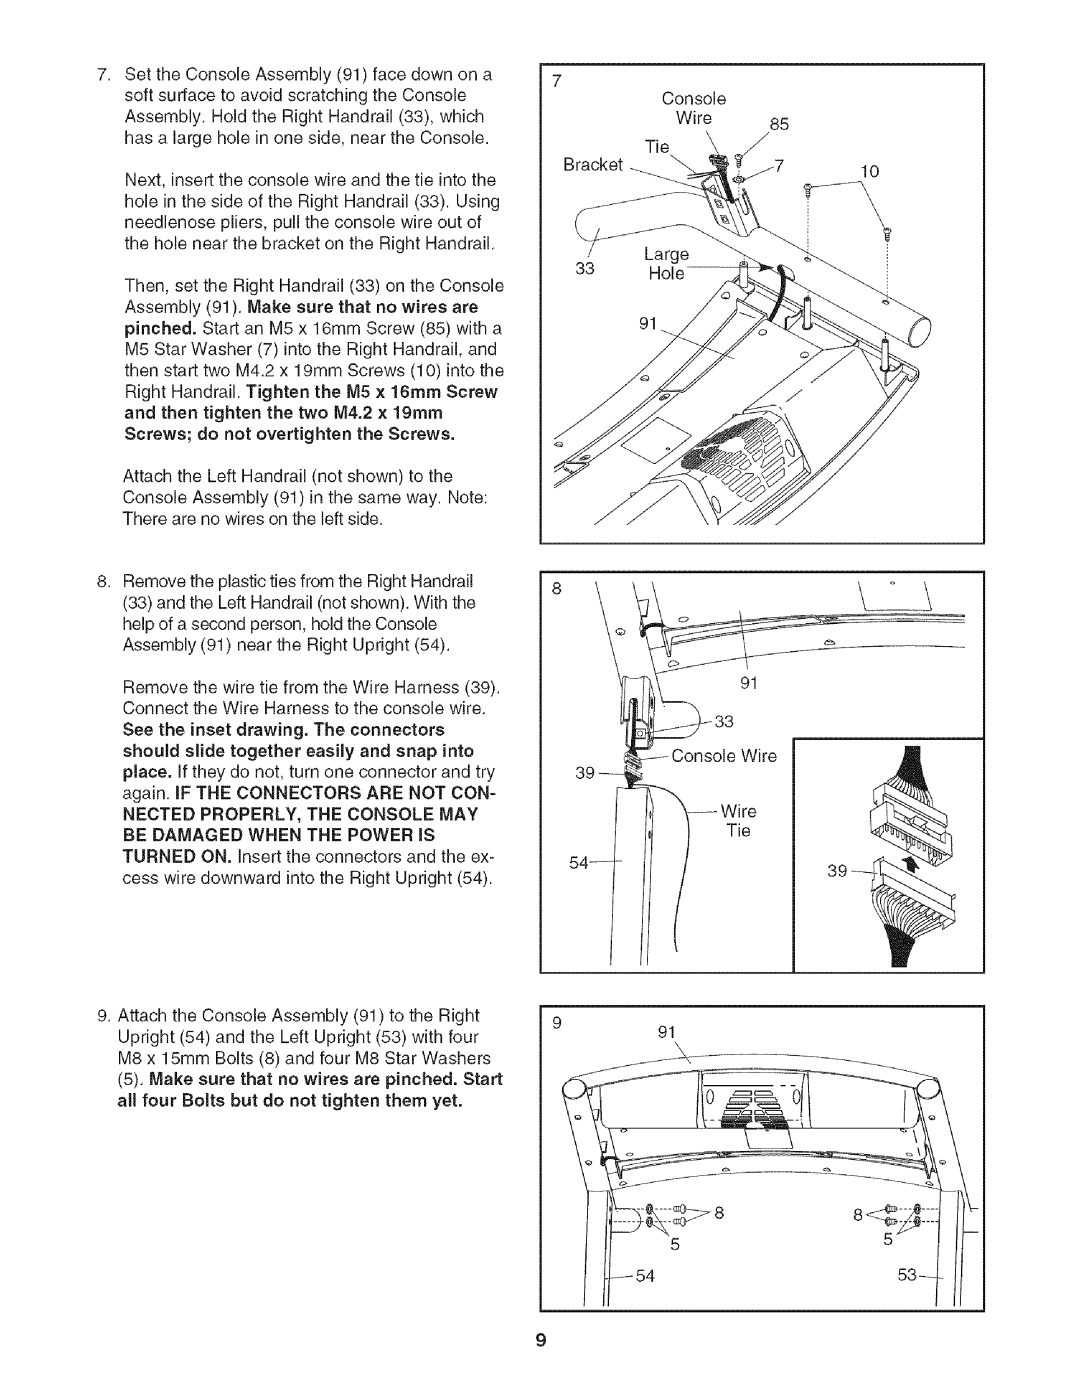
SettheConsoleAssembly(91)facedownona softsurfacetoavoidscratchingtheConsole AssemblyHoldtheRightHandrail(33),which. hasa largeholeinoneside,neartheConsole.
Next,inserttheconsolewireandthetieintothe holeinthesideof theRightHandrail(33).Using needlenosepliers,pulltheconsolewireoutof theholenearthebracketontheRightHandrail.
Then,settheRightHandrail(33)ontheConsole Assembly(91).Makesurethatnowiresare pinched.Startan M5x 16mmScrew(85)witha M5StarWasher(7)intotheRightHandrail,and thenstarttwoM4.2x 19mmScrews(10)intothe RightHandrailTightentheM5x. 16ramScrew andthentightenthetwoM4.2x 19ram Screws;do notovertightentheScrews.
AttachtheLeftHandrail(notshown)to the
ConsoleAssembly(91)in thesameway.Note: Therearenowiresontheleftside.
RemovetheplastictiesfromtheRightHandrail (33)andtheLeftHandrail(notshown)Withthe. helpofasecondperson,holdtheConsole Assembly(91)neartheRightUpright(54).
RemovethewiretiefromtheWireHarness(39). ConnecttheWireHarnesstotheconsolewire.
Seethe inset drawing. The connectors should slide together easily and snap into place. If they do not, turn one connector and try again. IF THE CONNECTORS ARE NOT CON=
NECTED PROPERLY, THE CONSOLE MAY BE DAMAGED WHEN THE POWER IS TURNED ON. Insert the connectors and the ex- cess wire downward into the Right Upright (54).
9.Attach the Console Assembly (91) to the Right Upright (54) and the Left Upright (53) with four M8 x 15mm Bolts (8) and four M8 Star Washers
(5). Make sure that no wires are pinched. Start all four Bolts but do not tighten them yet.
Console
Wire 85
Tie
10
33
91
91
91
5
9