b.If the walking belt has shifted to the right, first remove the key and UNPLUG THE POWER CORD. Using the 3/16" allen wrench, turn the left rear roller adjustment bolt counterclockwise, and the right bolt clockwise, 1/4 of a turn each. Be careful not to overtighten the walking belt. Plug in the power cord, insert the key and run the treadmill for a few minutes. Repeat until the walking belt is centered.
c. If the walking belt slips when walked on, first remove the key and
UNPLUG THE POWER CORD. Using the 3/16" allen wrench, turn both rear roller adjustment bolts clockwise, 1/4 of a turn. When the walking belt is correctlytightened, you should be able to lift each side of the walking belt
Repeat untilthe walking belt is propedy tightened.
STORAGE
Unplug the power cord when the treadmill is not in use.
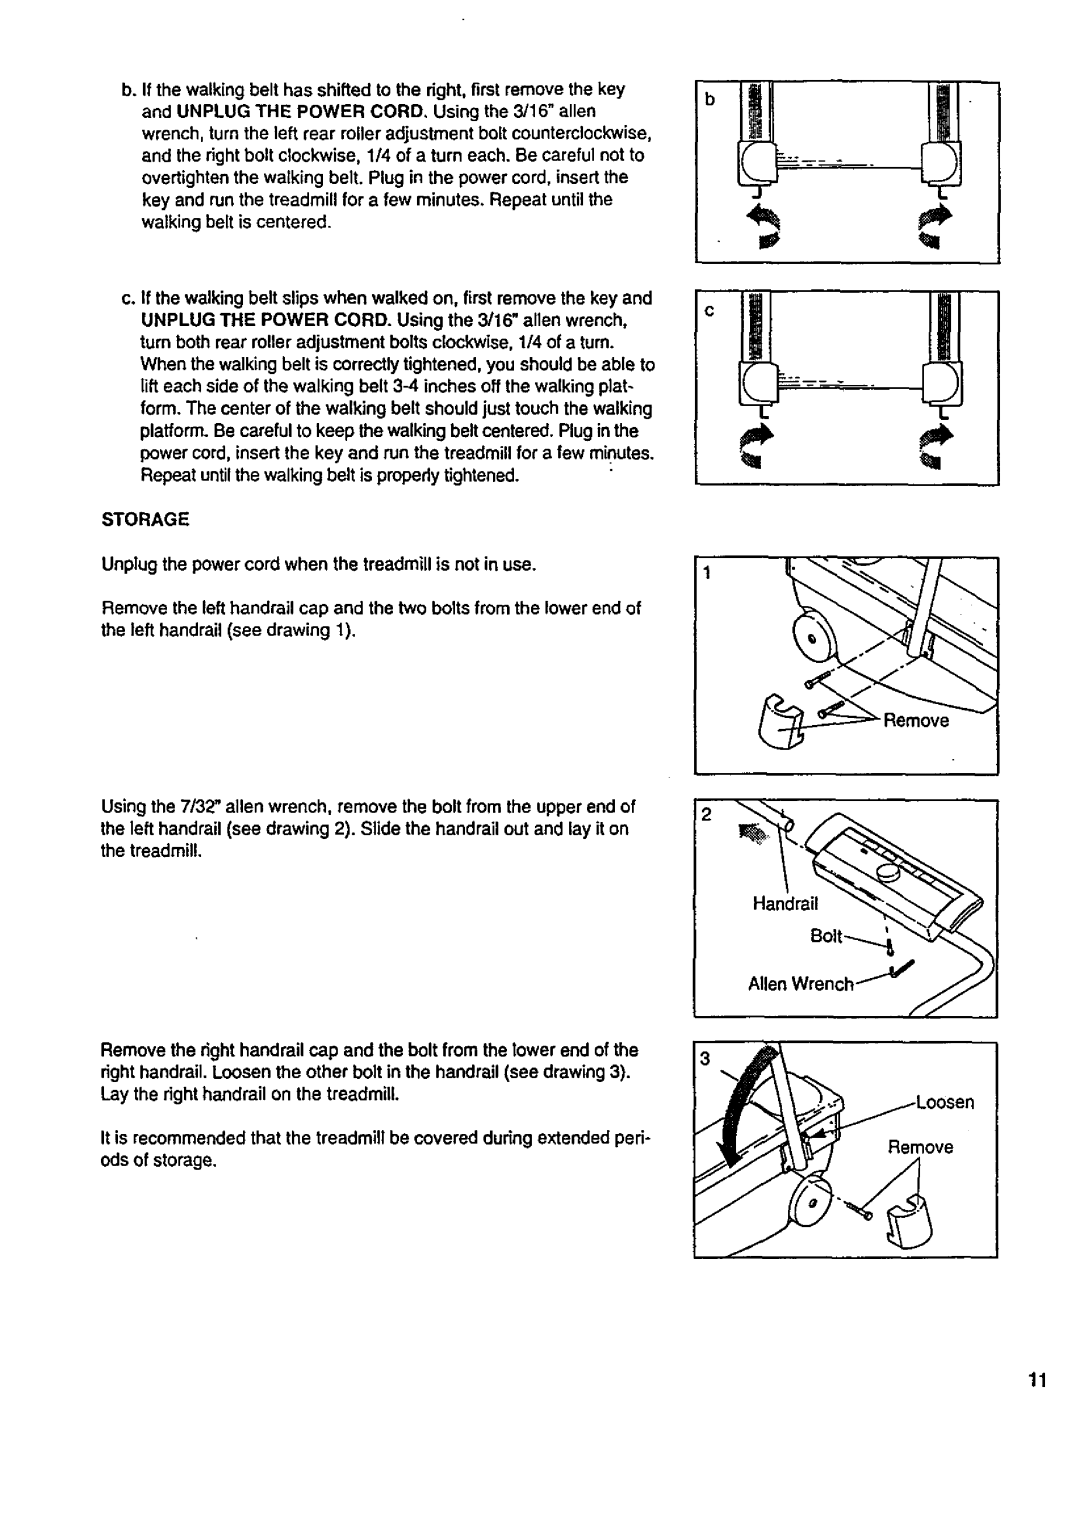
Remove the left handrail cap and the two bolts from the lower end of the left handrail (see drawing 1).
Using the 7132"allen wrench, remove the bolt from the upper end of the left handrail (see drawing 2). Slide the handrail out and lay it on the treadmill.
Remove the right handrail cap and the bolt from the lower end of the |
| |
right handrail. Loosen the other bolt in the handrail (see drawing 3). |
| |
Lay the right handrail on the treadmill. |
| |
It is recommended that the treadmill be covered during extended peri- | Remove | |
ods of storage. | ||
|
11