
917.25545 specifications
The Sears 917.25545 is a versatile and durable lawn mower that stands out for its combination of power, efficiency, and ease of use. Designed to handle various mowing conditions, this model has become a favorite among homeowners and gardening enthusiasts alike.At the heart of the Sears 917.25545 is its robust engine, which ensures reliable performance across various terrains. With a significant horsepower rating, this mower can tackle even the thickest grass and tricky landscapes with ease. The engine's design focuses on fuel efficiency, allowing users to mow longer without frequent refueling, making it an economical choice for lawn maintenance.
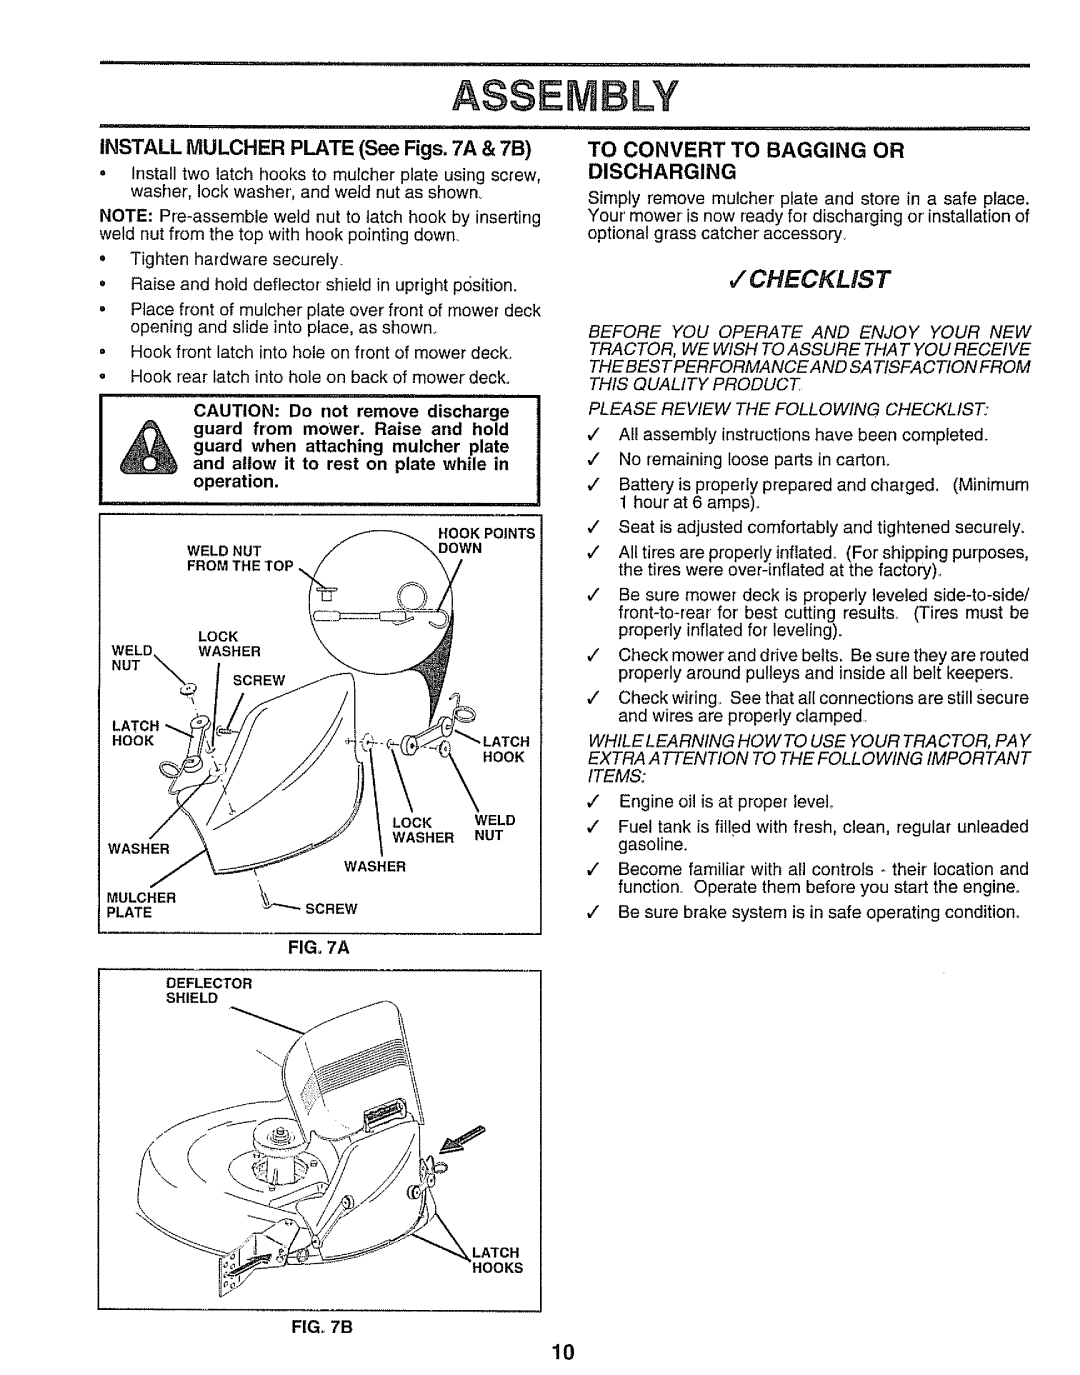
One of the standout features of the Sears 917.25545 is its adjustable cutting height. This mower offers multiple settings to accommodate different types of grass and seasonal variations. Whether it’s a quick trim or a more rigorous mowing session, users can customize the cutting height to achieve the desired results. The sharp, precision blades ensure a clean cut, promoting healthy grass growth.
In terms of maneuverability, the Sears 917.25545 is equipped with large rear wheels that provide excellent traction and stability, especially on uneven ground. This feature allows users to navigate around obstacles and tight corners effortlessly, reducing the stress of mowing a complex yard.
The mower's build quality is another highlight. Constructed from durable materials, the Sears 917.25545 is designed to withstand the rigors of regular use. The deck is rust-resistant, ensuring longevity and minimal maintenance over the years. Additionally, the model is relatively lightweight, which enhances its portability and ease of storage.
For added convenience, the Sears 917.25545 incorporates user-friendly features such as a simple pull-start mechanism and an ergonomic handle for comfortable control. These aspects minimize fatigue during operation, allowing users to complete their mowing tasks more efficiently.
Lastly, the Sears 917.25545 emphasizes safety with features like a blade brake that ensures the engine stops quickly when necessary. This essential safety feature gives users peace of mind while working.
In summary, the Sears 917.25545 is an exceptional lawn mower that perfectly balances power, efficiency, and user comfort. Its range of features, including adjustable cutting heights, durable construction, and safety mechanisms, makes it a reliable choice for maintaining any lawn.