ASSEMBLY
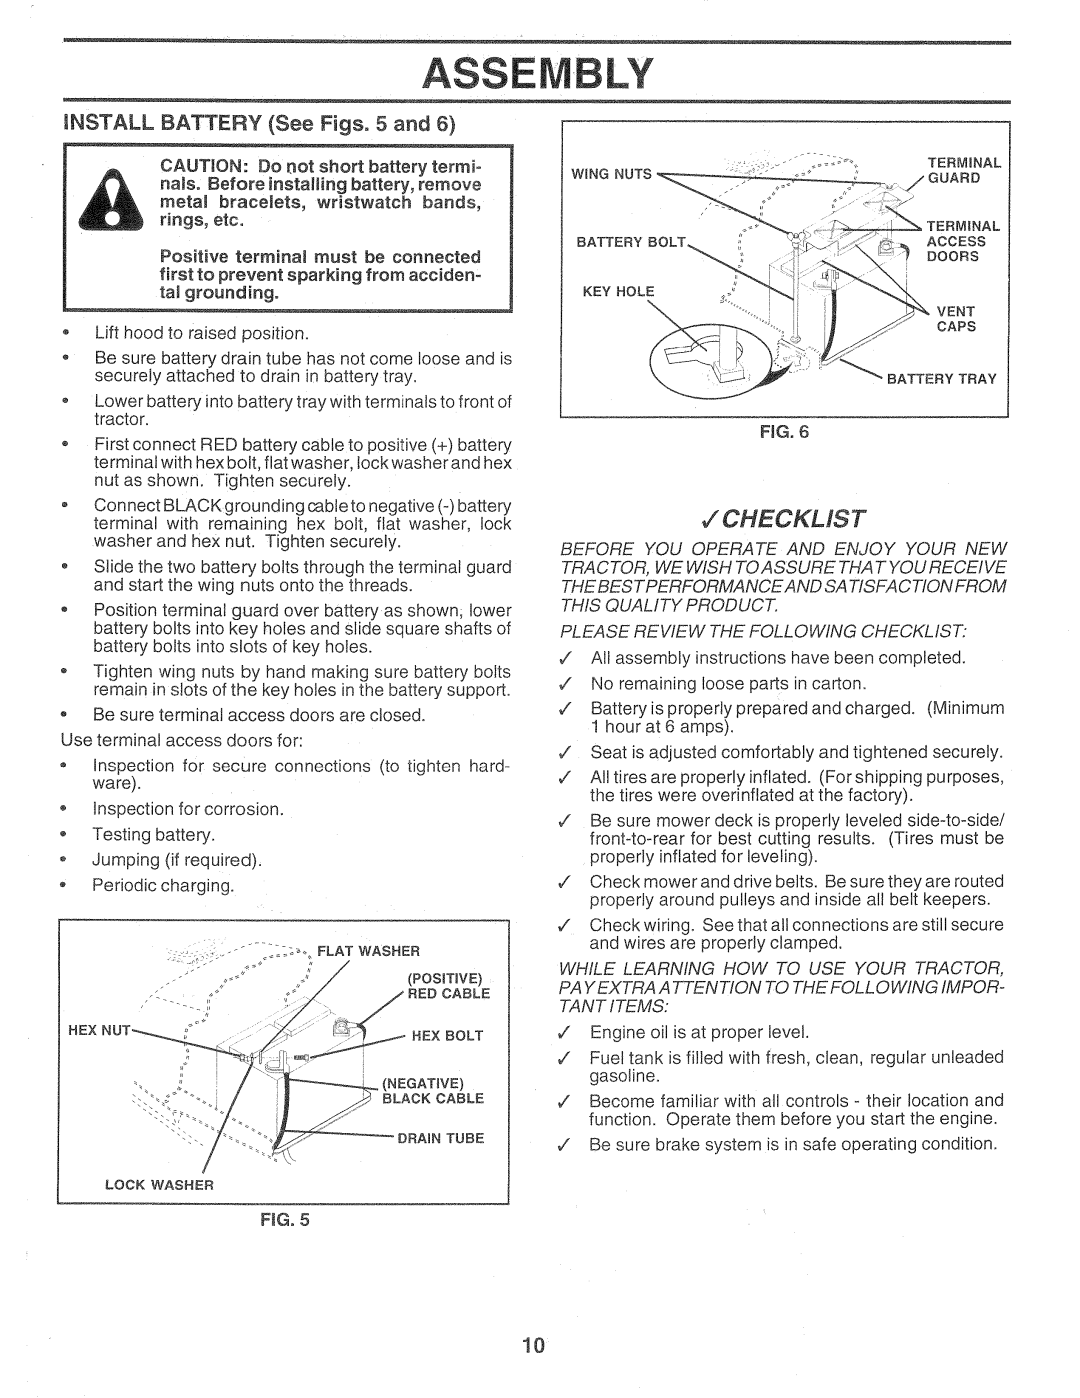
INSTALL BATTERY (See Figs, 5 and 6)
CAUTION: Do not short battery termi- nares°Before installing battery, remove metam bracelets, wristwatch bands, rings, etc°
Positive terminal must be connected first to prevent sparking from acciden- tal grounding.
-Lift hood to raised position.
oBe sure battery drain tube has not come loose and is securely attached to drain in battery tray.
oLower battery into battery tray with terminals to front of tractor.
oFirst connect RED battery cable to positive (+) battery terminal with hex bolt, flat washer, lock washer and hex nut as shown. Tighten securely.
o Connect BLACK grounding cable to negative |
terminal with remaining hex bolt, flat washer, lock |
KEY HOLE
\
ACCESS
DOORS
\VENT CAPS
BATTERY TRAY
FIG. 6
v" CHECKMST
washer and hex nut. Tighten securely. |
oSlide the two battery bolts through the terminal guard and start the wing nuts onto the threads.
°Position terminal guard over battery as shown, lower battery bolts into key holes and slide square shafts of battery bolts into slots of key holes.
Tighten wing nuts by hand making sure battery bolts reman in slots of the key holes in the battery support.
oBe sure terminal access doors are closed. Use terminal access doors for:
•Inspection for secure connections (to tighten hard- ware).
Inspection for corrosion.
®Testing battery.
oJumping (if required). o Periodic charging.
FLAT | WASHER |
/ |
|
/ / | (POSITWE) |
| / RED CABLE |
HEX | HEX BOLT |
| |
| NEGATIVE) |
| BLACK CABLE |
| DRAIN TUBE |
LOCK WASHER |
|
FtGo 5 |
|
BEFORE YOU OPERATE AND ENJOY YOUR NEW TRACTOR, WE WISH TO ASSURE THAT YOU RECEIVE Tt lE BES T PERFORMANCE AND SA TISFA CTION FROM THIS QUALITY PRODUCT,
PLEASE REVIEW THE FOLLOWING CHECKLIST:
,/ All assembly instructions have been completed.
¢' No remaining loose parts in carton.
v' Battery is properly prepared and charged. (Minimum 1 hour at 6 amps).
,/ Seat is adjusted comfortably and tightened securely.
,/ All tires are properly inflated. (Forshipping purposes, the tires were overinfiated at the factory).
v" Be sure mower deck is properly leveled
,/ Check mower and drive belts. Be sure they are routed properly around pulleys and inside all belt keepers.
v" Check wiring. See that all connections are still secure and wires are properly clamped.
WHILE LEARNING HOW TO USE YOUR TRACTOR, PAY EXTRA A TTEN TION TO THE FOL L 0 WING IMPOR- TANT ITEMS:
,/ Engine oil is at proper level.
,/ Fuel tank is filled with fresh clean, regular unleaded gasoline.
v" Become familiar with all controls - their location and function. Operate them before you start the engine.
v" Be sure brake system is in safe operating condition.
10